Thursday 31 January 2013

Cinnamon Swirl Cupcakes


This is another recipe I stumbled upon on one of my random perusals of other baking blogs.  It struck me as interesting as it is one of those cupcakes based on something else.  In this case, cinnamon swirls/rolls/buns.  Since the fiancé likes cinnamon I thought I would give it a go.

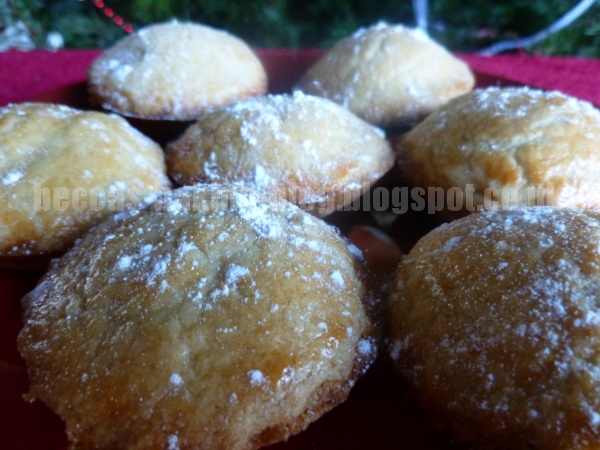
The only problem I had with the recipe I found is that it starts with a boxed cake mix.  I'm not keen on using boxed cake.  I like making everything from scratch.  So, since it was a butter cake, I went looking for a good butter cake recipe.  And found one.  With recipes in hand, I aimed for 12 muffin sized cupcakes since that is what I was supposed to get from the butter cake recipe.  Well...I did get 12 but really I think I should have split it into more.  The tins were slightly too full so when they rose, the batter spread out over the top and I ended up with mushroom looking cakes.  The one cake that turned out okay was made separately in a separate silicone cake case.

I also had a problem with the cakes sticking to their tins.  I had decided to not make them in cake cases because I thought it would be nice to see the cinnamon ring running through it.  It probably would have been okay though, if I'd done it in the silicone cases.  My silicone cake tins just seem to stick to what's in them, no matter how much I grease them, which is a shame.  Consequently, I ended up with some slightly broken cakes as well as mushroom topped.  Most of them survived intact, but I really regretted not putting them in cases.  Ah well, live and learn.

Despite their problems though, they still went down with the tasters.  The fiancé seemed to particularly like them since he ate four of the cakes himself.  I personally think they needed slightly more glaze but otherwise they were deemed yummy.


Recipe - adapted from Daily Eats and Hoosier Homemade
Makes about 18

Cake: 
  • 225g/8oz self-raising flour
  • 1/4 tsp salt
  • 120g/4oz butter
  • 1 tsp vanilla extract
  • 225g/8oz caster sugar
  • 3 large eggs
  • 80ml/2.7fl.oz buttermilk
Cinnamon Sugar:
  • 55g/2oz caster sugar
  • 1 tbsp ground cinnamon
Streusel Topping:
  • 80g/3oz brown sugar
  • 60g/2oz butter
  • 4 tbsp plain flour
  • 1.5 tbsp ground cinnamon
  • 1/2 tsp ground nutmeg
Glaze:
  • 80g/3oz icing sugar
  • 2 tbsp milk
  1. Preheat the oven to 180°C/350°F/Gas Mark 4 and line two 12 hole muffin tins with 18 cases.
  2. Make the cake mix by beating the butter, sugar and vanilla extract together in a large bowl until light and fluffy.
  3. Add the eggs one at the time, beating after each addition until fully incorporated into the mix.
  4. Add the flour and buttermilk alternately to the mix, mixing in after each addition.  Start with a third of the flour, then half the milk.  Another third of flour, the rest of the milk and then the last of the flour.  Set aside.
  5. Make the cinnamon sugar by mixing together the cinnamon and caster sugar in a small bowl.
  6. Make the streusal topping by first melting the butter.
  7. Combine the other dry ingredients in a bowl and then add a little butter at a time, mixing it in until it takes on a crumbly texture.
  8. Spoon about 1 tablespoon of cake batter into each of the cases, making sure the bottoms are covered.
  9. Next cover the batter in each case with the cinnamon sugar.
  10. Spoon another tablespoon of batter on top to cover the sugar, then sprinkle on the streusel topping.
  11. Bake for about 20-25 minutes, until cakes are springy and a skewer inserted into the centre comes out clean.
  12. Allow to cool in their tins for a bit before transferring to a wire rack.
  13. Make the glaze by combining the icing sugar with the milk.
  14. Drizzle the glaze over the cooled cupcakes and leave to set.

Wednesday 23 January 2013

Vanilla Buttermilk Cupcakes with Brown Butter Sauce and Raspberry Jam Buttercream


Quite a wordy title for this one, isn't it?  So this Monday's bake came about as a result of wanting to use up the remaining buttermilk from the Nutella cupcakes because I end up letting it go off otherwise, which is wasteful.  However, I didn't have the hugest amount left over (only 50ml) so didn't want a recipe that required too much of it.  I also wanted something that sounded a bit different and would be interesting to make.

Well, I found such a thing: vanilla buttermilk cake with brown butter sauce.  Sounded intriguing enough and I had everything, or at least enough for a half batch.  This was fine because I usually find half a batch of cake batter works out at about 12 cupcakes anyway.  So I set about making them...only I messed up by not realising until part way through that I'd not halved the ingredients.  I am seriously scatterbrained at the moment.  Oh dear.  This was problematic since I now didn't have enough buttermilk and didn't want to start over.  So I made up the amounts with a homemade version using milk and lemon juice.  I also added about a tablespoon of whipped double cream to get a slightly thicker consistency.  Really I wanted to make proper buttermilk by whipping double cream until I got butter and buttermilk, but it just would not work for me, which I think is down to the fact that I use Elmlea, which is not actual cream but a cream substitute.  I only found that out recently actually.  It made me rather happy because it meant all my recipes that don't involve milk are actually dairy free, since both my cream and butter are vegetable oil substitutes.

Anyway, yes, had to make up the amount of buttermilk.  However, this worked out for the best because it meant I had enough mixture to make 12 muffin sized cupcakes.  I will also note I used one less egg than the recipe called for, just because.  It didn't seem to be detrimental to the final result.  Then there was the brown butter sauce, which gets drizzled over the cakes once they come out the oven to give it a different texture.  I honestly don't think I got it as thick as I was meant to, and I had far too much for the amount of cake.  Also, because it ran over the sides of the cakes, it made the cases a bit sticky on the bottom and I had to put them on kitchen paper to absorb it all.  Hence I'll be recommending to bake without them in the write-up.

As for the buttercream, the recipe I was using serves the cake with a fruit compote.  The ingredients and method for making a compote reminded me of jam and, since I had recently made buttercream that tasted like jam, I thought that would make a nice compliment to the cupcake, albeit this time I made it with raspberry jam rather than strawberry.

I will admit, I was dubious as to how this would come together.  But I needn't have worried.  My taste testers loved them.  One wants a bowl just of the buttercream for their birthday, which I was quite pleased to hear.  Part of me thinks that's down to the quality of the jam, since it was homemade by the fiancé's sister.  And it's true what they say: good quality ingredients results in great tasting food.  The fiancé said the cakes were lovely, light and fluffy and the flavour was indescribable but was sweet and very scrumptious.  So good reviews it seems.  Hoorah!


Recipe - adapted from Schwartz
Makes about 12 

Cakes:
  • 200g/7oz plain flour
  • 1/2 tsp baking powder
  • 1/2 tsp bicarbonate of soda
  • 200g/7oz granulated sugar
  • 115g/4oz butter
  • 2 eggs
  • 2 tsp vanilla extract
  • 125ml/4fl.oz buttermilk
  • 1 heaped tbsp whipped double cream
  1. Preheat the oven to 180°C/350°F/Gas Mark 4 and liberally grease a 12 hole muffin tin with butter.
  2. Cream the butter and sugar together in a large bowl until light and fluffy.
  3. Add the eggs one at a time, beating until incorporated after each addition.
  4. Add the vanilla extract and beat in.
  5. Gradually add the flour and buttermilk to the mixture, alternating between the two, and mix in.
  6. Add the cream and mix in until smooth.
  7. Fill the muffin tins about 2/3 of the way up each hole.
  8. Bake for about 20 minutes until golden and springy and a skewer inserted in the centre comes out clean.
  9. Whilst cakes are baking, make the butter sauce.
 Brown Butter Sauce:
  • 40g/1.5oz butter
  • 50g/1.8oz granulated sugar
  • 1/2 tsp vanilla extract
  • 20ml/0.7fl.oz water
  1. Melt the butter in a small saucepan, and at the same time, mix the water, sugar and vanilla extract together in a small bowl.
  2. When the butter has turned a caramel brown colour, add the sugar mix and whisk together until blended and smooth and ever so slightly thicker in consistency.
  3. Remove from the heat and allow to cool slightly.
  4. When the cakes come out the oven, leave them in their tin and use a skewer to poke 5 holes in the top of each one.
  5. Pour the butter sauce over the top of each cake and then leave them to cool and absorb the sauce in the tin.
  6. Once cooled, you can decorate with the buttercream.
Buttercream:
  • 115g/4oz butter
  • 225g/8oz icing sugar
  • 2 tbsp seedless raspberry jam
  • Red food colouring
  1. Put the jam in a small saucepan and warm through until runny.
  2. Reserve 3 teaspoons worth of jam and put the rest in a bowl along with the icing sugar, butter and food colouring, mixing them together until you get a smooth buttercream.
  3. Put the buttercream into a piping bag fitted with a large star nozzle and pipe a swirl of buttercream in the centre of each cake.
  4. Drizzle 1/4 tsp of the remaining jam over each cake for decoration.

Monday 21 January 2013

Nutella Cupcakes and Jar Cake


A couple of weeks ago I saw a gorgeous food photograph featuring cakes baked in Nutella jars.  This looked like a fantastic idea and would make a nice gift.  However, the cake in the pictures was just a chocolate cake and really I thought it would be more fun to make a Nutella cake to go in the Nutella jar.  I could then give this jar to the fiancé's sister, because she is a Nutella fiend.

So off I went and found a recipe I thought would be good, and scooped out a Nutella jar to fill with cake.  However, I wasn't sure exactly how much mixture I would need for the jar cake, so I figured I would just make an entire batch of mixture, and turn the rest into cupcakes.  The recipe I picked said it would yield 24 cupcakes.  As it turned out, I got 24 cupcakes plus a jar cake.

The cake mixture is a really runny one and resulted in a really moist cake.  The buttercream is really nice!  I'm not the biggest fan of Nutella but even I liked the buttercream.  And it definitely tastes of Nutella, just a bit sweeter due to it being buttercream. 


Recipe - adapted from Chef in Training
Makes about 24 cupcakes 
Or about 8 x 400g Nutella jars worth (that's a rough guess)
  • 55g/2oz unsweetened cocoa powder
  • 250ml/8.8fl.oz hot water
  • 250ml/8.8fl.oz buttermilk
  • 2 eggs
  • 425g/15oz caster sugar
  • 125ml/4.4fl.oz vegetable oil
  • 1.5 tsp vanilla extract
  • 300g/10.5oz plain flour
  • 2 tsp baking powder
  • 1 tsp bicarbonate of soda
  • 1/2 tsp salt
  • 125ml/4.4fl.oz double cream
  • 180g/6.3oz Nutella
  1. Preheat the oven to 180C/350F/Gas Mark 4 and either line two 12 hole muffin tins with muffin cases, or put sterilized jars on baking trays.
  2. Sift the cocoa into a medium sized bowl and pour in the hot water.  Whisk until it is combined.
  3. Add the buttermilk and the sugar and whisk until smooth.
  4. Add the eggs, vanilla and oil and whisk again.
  5. In a separate bowl, mix together the flour, baking powder, bicarbonate of soda and salt.
  6. Add the dry ingredients to the wet mixture and whisk together until it is smooth with no lumps.
  7. Melt the Nutella in a saucepan, stirring it to prevent it burning.
  8. Add this and the double cream to the cake batter and stir until evenly mixed together.
  9. Fill the cases two thirds of the way up.  If using jars, fill them about a third of the way up.
  10. Bake for 20-30 minutes until the sponge is springy and a skewer inserted into the centre comes out clean.
  11. Allow to cool completely on a wire rack before icing.
  12. If using jars and the sponge has risen a bit too high, use a knife to cut the top off.  It needs to be below where the lid would sit, and have enough room for buttercream to go on top.
Buttercream:
  • 120g/4.2oz butter
  • 3/4 tsp salt
  • 1.5 tsp vanilla extract
  • 2 x 33g packet Bird's Dream Topping
  • 90g/3oz Nutella
  • 3 tbsp milk
  • 400g/14oz icing sugar
  • Chocolate sprinkles
  1. Beat the butter, vanilla extract and salt together until smooth and creamy.
  2. Add the Dream Topping and mix to combine.
  3. Beat in the Nutella, milk and icing sugar until thoroughly combined.
  4. Put into a piping bag fitted with a large star nozzle and pipe a swirl on top of each cupcake.  If you have baked in jars, pipe a circular spiral from the outside edge to the centre, covering the cake completely.  I did a double layer so there was more buttercream to go with all the cake in the jar.
  5. Decorate with the chocolate sprinkles.

Sunday 20 January 2013

Pink Condensed Milk Cupcakes


I really, really want to make cupcakes that taste like strawberries.  I love strawberry flavoured things.  Less keen on the actual fruit, though they're bearable if taken with ice cream.  Now, researching ways to do this has often yielded the need for strawberry extract.  However, that does not seem to be available here in the UK.  At all.  Not even online.  It is quite annoying.  I can't even find essence.  I have seen and tried a strawberry flavouring before but whilst it smelt right, it does not taste good.  It's a shame.  But, ever the determined woman, I started looking in to if I could make one and did eventually stumble across a recipe for strawberry extract.  So I thought I would give it a go and see how strawberry tasting the cakes made with it turned out.

As for the cake's base recipe itself, I decided to take a different route from my usual one.  I'd seen a recipe on Carnation's website for vanilla cupcakes made with condensed milk.  The opinion of the people who had tried the recipe out was positive, so I thought I would try that method out at the same time, along with the buttercream.

So the result?  The extract came out like I expected it to but tasting it reminded me strongly of strawberry jam which, considering the what the recipe contains, it pretty much is.  However, I thought it would be worth continuing anyway.  Well, the cakes tasted nice enough but they did not taste like strawberry.  I'd also added some pink food colouring to the mixture to make the cakes look a bit more interesting, but it faded quite a bit whilst baking.  There is still a colour difference and the interior of the cakes is quite pink, if not as pink as I would have liked.  The buttercream though, tasted very much like strawberry jam and was rather lovely.  The fiancé agreed they tasted like jam, but very good quality jam because he doesn't really like strawberry jam but he did like the taste of this one.

So I ended up with vanilla cakes rather than strawberry, and buttercream that tasted like strawberry jam rather than strawberries.  The latter result makes me think the same taste could therefore be achieved with some seedless strawberry jam, albeit a jam that is of decent quality.  But I'll still put up the 'extract' recipe for those who want to try it.


Recipe:

Strawberry Extract Jam - adapted from eHow
  • 250g/9oz strawberries
  • 125ml/4.5fl.oz water
  • 55g/2oz caster sugar  
  1. Cut the stems off the strawberries and chop into thin slices.
  2. Put the water, chopped strawberries and sugar into a saucepan, cover with a lid and bring to a simmer.
  3. Remove the lid and cook the strawberries for about 30 minutes, stirring occasionally, until the fruit starts to go limp and fall apart.
  4. Place a cheesecloth inside a strainer and place over a bowl.
  5. Pour the strawberry mixture into the strainer and allow all the juice to pass into the bowl.  Press the leftover pulp against the cheesecloth to get any remaining juice.
  6. Pour the juice into a clean saucepan and then set over a medium to high heat and reduce it to a half its amount, stirring every now and again to prevent burning.  The syrup should be slightly thicker than it was before.
  7. Pour into a container and allow to cool.
Cupcakes - adapted from Carnation
Makes 12
  • 125g/4.5oz plain flour
  • 250g/9oz condensed milk 
  • 1 egg
  • 1 tsp vanilla extract
  • 85g/3oz butter
  • 1.5 tsp baking powder
  • Pink food colouring (optional)
  1. Preheat the oven to 180°C/350°F/Gas Mark 4 and line a 12 hole muffin tin with muffin cases.
  2. Put all the ingredients into a bowl and whisk together until smooth and creamy.
  3. Spoon the mixture into the cases and bake for about 20 minutes until the sponge is springy to touch and a skewer inserted into the centre comes out clean.
  4. Leave to cool.
Buttercream
  • 200g/7oz icing sugar
  • 55g/2oz butter
  • 1/2 tsp vanilla extract
  • 4 tsp strawberry extract (above) or good quality seedless strawberry jam
  • 3 tbsp condensed milk
  • Pink food colouring
  • Sprinkles
  1. Warm the extract/jam up in a saucepan until it is quite runny.
  2. Beat together all the ingredients until you get a thick, pipeable buttercream.
  3. Put into a piping bag fitted with a large star nozzle and pipe a swirl in the centre of each cake.
  4. Decorate with the sprinkles of your choice.

Tuesday 15 January 2013

Hot-Chocolate Cupcakes


I have a few cakes that I want to bake at the moment and these are one of the recipes I really wanted to try.  I ran the idea by the fiancé as a possibility for cakes to take to Dundee for him and his friends tonight and he was all for them.

So these are hot chocolate cupcakes, containing about half a pint of milk and drinking chocolate.  The recipe for the cakes themselves is from the Hummingbird Bakery although I decided to go a different route for the topping.  Rather than using drinking chocolate and making a buttercream I thought I would top it with cream instead, like people do with hot chocolate, and then decorate with marshmallows and chocolate sprinkles to finish the look.

I was really happy with how they turned out, except for the fact that they sank a bit after they had came out of the oven.  I wasn't sure why but then I looked over the recipe and realised I had misread the amount of baking powder!  I only used a teaspoon, rather than a tablespoon, which was a bit silly of me.

Despite my mistake though, the fiancé says they taste delicious and are very creamy.  For an idea of what they taste like, I was told it's like when the cream on top of your hot chocolate has taken on some of the chocolate flavour.


Recipe - adapted from Cake Days
Makes about 12

  • 240ml/8.5fl.oz full fat milk
  • 25g/1oz hot chocolate powder
  • 80g/3oz unsalted butter
  • 280g/10oz caster sugar
  • 240g/8.5oz plain flour
  • 1 tbsp baking powder
  • 1/4 tsp salt
  • 2 large eggs
  • 200ml/7fl.oz double cream 
  • 36 mini marshmallows
  • Chocolate sprinkles
  1. Preheat the oven to 190°C/375°F/Gas Mark 5 and line a 12 hole muffin tray with muffin cases.
  2. Warm the milk over a gentle heat but don't boil it.
  3. Add the hot chocolate powder and mix in until dissolved, then set aside to cool. 
  4. Put the butter, sugar, flour, baking powder and salt in a large bowl and use an electric mixer to slowly whisk them together until you get something resembling fine breadcrumbs.  You can probably get this result with a spoon but it will take a long time.
  5. Put the cooled chocolate milk into a jug, add the eggs and beat together.
  6. Add three quarters of the mixture to the dry ingredients and mix together until well incorporated and smooth.
  7. Add the rest of the chocolate milk, beating until smooth.
  8. Divide the mixture across the muffin cases, filling each about two thirds of the way up.  You may have excess mixture, so just put it into spare muffin cases and bake those too.
  9. Bake for about 20 minutes, until the cakes are risen and a skewer inserted into the centre comes out clean.
  10. Leave to cool completely before decorating.
  11. Whip the cream until it holds stiff peaks and then put into an icing bag fitted with a large star nozzle.
  12. Pipe swirls on top of each cake, then decorate with chocolate sprinkles and top with three marshmallows per cake.  

Wednesday 9 January 2013

Raspberry and White Chocolate Chunk Cookies


Okay, I seem to be getting a bit lax in my updates, which I really have no excuse for since I don't have a job at the moment.  So here's that other white chocolate biscuit recipe I mentioned in the last post, only this one has condensed milk as a core ingredient and also contains raspberries, something that my darling fiancé really likes.  Hence when I got a chance to go to the big supermarket in town, I snapped up a box of them for making biscuits.  I was also pleased to find that that particular supermarket did in fact sell the tubes of condensed milk, meaning I didn't have to break open my large tin of it.  Now I can save that for something else.  (I was amused that the tube had the recipe I was using on.  Pleased too, since it meant I didn't have to sit my laptop in the kitchen to read the company's website I had originally found the recipe on.)

These biscuits are quite soft.  I may have made mine just a little too big, since they're extra soft in the middle whilst the rest is just right and the base is nicely brown but not burnt.  Next time I would make them a little smaller.  I would probably put fewer on the tray too since they do spread a lot.  Since they're so soft when they come out, it's easy to separate them all but you end up with funny square biscuits rather than round ones.  I also tampered with the amount of raspberries and chocolate, because I didn't have quite the numbers needed for each.  But I still feel there was plenty of each per biscuit.

The fiancé loves them though.  They rank high on his favourite things that I've baked.  He likes how the raspberries taste since there is just something about them when they've been slightly cooked that makes them better than when they're raw.  Since they have condensed milk and white chocolate in, they are generally a sweet biscuit, but the tartness of the raspberries will compliment the sweetness. 


Recipe - adapted from Carnation
Makes about 30

  1.  Preheat the oven to 180C/350F/Gas Mark 4 and line 2-3 baking sheets with greaseproof paper.
  2. Cream together the butter, sugar and condensed milk in a bowl until smooth and pale.
  3. Add the flour and mix to form a sticky dough.
  4. Chop up the chocolate into chunks and work into the dough.
  5. Take a piece of dough about the size of a walnut, roll it into a ball and then flatten it in your hand.  
  6. Put 2-3 raspberries in the middle and then fold the dough up around them to form a rough ball.  Place on the baking sheet.
  7. Repeat with the rest of the dough and raspberries, making sure to keep the biscuits spaced far apart on the tray (you'll get 6 - 9 on a tray depending on size).
  8. Bake for 15-20 minutes.  The edges should be starting to turn golden brown but they will still be a bit soft in the middle.
  9. Remove and leave to firm up on the tray for about 10 minutes before transferring to a wire rack to cool.  If they have spread and joined up whilst baking, use a knife or similar tool and run it between them once they come out the oven to separate them.

Friday 4 January 2013

White Chocolate and Custard Biscuits


I love white chocolate and the last couple of months it has been my go to sweet for dessert.  Recently though, I've been wanting biscuits too, so I went hunting for a recipe that had both biscuits and white chocolate in it.  And I found a couple of good looking ones, one for me and one for the fiancé.  Since I didn't have one of the key ingredients for the fiancé's biscuits and the local shop didn't have  either, I went ahead and made the ones for me (though there are plenty for him to eat too).

So these are essentially white chocolate chip cookies, but they have custard powder in them too, which adds an extra sweet taste to the biscuits.  In fact, both the fiancé and I thought they ended up tasting a lot like Millie's Cookies.  We thought that was rather splendid and the things are ridiculously moreish.  They are also really quick and easy to make, which is just a bonus really.


Recipe - adapted from BBC GoodFood
Makes about 36 biscuits 

  • 140g/5oz butter
  • 175g/6oz caster sugar
  • 1 egg
  • 1/2 tsp vanilla extract
  • 225g/8oz self-raising flour
  • 75g/2.5oz custard powder
  • 100g/3.5oz white chocolate chips
  1. Preheat the oven to 180C/350F/Gas Mark 4 and line 3 baking trays with greaseproof paper.
  2. Cream the butter and sugar together in a bowl until pale and fluffy.
  3. Add the egg and vanilla extract and mix well.
  4. Sift together the flour and custard powder into the mixture and then fold in to get a soft but slightly sticky dough.
  5. Add the chocolate chips and work through the dough with your hands until evenly spread.
  6. Take walnut sized pieces of dough and roll into balls with your hands.  Place the balls on the tray, repeating until all the dough is used up.
  7. Bake for 15-20 minutes, until the edges are golden but the middle is still a little soft.
  8. Use a spatula to transfer the biscuits to a wire rack to cool.

Tuesday 1 January 2013

Mince Pies with Homemade Mincemeat


I have never had mince pies in my house at Christmas.  Well, I don't think I have.  They don't ring any bells.  They may have been at extended family Christmas parties but for dinners at home, they weren't there.  I don't think they held any appeal for my family.  I would have rejected them outright since I don't really like pastry.  And I admit, for the longest time I thought they contained meat and found that weird as they were a dessert.  Obviously I know that's not the case now but they still don't appeal to me.  I'm terribly picky.

However, mince pies do seem to be a traditional addition to most people's Christmas dinners so I thought I would try and make some for the one I was attending.  It was an excuse to try working with pastry after all.  Although in the end I picked a pastry that was more like shortbread than actual pastry since it saved a lot of time.  I also decided to challenge myself by making my own mincemeat, which really wasn't that hard after all, even though I made a mistake and missed out some of the ingredients in the first stage.  Namely the spices.  I'd gotten confused by the change in text colour on the screen.  Silly me needs to read things better.  There were also no sultanas because the fiancé didn't pick them up from the shop, even though they were on the list, and they ended up being non-alcoholic.  I don't drink and as such don't keep alcohol in my house.  The recipe called for brandy, which I did consider buying but it was all too expensive to justify buying for one recipe.  So after some research I substituted the brandy with apple juice.  No one seemed to notice.

In fact, the mince pies went down really well.  People liked the ratio of pastry to mincemeat, saying it was less stodgy than shop bought pies.  They also liked the taste of the mincemeat.  I was so pleased.  And since I had mincemeat left over, I made more for the New Years party today.  They went down well there too.

Since I made these twice, I experimented with how I made the pastry part of pies.  In the recipe, it says to pull parts off by hand the size of a walnut and flatten it into a circle for the base, and then do the same with a slightly smaller piece for the top.  This worked perfectly fine and made great pies.  But they did look a little messy.  So on my second go, I used two different sized cookie cutters to make the two pieces for each pie.  Equally effective, though I got a more equal amount of pastry per pie and the overall appearance of the pies was much better.  Hence I'll be putting that method in the recipe write-up.


Recipe - makes about 48 mince pies
  

You need to make the mincemeat at least the day before you want to make the pies since it needs to rest for a few hours, be cooked for three hours and allowed to cool again.


Mincemeat - adapted from Delia Online
  • 225g/8oz Bramley apples, cored
  • 110g/4oz shredded suet (I used vegetable suet)
  • 175g/6oz raisins
  • 110g/4oz sultanas
  • 110g/4oz currants
  • 110g/4oz mixed candied peel
  • 175g/6oz dark brown sugar
  • Zest and juice of 1 orange
  • Zest and juice of 1 lemon
  • 25g/1oz flaked almonds
  • 2 tsp ground mixed spice
  • 1/4 tsp ground cinnamon
  • Pinch of ground nutmeg
  • 3 tbsp apple juice (or brandy if you prefer) 
  1. Chop the apples into small pieces.
  2. Combine all the ingredients except the apple juice (or brandy) in a heat safe bowl and mix together thoroughly.
  3. Cover the bowl in a clean cloth and leave in a cool place for 12 hours or overnight to let the flavours mingle together.
  4. Preheat the oven to 125°C/225°F/Gas Mark 1/4.
  5. Once hot enough, cover the bowl of ingredients with tin foil and place inside the oven.  Leave to cook for 3 hours.
  6. Remove from the oven and place to one side to cool.  Stir the mixture from time to time as it does so.
  7. When the mincemeat is cold, add the apple juice (or brandy) and mix well.
  8. If you are not going to use all the mincemeat, store it in a sterilised jar with a wax paper sheet between the mince and the jar lid.


Pies - adapted from BBC Good Food 
  • 450g/16oz cold butter
  • 700g/24oz plain flour
  • 200g/7oz caster sugar 
  • Pinch of salt
  • 1.35kg/3lb mincemeat
  • 1 egg
  • Icing sugar , to dust 
  1. If planning to use the pastry straight away, preheat the oven to 200°C/400°F/Gas Mark 6 and grease four 12 hole patty tins (unless you're like me who only owns 1 and therefore has to do it in batches).
  2. Cut the butter into cubes, or scoop out in small spoonfuls and place in a large bowl with the flour.
  3. Rub the butter and flour together until you get a mixture resembling breadcrumbs.
  4. Stir in the sugar and salt and then bring the dough together into a ball.  Do not add any liquid.  It may take some time but it will come together.
  5. Knead the dough for a couple of minutes.
  6. If saving pastry for later, wrap in clingfilm and place in the fridge to chill.
  7. Roll pastry out on a lightly floured surface until it is 0.5cm/0.25inches thick and use a 6.5cm/2.5inch pastry cutter to cut circles out.  Place each circle in one hole of the patty tin.
  8. Spoon a heaped teaspoonful of mincemeat into the centre of each pie.
  9. Now use a 5.5cm/2inch cutter to cut out circles for the pie tops.
  10. Place the pie tops over the mincemeat and gently press down all around the edges to seal the pies.
  11. Beat the egg in a small bowl and use a pastry brush to cover the pie tops in an egg wash.
  12. Bake in the oven for 20 minutes.
  13. Remove from the oven and transfer to a wire rack to cool.
  14. Dust lightly with icing sugar.