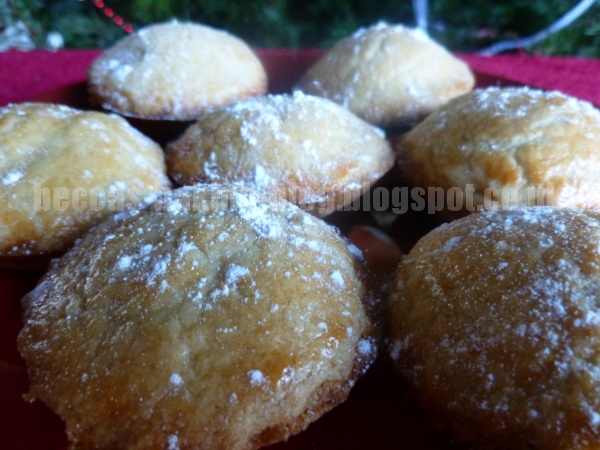
Showing posts with label Christmas. Show all posts

Monday, 28 December 2015

Red, White and Blue Mini Panettones


Hello all, I hope you have had a nice Christmas or a general happy holidays if that's not your thing.  Mine was quite lovely except for the fact that I have been ill since I came off from school!  I was bed-ridden for 3 days, where I did nothing but watch movies on Netflix and sleep.  The Hubby did a wonderful job taking care of me (bringing me food and drinks and sitting with me for a bit) and has ended up being sick himself for his troubles.  It doesn't quite seem to be the same thing: he's really stuffed up whereas I was hurting and suffering an annoying and painful cough.  I've still got the latter.  Curse my weak lungs and the sensitivity to the weather.  It's worse this year though as it is far too easy for me to get out of breath.  I was almost done in by a walk to the train station yesterday (which is 3 minutes away).  

But enough about that.  As I was saying, my Christmas has been lovely.  There were some lovely presents under my  beautiful (if I say so myself since I made all the decorations) Christmas tree and it was nice having dinner with the Dunion side of the Hubby's family, as well as skyping mine.  I even spent a chunk of the day making mince pies because the mother-in-law had requested them.  I made a batch for taking to Christmas dinner and then sent another batch along to Falkirk with the in-laws on Boxing Day when they visited the McGinlay side of the family.  The Hubby and I didn't go.  We took the day to recover.

Now with the Dunion side of the family, one of the siblings hosts Christmas Dinner.  This year it was the Hubby's Aunt Linda.  We all go for our tea and then we all exchange presents with each other.  We didn't go last year since we were down in England visiting my family.  I try and make my presents for extended family.  The year before last it was orange shortbread.  This year, I made panettone since the Dunion side has Italian roots.


I'll say right off the bat, this is not a proper, traditional panettone.  You can probably see that from the photos since they are quite tall and skinny panettone and baked in tin cans.  True panettone would also require a sourdough starter, which I do not have the patience to cultivate or maintain, and several days for proving.  Admittedly, I did have that latter bit but it was slightly scuppered by the being ill thing.  Hence they are not as beautifully fluffy as a real panettone should be.  Finally, I'm not using the most traditional of ingredients.  No mixed fruit or Fiori di Sicilia.  This has cranberries, blueberries, white chocolate and candied peel.  Hence the red, white and blue in the title.  That being said, these are still very yummy and went down well as gifts.

I wanted the panettone to be as fresh as possible so I made them on Christmas Eve.  I just about managed to stay upright whilst doing it.  It gave me a fair bit of trouble.  The dough is ridiculously sticky for a start.  However, I may have added slightly more egg that I was meant to because a bag of sugar fell out the cupboard and upended my jug of beaten egg onto the floor.  There was still some left and I just mixed up 3 new eggs.  The recipe said it is meant to be sticky, but I'm also supposed to be able to knead it into a ball, which was a bit of a hassle and very messy.   It also did not want to rise so I was constantly worried that I had killed the yeast.  I ended up leaving it whilst we went for Christmas Eve tea and board games with the Hubby's parents, sister and sister's boyfriend.  I was praying they had risen by the time I got back so I could cook them before bed.  Otherwise I was going to have to start over again.  I stole eggs from my mother-in-law's kitchen just in case.   Thankfully though, I came home and they had risen.  I'd put them in the oven since I figured it would be a bit warmer in there and that seemed to do the trick.  Baking took forever as I was wanting that golden brown finish on the top and it was pretty late by the time I finally got to go to bed but the blasted things were done.  I would just need to spruce them up and package them the next morning, as well as grab a few photos (what a shame most of them blurred because I forgot to correct the ISO...).


Recipe - adapted from Good Food: Delicious Gifts
Makes 5 


There is a lot of waiting around and a lot of rising to be done with these.  At the least add in 2.5 hours for rising time but may take longer if it is cold.  Mine did.  Along with the prep and cooking time, you're looking at at least 4 hours from start to finish.

Panettone:
  •  500g/1lb 2oz plain flour
  • 14g/0.5oz easy blend, dried yeast
  • 1 tsp salt
  • 100g/3.5oz golden caster sugar
  • 3 eggs
  • 1 tsp vanilla extract
  • 200ml/7fl.oz milk
  • 200g/7oz butter
  • 75g/3oz dried cranberries
  • 75g/3oz dried blueberries
  • 100g/3.5oz white chocolate chips
  • 100g/3.5oz mixed candied peel
To finish:
  • 1 egg
  • 2 tbsp flaked almonds
  1. In a stand mixer fitted with a dough hook, mix the flour, yeast and salt together briefly before adding the sugar and mixing again.
  2. Heat the milk in a saucepan until it is hand hot.
  3. Beat the eggs with vanilla extract and add to the dry ingredients along with the warmed milk.  Mix to make a soft, sticky dough.
  4. Work the dough for a few minutes in the mixer then remove the hook and allow to rest until it has doubled in size (about 1 hour but maybe more if it is cold).
  5. Put the hook back in, add the butter to the dough in small pieces and mix to incorporate.  Leave to rise for another hour.
  6. Add the cranberries, blueberries, white chocolate chips and mixed peel to the dough and mix in until just incorporated.
  7. Grease the bottom of 5 clean 400g soup tins and add a circle of baking parchment.  Cut a strip of baking parchment that is just over double the height of the tin.  Fold in half and place inside the tin to form a collar.  Make sure the parchment sticks out over the top of the tin.
  8. Tip the dough out onto a floured surface and knead quickly into a ball (the dough is very sticky so this is quite tricky and messy, I recommend using a dough cutter to help).  Divide the ball into 5 pieces and put one in each of the tins.  Leave to rise for about 30 minutes.
  9. Preheat the oven to 180°C/350°F/Gas Mark 4.
  10. Beat the egg and brush over the tops of the panettones and sprinkle with the flaked almonds.
  11. Bake for about 50 minutes or until the panettones are a deep golden colour.  
  12. Cool in the tins on a wire rack.  You should then be able to remove the parchment collar and decorate your tins with a bit of wrapping paper to present as a gift.

Monday, 15 December 2014

Cola Gingerbread Men for the Great Food Blogger Cookie Swap


My oh my, baking has been even more lacking.  Work is hard and distressing right now and not looking to get better any time soon, hence the sheer amount of not posting there has been.  Sorry.  But you don't want to hear about that, you're here for cookies!  Specifically, for cookie swap cookies!

The Great Food Blogger Cookie Swap 2014

I stumbled across the Great Food Blogger Cookie Swap last year, after it had closed.  I was really disappointed as it looked like such fun!  So of course I immediately added myself to the mailing list so I would not miss out next time.

It wasn't until mid October that I began to wonder about whether or not the swap had opened up again.  I hadn't received any email saying so.  Some investigation revealed that yes, it had opened up, and that my email had ended up in the Junk folder.  A good thing I checked or I'd be sitting out this year too!  So I got signed up and then began plotting.

The idea for the cookies came from a book I was reading.  In the story one of the characters is a chocolatier but at one point it mentioned cola gingerbread.  Well, I was intrigued.  What an interesting idea and rather ideal for a festive gift.  Gingerbread is very Christmassy, as far as I'm concerned.  The cola is an added bonus as I have always felt that the Coca-Cola advert with the trucks and the song and the lights is the first sign that it is almost Christmas!  I don't care about what's on sale as soon as Hallowe'en finishes, it's not the festive season until Coca-Cola announces that the holidays are coming!


Anyway, I ended up having to experiment with this recipe for a couple of weeks as there was not an existing recipe for cola gingerbread cookies (that I could find).  So I was having to tamper with an existing recipe.  For my initial batches the shape held up but they caught very easily and the cola flavour was rather too subtle.  So I had to increase the amount of syrup to improve the flavour.  Unfortunately that meant the cookies spread.  Not such a big deal really, except that it meant I couldn't do my original idea for the final look.  Based on something I had seen on Pinterest, I wanted to have my gingerbread men hugging their cola bottles.  This was also part of the experimentation.  It worked well in the early batches but wouldn't in the later ones.  Flavour trumps aesthetics though for me so I just went with the spreading batches and used icing to attach the cola bottles to my little men.  Not quite as lovely but still rather cute.  The only other problem this caused was that packaging the little guys was a bit of a curfuffle as some of the bottles would come away from the hands.  I managed it in the end though and it seems they arrived fairly intact at their various destinations! 

And once my own cookies were away, the ones from the lovely bloggers who got me in the swap started arriving!  It was kinda fun to get mystery boxes of cookies.  I didn't eat any until the weekend though since the Hubby and I decided to pack them all up and take them to Glasgow with us as we were away for a shopping weekend.  You can see them in all their delicious glory in the pictures below.  From top to bottom: Cranberry, White Chocolate and Sea Salt cookies from Ellie of RovingLights; Malted Chocolate Chip Cookies from Kirsty of Ever So Sweet; and Oat and Maple Syrup Biscotti from Tina of The Worktop.  Thank you so much, ladies.  These were scrumptious and the Hubby and I thoroughly enjoyed them!


I am hoping my swapees liked their cookies just as much.  I can tell you that we certainly enjoyed eating the spares.  I'm not much of a fan of gingerbread and even I was scoffing them without thinking.  They're a slightly soft cookie which are not too hot.  The ginger and cola mix nicely, especially when you eat the cola bottle with the cookie.  Yum yum!


Recipe - adapted from Home Baking Biscuits and Cookies
Makes 36
  • 350g/12oz plain flour
  • 1 tsp bicarbonate of soda
  • 2 tsp ground ginger
  • 100g/3.5oz butter
  • 175g/6oz light brown sugar
  • 1 egg yolk
  • 4 tbsp cola syrup
  • 2 tbsp golden syrup 
  • Decorative sugar balls
  • 36 cola bottle sweets
  • 2 tbsp icing sugar
  • Cold water
  1. Preheat the oven to 190°C/375°F/Gas Mark 5 and line a few baking trays with greaseproof paper. 
  2. Mix the flour, bicarbonate of soda and ginger together in a bowl.
  3. Add the butter in pieces and then rub into the dry ingredients until the mixture resembles breadcrumbs.
  4. Stir in the sugar and then make a well in the centre.
  5. Add the egg yolk, cola syrup and golden syrup and mix together.
  6. Knead into a smooth dough.
  7. Sprinkle a clean surface with flour and roll out the dough to about 5mm/0.25inches thick.
  8. Cut out gingerbread men with a 10cm/4inch cutter.
  9. Space out well on the tray as these cookies spread.  Create eyes and buttons by pushing the sugar balls into the dough.
  10. Cook for about 10 minutes, until the edges are just starting to brown.
  11. Remove and allow to rest on the tray for a minute before transferring to a wire rack to finish cooling.
  12. Once cool, mix the icing sugar with a little water to get a fairly thick icing.
  13. Place a blob of icing on one of the hands of each of the gingerbread men and stick a cola bottle sweet to the blob.  Leave to set.

Tuesday, 1 January 2013

Mince Pies with Homemade Mincemeat


I have never had mince pies in my house at Christmas.  Well, I don't think I have.  They don't ring any bells.  They may have been at extended family Christmas parties but for dinners at home, they weren't there.  I don't think they held any appeal for my family.  I would have rejected them outright since I don't really like pastry.  And I admit, for the longest time I thought they contained meat and found that weird as they were a dessert.  Obviously I know that's not the case now but they still don't appeal to me.  I'm terribly picky.

However, mince pies do seem to be a traditional addition to most people's Christmas dinners so I thought I would try and make some for the one I was attending.  It was an excuse to try working with pastry after all.  Although in the end I picked a pastry that was more like shortbread than actual pastry since it saved a lot of time.  I also decided to challenge myself by making my own mincemeat, which really wasn't that hard after all, even though I made a mistake and missed out some of the ingredients in the first stage.  Namely the spices.  I'd gotten confused by the change in text colour on the screen.  Silly me needs to read things better.  There were also no sultanas because the fiancĂ© didn't pick them up from the shop, even though they were on the list, and they ended up being non-alcoholic.  I don't drink and as such don't keep alcohol in my house.  The recipe called for brandy, which I did consider buying but it was all too expensive to justify buying for one recipe.  So after some research I substituted the brandy with apple juice.  No one seemed to notice.

In fact, the mince pies went down really well.  People liked the ratio of pastry to mincemeat, saying it was less stodgy than shop bought pies.  They also liked the taste of the mincemeat.  I was so pleased.  And since I had mincemeat left over, I made more for the New Years party today.  They went down well there too.

Since I made these twice, I experimented with how I made the pastry part of pies.  In the recipe, it says to pull parts off by hand the size of a walnut and flatten it into a circle for the base, and then do the same with a slightly smaller piece for the top.  This worked perfectly fine and made great pies.  But they did look a little messy.  So on my second go, I used two different sized cookie cutters to make the two pieces for each pie.  Equally effective, though I got a more equal amount of pastry per pie and the overall appearance of the pies was much better.  Hence I'll be putting that method in the recipe write-up.


Recipe - makes about 48 mince pies
  

You need to make the mincemeat at least the day before you want to make the pies since it needs to rest for a few hours, be cooked for three hours and allowed to cool again.


Mincemeat - adapted from Delia Online
  • 225g/8oz Bramley apples, cored
  • 110g/4oz shredded suet (I used vegetable suet)
  • 175g/6oz raisins
  • 110g/4oz sultanas
  • 110g/4oz currants
  • 110g/4oz mixed candied peel
  • 175g/6oz dark brown sugar
  • Zest and juice of 1 orange
  • Zest and juice of 1 lemon
  • 25g/1oz flaked almonds
  • 2 tsp ground mixed spice
  • 1/4 tsp ground cinnamon
  • Pinch of ground nutmeg
  • 3 tbsp apple juice (or brandy if you prefer) 
  1. Chop the apples into small pieces.
  2. Combine all the ingredients except the apple juice (or brandy) in a heat safe bowl and mix together thoroughly.
  3. Cover the bowl in a clean cloth and leave in a cool place for 12 hours or overnight to let the flavours mingle together.
  4. Preheat the oven to 125°C/225°F/Gas Mark 1/4.
  5. Once hot enough, cover the bowl of ingredients with tin foil and place inside the oven.  Leave to cook for 3 hours.
  6. Remove from the oven and place to one side to cool.  Stir the mixture from time to time as it does so.
  7. When the mincemeat is cold, add the apple juice (or brandy) and mix well.
  8. If you are not going to use all the mincemeat, store it in a sterilised jar with a wax paper sheet between the mince and the jar lid.


Pies - adapted from BBC Good Food 
  • 450g/16oz cold butter
  • 700g/24oz plain flour
  • 200g/7oz caster sugar 
  • Pinch of salt
  • 1.35kg/3lb mincemeat
  • 1 egg
  • Icing sugar , to dust 
  1. If planning to use the pastry straight away, preheat the oven to 200°C/400°F/Gas Mark 6 and grease four 12 hole patty tins (unless you're like me who only owns 1 and therefore has to do it in batches).
  2. Cut the butter into cubes, or scoop out in small spoonfuls and place in a large bowl with the flour.
  3. Rub the butter and flour together until you get a mixture resembling breadcrumbs.
  4. Stir in the sugar and salt and then bring the dough together into a ball.  Do not add any liquid.  It may take some time but it will come together.
  5. Knead the dough for a couple of minutes.
  6. If saving pastry for later, wrap in clingfilm and place in the fridge to chill.
  7. Roll pastry out on a lightly floured surface until it is 0.5cm/0.25inches thick and use a 6.5cm/2.5inch pastry cutter to cut circles out.  Place each circle in one hole of the patty tin.
  8. Spoon a heaped teaspoonful of mincemeat into the centre of each pie.
  9. Now use a 5.5cm/2inch cutter to cut out circles for the pie tops.
  10. Place the pie tops over the mincemeat and gently press down all around the edges to seal the pies.
  11. Beat the egg in a small bowl and use a pastry brush to cover the pie tops in an egg wash.
  12. Bake in the oven for 20 minutes.
  13. Remove from the oven and transfer to a wire rack to cool.
  14. Dust lightly with icing sugar.

Saturday, 29 December 2012

Candy Cane Cupcakes


I had been wanting to make some Christmas themed cupcakes for a while, and since I had peppermint extract and willing volunteers, I thought candy cane inspired cakes would be fun.

I probably got a bit carried away with ideas for this one.  Some of which were too big and I didn't manage to pull off, so the end result wasn't quite what I was hoping for.  But they were still very much enjoyed by the fiancĂ© and his friends.

So what have we got?  Well, the cakes are red velvet and white chocolate marble cakes.  These are then topped with peppermint flavoured buttercream, in red and white, and then finished with crushed candy cane sprinkles.  If I had managed too, I wanted to pipe the cake mixture into the cases to get a spiral pattern, rather than marbling, but the two mixtures I used were of slightly different consistency and wouldn't co-operate.  Maybe if I'd used one of the split piping bags instead of trying to fill a single one half and half it might have worked better but oh well.  Live and learn.

I actually tried two different mixtures for the white chocolate part of the cakes but the first recipe was far too runny.  I did save it to cook as a cake on its own but, due to being ill and thus a bit cloudy in the head, I forgot to take it out the oven when the timer went off and it got ruined.  Ooops.  I'll have to try it again at some point in the future though because it sounded yummy. 


Recipe - makes about 12 (and maybe 3 or so spare red velvet cupcakes)


Red Velvet Cake - adapted from Cake Days 
  • 60g/2oz unsalted butter
  • 150g/5oz caster sugar
  • 1 large egg
  • 10g/0.35oz cocoa powder
  • 40ml/1.5fl.oz red food colouring
  • 1/2 tsp vanilla extract
  • 1/2 tsp salt
  • 150g/5oz plain flour
  • 120ml/4.25fl.oz buttermilk
  • 1/2 tbsp white wine vinegar
  • 1/2 tsp bicarbonate of soda
White Chocolate Cake:
  • 60g/2oz butter
  • 60g/2oz caster sugar
  • 1/2 tsp vanilla extract
  • 1 large egg
  • 60g/2oz self raising flour
  • 100g/4oz white chocolate
  1. Preheat the oven to 190°C/375°F/Gas Mark 5 and line a 12 hole muffin case with cases.  
  2. Put the white chocolate in a glass bowl and then place over a pan of gently simmering water to melt.  Don't let the water touch the bowl.
  3. Start making the red batter by creaming the butter and sugar until pale and fluffy.
  4. Add the egg and beat into the mixture well until thoroughly incorporated.
  5. In a small, separate bowl, mix together the vanilla extract, cocoa powder and food colouring to form a paste.  Add the paste to the cake batter and mix until all the batter is red.
  6. In another bowl, sift together the flour and the salt.  Add the flour to the cake batter in two batches, alternating with the buttermilk.  Mix well after each addition.
  7. In yet another bowl, mix together the vinegar and bicarbonate of soda and then add to the batter.  Mix well and then set aside.
  8. If the chocolate has melted, remove from the heat and place to one side.
  9. For the white chocolate cake, start by beating the butter, sugar and vanilla together until creamy.
  10. Add the egg and mix in well.
  11. Pour in the white chocolate and mix in.
  12. Sift in the flour and fold into the mixture.
  13. Fill the muffin cases about two thirds full, half with red batter and half with white.  If you can, try and keep the colours split down the middle.  Otherwise fill with alternating spoonfuls.  You will probably have more red velvet mixture than you need so pour any excess into spare cases.
  14. Use a skewer or toothpick to marble the cake batter.  You want to aim for a swirling, spiral pattern but don't worry if it doesn't co-operate.  Not all of mine would.
  15. Bake in the oven for about 25-30 minutes.  The sponge should be slightly springy to the touch.
  16. Remove and leave to cool before decorating.
Peppermint Buttercream
  • 340g/6oz butter
  • 680g/12oz icing sugar 
  • 2 tsp peppermint extract
  • Red food gel
  • White food gel
  • 7 candy canes
  1. Divide the butter and sugar between two bowls (so 170g/3oz butter and 340g/6oz sugar per bowl) and add 1 tsp peppermint extract to each.
  2. Mix together until you get smooth and creamy buttercream.
  3. Add the red gel to one bowl a little at a time and mix until you get the desired colour.
  4. Do the same with the white gel in the other bowl.
  5. Fit a piping bag with a large star nozzle and then fill it half with red icing and half with white.  You want the colours side by side, not one of top of the other.  It is tricky but doable.
  6. Pipe swirls of buttercream on top of each of your cakes.
  7. Put the candy canes in a bag and partially crush them with a rolling pin.  You want small, sprinkle like pieces but also some big chunks of candy cane.
  8. Sprinkle the smaller pieces over the top of each cake, and then finish with a couple of bigger pieces.