Monday 29 October 2012

Gingerdead Cupcakes


The next couple of days are going to be quite busy baking wise.  I have four different batches of cakes to make for Hallowe'en.  All cakes were baked today and the majority will be decorated tomorrow evening.  However, one set is for the fiance to take to Dundee tomorrow so they had to be finished today.  

So these cakes came from a book I picked up a few weeks ago and after perusing it, I asked the fiancé if he would like these cakes for to take for Hallowe'en.  He jumped on the idea.  Chocolate cake with chocolate buttercream and gingerbread gravestones.  Fairly easy and yet surprisingly effective.  And fun to photograph too.  I had fun playing with the lighting.

I only made two modifications to the recipe.  The first was to leave out the espresso coffee because I didn't want that to come through in the cakes.  At the very least the fiancé doesn't like coffee and I want him to enjoy them.  The second was using lemon extract instead of lemon zest for the gingerbread.  I will also note that the amount of gingerbread that resulted from the recipe was far too much for making 12 graves.  So I ended up with a few spare graves (in case any broke in assembly) and nearly two dozen gingerbread bats.  I figure I'll keep them to hand out to trick-or-treaters.  Hence in the write-up, I'm going to halve the gingerbread recipe.


Recipe - adapted from A Zombie Ate My Cupcake
Makes 12

Gingerbread:
  • 225g/8oz plain flour
  • 1/2 tsp bicarbonate of soda
  • 1 tsp ground ginger
  • 3/4 tsp ground cinnamon
  • 1/2 tsp ground nutmeg
  • 1/8 tsp salt
  • 60g/2oz unsalted butter
  • 50g/1.75oz granulated sugar
  • 80ml/2.8fl.oz black treacle
  • 1 small egg
  • 3/4 tsp lemon extract
  1. Sift together the flour, bicarbonate of soda, spices and salt.
  2. In a large bowl, beat the butter and sugar together until light and fluffy.
  3. Add the egg and the treacle and mix until thoroughly combined.
  4. Add the lemon extract and mix in. 
  5. Gradually add the flour a bit at a time, mixing until fully incorporated before adding more.  You may need to use your hands for the last of it as you end up with quite a thick dough.
  6. Split the dough in two, shape into balls and wrap each ball in clingfilm.  Put in the fridge to rest for about 3 hours.
  7. Preheat the oven to 180°C/350°F/Gas Mark 4 and line 2-3 baking trays with greaseproof paper.
  8. Remove the dough from the fridge and let it sit for about 5 minutes.  Meanwhile lightly flour your work surface and rolling pin.
  9. Roll the dough out to be about 5mm/0.25inches thick and then cut out gravestone shapes with a knife.  Transfer each shape to a tray, spacing the biscuits about 1 inch apart.  You need 12 gravestones but it's worth making a couple of spares in case any break.  Remember not to make them too big or they won't fit in the cakes.
  10. Bake for about 10 minutes before removing from the oven and leaving to cool on a wire rack. 

Cakes:
  • 60g/2oz butter
  • 140g/5oz caster sugar
  • 1 large egg
  • 1/2 tsp vanilla extract
  • 115g/4oz plain flour
  • 30g/1oz cocoa powder
  • 1/4 tsp bicarbonate of soda
  • 1/4 tsp salt
  • 80ml/2.8fl.oz sour cream (or sour cream substitute)
  1. Preheat the oven to 180°C/350°F/Gas Mark 4 and line a 12 hole muffin tin with cases, preferably black or dark brown.
  2. Cream the butter and sugar together until very pale and fluffy.
  3. Add the egg and vanilla and beat until well incorporated.
  4. In a separate bowl, combine the flour, spices, bicarbonate of soda and salt by sifting them together.
  5. Add 1/3 of the dry ingredients to the cake batter and mix in thoroughly.
  6. Add half the sour cream and mix.
  7. Now add half of what is left of the dry ingredients and mix.
  8. Add the rest of the cream and mix.
  9. Add the last of the dry ingredients and blend together well.
  10. Spoon equal amounts of batter into the cases and then bake in the oven for 15-20 minutes, until a skewer inserted into the middle comes out clean.
  11. Cool on a wire rack before decorating.

Buttercream:
  • 60g/2oz unsalted butter
  • 30g/1oz cocoa powder
  • 1/3 tsp salt
  • 1/2 tsp vanilla extract
  • 250g/8.8oz icing sugar
  • 2 tbsp milk
  • 2 tbsp double cream
  1. Beat together the butter and cocoa powder until smooth and creamy.
  2. Add the salt, vanilla extract, icing sugar and milk and beat until well incorporated.
  3. Add the cream and mix in until smooth.
 Assembly:
  • A small amount of white ready to roll fondant / 12 ready-made fondant flowers
  • White writing icing/chocolate
  • 2 tbsp cocoa powder
  1. Spread about 2 heaped teaspoons of buttercream onto each cooled cupcake and smooth to the edges with a spoon.
  2. Set the cakes on a sheet of baking parchment and use a sieve to dust with icing sugar.  Try to cover all the buttercream.
  3. Use the writing icing to decorate the gingerbread gravestones and then push one into the middle of each of the cakes.  They should stand on their own.
  4. If using ready to roll fondant, use a small flower cutter to make little fondant flowers.  
  5. Place the flowers on top of the cocoa covered buttercream.

Tuesday 23 October 2012

Chocolate and Orange Sandwich Biscuits


I appear to be in a biscuit mood this week.  I've just had an urge to make them.  First the Peek Freans, and now these.  I also seem to have developed a thing for sandwiches.  

These are for the fiancé and his friends.  Being in a biscuit mood, these were picked from the biscuit book and something that looked interesting but wasn't too experimental since it involved flavours that have proved popular before.  The biscuits themselves were very easy to make.  It was a good dough, which could be shaped easily.  Really, the hardest part with making the biscuits was finely chopping 100g of dark chocolate.  That was surprisingly tiring.  They also took a while to bake as I had to do it in four batches.

The cream was also fairly easy, though somehow mine ended up being quite runny, which meant when I first tried to use it, it just spilt over the sides of the biscuits.  I had to put it in the fridge to firm up before it worked properly.  I also decided to colour mine, because whilst Milky Bar white chocolate is divine tasting, it turned the cream a rather horrible colour, rather than the nice white look it has in the book.  So I thought making it orange would be more appealing.  It went well with the dark biscuits at least.

I did lose a couple of biscuits, which was shame.  The bottoms of the first batch burnt due to leaving them on the tray to cool like the book suggested (hence I didn't do it with the other three batches) and in trying to remove the burnt part, one cookie crumbled to pieces.  I should have let it cool a bit more so it wasn't as soft.  The other escaped during the filling stage and ended up on the floor.  It was quite annoying.

The tasters' verdict was that they were absolutely delicious.  The filling went really well with the biscuits and they were all gobbled up.  


Recipe - adapted from Cookie Jar
Makes about 15

Biscuits:
  • 225g/8oz butter
  • 140g/5oz caster sugar
  • 2 tsp orange extract
  • 1 egg yolk, lightly beaten
  • 2 tsp vanilla extract
  • 250g/9oz plain flour
  • 25g/1oz cocoa powder
  • Pinch of salt
  • 100g/3.5oz plain chocolate, finely chopped
Filling:
  • 125ml/4fl.oz double cream
  • 200g/7oz white chocolate
  • 1 tsp orange extract
  • Orange food colouring (optional)
  1. Preheat the oven to 190°C/375°F/Gas Mark 5 and line 2-4 baking trays with greaseproof paper (it depends on the size of your oven and thus the size of your trays).
  2. Mix the butter, sugar and orange extract in a large bowl.
  3. Beat in the egg yolk and vanilla extract.
  4. Sift together the flour and cocoa and salt, and add to the mix, followed by the finely chopped dark chocolate and stir until well combined.  You should get quite a thick paste.
  5. Scoop out tablespoons of dough and roll into balls.  Flatten each ball slightly and place on the trays, spacing about 1 inch apart.  They don't spread too much in the oven.  You want about 30 biscuits, or at least an even number. (I only managed 28).
  6. Bake for about 10-15 minutes.  They will still be slightly soft when they come out but will firm up as they cool.  Transfer them to a wire rack to do this.
  7. Make the filling by bringing the cream to a boil in a small saucepan and then removing from the heat.
  8. Add the chocolate, stirring until it has melted and the mixture is smooth.
  9. Add the orange extract, and food colouring if using, and stir in.
  10. Allow mixture to cool completely before using.  If very runny after this point, put in the fridge for about 20 minutes to firm up.
  11. Put a dollop of filling in the middle of the underside of one biscuit.  Don't fill all the way to the edge because it will spill out when you make the sandwich.  Top with another, squeezing them together gently to spread the filling out.  Repeat until all biscuits are filled.

Lemons, Lemons, Lemons Cupcakes


When I first set about making these yesterday, I did so without the intent to blog about them, since originally I was going to be doing a vanilla cupcake with water icing: nothing fancy.  However, they turned into the cakes they are now as I went along and I ended up with something a bit more interesting, if still fairly simple.

These were made for my fiancé, who has been getting some nasty back to back shifts the last couple of weeks (we're talking finishing at 10pm then having to be in again for 6:30am the next day with a 6 mile cycle to get there).  He mentioned over the weekend that he likes taking my baking to have with his lunch/dinner because it cheers him up but obviously there haven't been any cakes for him to do so.  So I wanted to make him some, and I did.

Like I said, they started conceptual life as vanilla cupcakes.  I instead turned them into lemon ones since he likes lemon.  I then thought I'd put lemon buttercream in the middle and found I had just enough icing sugar to manage it.  But what to top it with, having run out of icing sugar?  Well, I was also making biscuits at the same time, which were to have an orange cream inside, so I pinched some of it before flavouring and made it lemon.  It is then topped with flakes of white chocolate.

He likes them, though it turns out I didn't use enough lemon extract in the sponge.  I discovered that when I ate the leftover sponge from coring out the middles.  I'll amend it in the recipe.  His favourite bit is the buttercream middle.


Recipe - makes 6

Cakes:
  • 75g/2.5oz butter
  • 75g/2.5oz caster sugar
  • 1 large egg
  • 90g/3oz self-raising flour
  • 1 tsp lemon extract
Buttercream:
  • 25g/1oz butter
  • 50g/2oz icing sugar
  • 1 tsp lemon extract
Lemon Cream Topping:
  • 50g/2oz white chocolate
  • 30ml/1fl.oz double cream
  • 1 tsp lemon extract 
  • Yellow Food Colouring
  • 1 square white chocolate, finely chopped for decoration
  1. Preheat the oven to 180°C/350°F/Gas Mark 4 and line a six hole muffin tin with cases.
  2. Beat the butter and the sugar together until light and creamy.
  3. Add the egg and the lemon extract and beat in.
  4. Sift in the flour and fold into the mixture.
  5. Distribute evenly amongst the cases and then bake for about 20 minutes, until risen and a skewer inserted into the centre comes out clean.  Leave to cool on a wire rack.
  6. Make the buttercream by combining the butter, icing sugar and lemon extract together and beating until it is smooth and creamy.
  7. Cut out holes in the centre of each cake, either with a knife or an apple corer.  Reserve the top of the 'cores' to use as lids.
  8. Fill the holes with buttercream and then put the 'lids' back in place.
  9. Put the cream in a small saucepan and bring to a boil.
  10. Remove and add the white chocolate, stirring until the chocolate has melted and the mixture is smooth.  Add the colouring and mix in.
  11. Spoon on top of the cakes.
  12. Top with a sprinkling of white chocolate flakes.

Sunday 21 October 2012

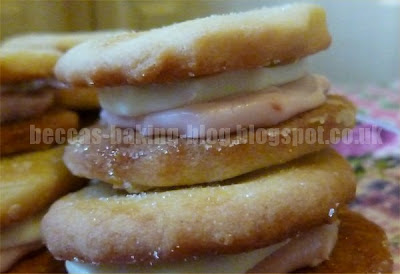
Peek Freans Pink Freens


03/01/13: I have renamed these since they are not actually a Peek Frean biscuit.  They're just inspired by a description of one.  Since writing this recipe, I found what I think is the biscuit they are talking about, which is a Fruit Creme.  My biscuit is a bit different, hence a slightly different name.  It's what the fiancé keeps calling them. 

So some people may remember that way back in May, I attempted to make a biscuit inspired by something I heard in the television series Fringe.  This biscuit being a 'Peek Frean', which was described as a vanilla wafer with a lemon cream and raspberry centre. I was unable to find a recipe for such a thing and decided to concoct my own instead.  Unfortunately it was a failure, at least for me.  I thought the filling was too sweet.  The fiancé enjoyed them though and finished the entire batch off himself, so at least they weren't wasted.

Anyway, recently I was checking the statistical information for this blog and found I've been getting a few hits on that particularly page of late and a number of people stumbling upon my blog looking for a recipe for Peek Freans.  I admit I felt a bit bad for not having any such recipe on that page and so last night, I decided I would attempt it again.  Of course, this meant I needed fondant.  I was thinking something like the ready to roll fondant you can get in supermarkets, but I did not feel like trekking out to one to get it.  So instead I thought I could make it from scratch.  I had a recipe I wanted to try in my sweet making book, but it requires a resting period of 12 hours, so I was making that at 10pm, dressed in pyjamas, so that it could be ready to use today.

I admit, I was a bit nervous about the fondant.  I really wasn't sure if I would pull it off since it required a sugar syrup and my track record with that hasn't been the best.  I usually burn at least one batch each time.  But this time I got it on the first try!  I was so pleased.  The actual working of the sugar syrup afterwards though was exhausting.  It takes quite a while and becomes harder the stiffer it gets.  And then I had a strange period where it suddenly went crumbly, so I added a little water and it went too soft and got stuck to my hands.  I had to get the fiancé to help me scrape it off using a butter knife.  I succeeded in the end though and I was very proud.  It's always a very pleasing feeling to make something from scratch well on the first go.


As for the biscuit part, I went through one of my biscuit books and found a recipe for jam rings, which looked perfect.  A simple vanilla biscuit that could be cut into shapes.  In theory anyway.  For some reason the dough is ridiculously sticky.  I was adding so much flour to it when rolling it out to stop it sticking to everything.  I ended up with some slightly wonky shapes as a result but the final product was still very delicious and worked well.  I admit, because I'd only made half a batch of fondant, I didn't have enough to fill all the biscuits so I just coated my remaining biscuits with chocolate, or sandwiched them together with jam.  But if I'd made a full batch, I would have filled them all, hence I'll be doing that next time.

So...was it a success?  Oh indeed it was!  They were so scrummy.  The fiancé likes them and says they are better than the last batch.  He really likes the fondant filling.  I like them too!  Not too sweet but lovely and creamy and the soft filling and the crunchy biscuit is so good!  I was very very happy.  So this time, you do get a recipe. 


Recipe - Makes 18

Fondant - adapted from The Home-Made Sweet Shop
  • 400g/14oz caster sugar
  • 150ml/5fl.oz water 
The fondant needs to rest for 12 hours when making from scratch, so prepare it the day before you want to make the biscuits.
If you don't want to make your fondant, you need about 400g/14oz ready to roll fondant icing from the supermarket and skip to the biscuits.
  1. Prepare an ice bath and moisten a baking tray or marble slab with water.  Also moisten a metal scraper (or in my case, a cake slicer) and wooden or rubber spatula.  Keep a wet butter knife on hand just in case and a bowl of cold water.
  2. Make the fondant by putting the sugar and water in a heavy saucepan and heating until the sugar dissolves.
  3. Bring to a boil and then turn the heat down and allow to cook until the syrup reaches a temperature of 114°C/238°F (soft ball stage).
  4. Arrest the cooking by placing the saucepan in the ice bath and then quickly pour the syrup onto the damp tray/slab and allow to cool for a few minutes.
  5. Using the metal scraper, start scooping the edges of the syrup into the centre of the pool until it becomes glossy.  If it gets stuck to the scraper, use the wet knife to scrape it off.  You may want to re-dampen the scraper every once in a while.
  6. Switch to the wooden/rubber spatula and start to move it through the syrup in a figure of eight pattern, scooping it up and pushing it along as you go.  Keep doing this until the syrup goes from being easy to move and transparent to very thick and opaque white.  This does take a long time and you will get sore arms.
  7. When mixture is the right appearance, knead it until you can feel no hard lumps and you have a nice, smooth paste.
  8. Put the paste in slightly damp bowl, cover with a clean, damp cloth and put in the fridge to rest for 12 hours.
Biscuits - adapted from Cookie Jar
  • 225g/8oz softened butter
  • 140g/5oz caster sugar, plus extra for sprinkling
  • 1 egg 
  • 2 tsp vanilla extract
  • 280g/10oz plain flour, plus extra on hand for overly sticky dough
  • Pinch of salt
  1. Make the dough for the biscuits by first separating the egg and putting the white to one side.
  2. Put the butter and sugar into a bowl and mix together.
  3. Lightly beat the egg yolk and add it and the vanilla extract to sugar butter and mix.
  4. Sift in the salt and flour and mix.
  5. Split the dough in half, roll each half into a ball and wrap them in clingfilm.  Put them in the fridge to rest for 30-60 minutes.
  6. Remove from the fridge and let sit for a few minutes.  Meanwhile, preheat the oven to 190°C/375°F/Gas Mark 5 and line 3 baking trays with parchment.  Flour the work surface and rolling pin, and have more flour on hand in case the dough gets sticky.  
  7. Roll the dough out until it's about 5mm/0.25inch thick and cut out circles using a 5.5cm/2.2inch fluted cookie cutter.  Transfer to the baking sheets.  You should get 18 pairs of biscuits from the dough.
  8. Bake for 7 minutes, then remove, brush with the egg white and sprinkle with caster sugar.  Bake for a further 5-8 minutes, until the edges of the biscuits are slightly brown.
  9. Allow to cool on the tray for 10 minutes before transferring to a wire rack to cool.
Filling:
  • 400g/14oz fondant
  • 1/2 tsp lemon extract
  • 2 tbsp seedless raspberry jam
  • Icing sugar for dusting
  • Pink and yellow food colouring
  1. Put the jam into a saucepan and heat.  You want to remove as much moisture as possible, aiming for about half the amount of jam you started with.  Set aside to cool to room temperature. 
  2. Divide the fondant in half and place the half not being used into a bag to stop it drying out.
  3. Dust the work surface with icing sugar.  
  4. Knead the fondant until it is soft and pliable, then add the lemon extract and a few drops of yellow colouring.  Knead the fondant again to mix the flavouring and colour into it.  Place in a bag to keep fresh.
  5. Knead the other half of the fondant.  Cut slits in it and spread the jam into the slits, along with a few drops of pink colouring.  Dust with icing sugar and then knead in to mix the colour and jam into the fondant.  The jam will make it sticky so you'll need to keep adding icing sugar to it until it no longer sticks to your hands.
  6. Roll the pink fondant out and use a 4cm/1.6inch cutter to cut out circles.  Place the circles on top of the underside of half the biscuits.
  7. Do the same with the yellow fondant, placing the circles on top of the pink.
  8. Place the remaining biscuits on top and very gently press together.

Tuesday 16 October 2012

Cola Float Cupcakes


This bake was a flavour experiment.  The idea came from a recipe for cola cupcakes in  Hummingbird Bakery: Cake Days, though I didn't actually use that one for mine.  I just took the idea of using cola syrup for flavouring.  So yes, the original idea was for cola cupcakes.  I wanted to try and take it further though and make them cola float cupcakes.  Cola floats, for those who do not know, are a drink of coca-cola, with a scoop of ice cream on top, usually vanilla.  It can be strange but is also quite delicious.  Hence, cake versions.  The cola bit would be the cake obviously, but the 'ice cream' was really where my experimentation lie since I thought it up by myself, no inspiration from anywhere.

Having made ice cream, I know that one of the main ingredients is custard, as well as cream and your flavourings.  But how to make a custard flavoured cream that was nice and pipe-able.  Add too much of a wet something to whipped cream and it tends to collapse, at least in my experience anyway0.  Then it hit me: custard powder!  So that's basically what I went with: whipped double cream, with custard powder and vanilla extract.  It was surprisingly effective.  The fiancé and I think it tastes almost like a Mr. Whippey ice cream (a slightly firmer version of the ice cream you get from an ice cream van).

It took me a while to find cola syrup.  Later on I was browsing through a Nigella book and saw she also had a cola cake recipe, which used actual coke, but I had my syrup by then.  I admit I got it somewhere I would not have expected, and that was Argos.  After much searching, I concluded I was going to have to buy syrup meant for those Sodastream machines, the ones that make fizzy drinks at home.  But the bottles seemed to be at least £8 wherever I looked, which was a bit much for an experiment, and that's not even considering postage.  Then I found it on Argos, via Google.  Only £4 and was free delivery.  Well, I jumped on that offer and it arrived in time to make them for the fiancé to take to Dundee tonight.  Yay!

So what did my willing testers think?  Well, it was mixed results.  The fiancé and one of his friends liked them.  The fiancé also really enjoys the cream topping.  Someone didn't like the cream.  They didn't quite taste cola like though.  It was sort of there but not very obvious, which is weird because I used twice the amount the Hummingbird recipe did.  The icing was very cola-y though.  I figured this one would be an acquired taste though.  I don't like cola flavoured things (except actually Coke) and so I didn't want to try.  So that's fair enough.    


Recipe - Makes 12


Cakes:
  • 140g/5oz butter
  • 140g/5oz caster sugar
  • 3 eggs
  • 170g/6oz self-raising flour
  • 2 tbsp cola syrup
Cola icing:
  • 55g/2oz icing sugar
  • 1-2 tbsp coca-cola
Vanilla 'Ice Cream' Cream
  • 284ml/10fl.oz double cream
  • 1x 75g/2.6oz packet instant custard powder
  • 1 tbsp vanilla extract 
  • 12 cola bottle sweets to decorate
  1. Preheat the oven to 180°C/350°F/Gas Mark 4 and line a 12 hole muffin tin with cases.   Use dark cases to look more like cola floats, or red for a striking contrast.
  2. Cream the butter and sugar together in a large bowl until pale and fluffy. 
  3. Add the cola syrup and beat in. 
  4. Add the eggs one at a time, and beat until fully incorporated after each addition. 
  5. Sift in the flour and fold into the mixture.
  6. Spoon into the cases, trying to distribute the mixture equally and making sure to fill the cases 2/3 of the way up.
  7. Bake for about 20 minutes until a skewer inserted into the centre comes out clean. 
  8. Leave to cool on a cooling rack.
  9. Make the cola icing, by mixing the coca-cola and icing sugar together.  Add the cola a little at a time to get the right consistency.  You don't want it too runny but you want to be able to spread it easily.
  10. When the cakes are cool, top with a thin layer of cola icing.
  11. Make the 'ice cream' by first whipping the double cream to stiff peaks.
  12. Add the custard powder and vanilla extract and fold into the cream.  The custard powder will make the cream stiffen a bit more.
  13. Put into a piping bag fitted with a large star nozzle and pipe a nice swirl on top of each cake.
  14. Top with a cola bottle sweet. 
 

Tuesday 9 October 2012

Carrot Cake Whoopie Pies with Cinnamon Filling


So last week the game my fiancé was for going to see his friends was cancelled.  This meant he didn't take the cakes I made to Dundee.  He was not too upset by that part, because it meant he got to eat two thirds of them (I took some into work with me).  But I felt a bit bad about them missing out on cakes and because I wouldn't usually make them this week due to working Monday.  So I caved to my own feelings and whipped up something for him to take this week.  I'm a big softie apparently.

Last week I also acquired some new books for my cookbook collection.  The shop I work in sells books (among other things) and we have loads of good deals on.  We're also getting a small period of extra staff discount so I was taking advantage of it.  One of the books I snapped up was The Hummingbird Bakery: Cake Days.  It is quite a nice book and it's where today's recipe comes from.  I found it whilst flicking through and thought my fiancé would enjoy them (I always base what I make for him and his friends primarily on what he likes).  They were based on carrot cake, which he likes, and has a cinnamon filling.  It was also for something I had never made before: whoopie pies.  It was certainly interesting.  And really I should read recipes all the way through because otherwise I start mixing up timings.  I was finishing off the filling at midnight last night and really I needed to let it set for 30 minutes before using it but I wanted to go to bed.  So I just put it in as it was and then put the whole cakes into the fridge.  Next time I'll do it the right way around.  

As for the final result, I have no idea what a whoopie pie should feel like so I don't know if I was successful...I admit I was expecting something more biscuit like but the book said cake so I think I am at least on the right lines.  Taste wise they were apparently very yummy and well received and all gone by the end of the night.


Recipe - adapted from The Hummingbird Bakery: Cake Days
Makes 8-10 

Sponge:
  • 1 large egg
  • 150g/5.5oz caster sugar
  • 125g/4.5oz plain yoghurt
  • 25ml/1fl.oz milk
  • 2 tsp vanilla extract
  • 75g/2.5oz unsalted butter
  • 275g/10oz plain flour
  • 1/2 tsp ground cinnamon
  • 1/2 tsp ground ginger
  • 1/4 tsp ground nutmeg
  • 1/4 tsp baking powder
  • 3/4 tsp bicarbonate of soda
  • 1/4 tsp fine sea salt
  • 100g/3.5oz carrot
Filling:
  • 170g/6oz unsalted butter
  • 1/2 tsp ground cinnamon
  • 280g/10oz icing sugar
  • 175g/6oz vanilla marshmallow fluff (I made it from the recipe I used here)
  1. Melt the butter in a small saucepan and then set aside.
  2. Whisk the egg and the sugar together in a large bowl until pale and fluffy.
  3. In a jug, mix together the yoghurt, milk and vanilla.
  4. Pour into the whisked eggs, followed by the melted butter and mix to combine.
  5. In a separate bowl, sift together the flour, ground spices, baking powder, bicarbonate of soda and sea salt.
  6. Add half to the egg and yoghurt mixture and beat in until just incorporated.  Repeat with the second half.
  7. Peel and grate the carrot. 
  8. Put into a sieve and press down to drain out any liquid.
  9. Add the carrot to the batter and stir in (if using an electric whisk or mixer up until this point, do this by hand) until it is spread evenly throughout the mixture.
  10. Put the batter in the fridge to cool and set for 30-40 minutes.
  11. Meanwhile, preheat the oven to 170°C/325°/Gas Mark 3 and line 2-3 baking trays with greaseproof paper.
  12. Once the batter is cool, spoon small mounds of butter onto the trays.  Make sure you have even numbers of mounds since each pair makes a pie.  The mounds should be about 3-5cm/1.25-2inches in diameter and spaced well apart (at least 2.5cm/1inch) because they will spread out when cooking.
  13. Bake for 10-15 minutes.  They should be lightly golden all over and will spring back when you touch them.
  14. Remove and transfer to a wire rack to cool. 
  15. Whilst the cakes cool, make the marshmallow fluff (if not already done so) and then make the filling.
  16. Mix together the butter, icing sugar and ground cinnamon until the butter and sugar combine together.  
  17. Add the marshmallow fluff and mix until mixture is light and fluffy.
  18. Put the filling in the fridge for half and hour.
  19. When sponges are cold, it is time to fill them.  Spread 1.5 tablespoons of filling mixture on the flat side of one of the cakes then place a second one on top, with the flat side touching the filling, to make a sandwich.  Press together gently.
  20. Repeat until all pies are sandwiches together.

Monday 1 October 2012

Blueberry Cupcakes with Lemon Buttercream


More cakes for the fiancé and his friends.  I've had to reduce when I make them to every other week because I'm too tired to do it after work.  So I can only really do them when I'm not working Mondays.  Being so tired really does impact on how often I bake.  It's a shame because I enjoy baking.  Should be some more bakes towards the end of this month though, with Hallowe'en coming.  I intend to make cakes to give out to any of the kids that come by.

Anyway, that's getting off topic.  Last week as I arrived at work, my manager pulled me back to the front of the shop, saying there was a magazine I had to get because it came with a free cupcake book and was only 92p.  I admit, I was a bit dubious but I did cave and buy it the next day.  It was well worth it.  It's a lovely little book with some nice sounding and interesting recipes in it.  Today's bake is one of them, which combines two things my darling fiancé enjoys: blueberries and lemon.

The cupcakes came out nice and big.   I did make more buttercream than the recipe suggested because I wanted to do some fancier piping rather than just covering the tops using a palette knife.  I didn't do the usual swirl either, since one of the photos from a different recipe in the book looked really pretty with it's curved layers.  I didn't quite pull off the effect but it still looked really cute.  I'll have to practice a bit more.

I really like the cases I used.  They are really nice and thick so the fats from the cake didn't make them go see-through during baking.  A good looking case adds to the overall appearance of a cake after all. 

The verdict was that they are delicious.  The fiancé gets to eat the one I cut up for photos.  He really enjoyed it. 


Recipe - adapted from Best Baking Delicious Cupcakes
Makes 12 

For the cakes:
  • 225g/8oz self-raising flour
  • Pinch of salt
  • 125g/4oz butter
  • 150g/5oz caster sugar
  • 1 tsp vanilla extract
  • 2 eggs
  • 100ml/3.5fl.oz milk
  • 1 tsp ground cinnamon
  • 125g/4oz blueberries
For the lemon buttercream:
  • 170g/6oz butter
  • 340g/12oz icing sugar, plus 1 tbsp for dusting
  • 2 tsp lemon extract
  • 24 blueberries for decorating
  1. Preheat the oven to 180°C/350°F/Gas Mark 4 and line a 12 hole muffin tray with muffin cases.  Wash and dry the blueberries.
  2. Sift the flour and salt together in a bowl.
  3. In another, larger, bowl, beat the butter until smooth and creamy.
  4. Add the caster sugar and vanilla extract and beat to combine.
  5. Fold in the eggs one at a time, making sure they are well incorporated.
  6. Pour in the milk and mix well.
  7. Keep beating the mixture whilst gradually adding the flour and the cinnamon.  Make sure it's all mixed in really well.
  8. Add the blueberries and fold in so the blueberries are evenly distributed throughout the mixture.
  9. Spoon the mixture into the cases.  Try and not get all the blueberries at the bottom.  You can always mix the batter a bit in the cases to move the blueberries about.  You should be able to get about two heaped teaspoons of batter per case.
  10. Bake for about 25 minutes, until a skewer inserted into the middle comes out clean.
  11. Leave to cool.
  12. Make the buttercream by beating the butter, icing sugar and lemon extract together until smooth and creamy.
  13. Put the buttercream into a piping bag fitted with a large star nozzle.  To pipe the curved layers, start by piping lines from the centre of a cake to the edge to create a sort of star.  For the second layer, start at the centre, pipe halfway towards the edge and then lift the nozzle up and over and pipe back over what you just did to create a nice, shell look.  Do this four more times.  Then point the nozzle directly above the centre and pipe a quick blob of buttercream for the final layer.  If you want, you can fill in any gaps around the edge in the same manner as the top layer.
  14. Top each cake with two blueberries and then dust with icing sugar.