Monday 31 December 2012

Christmas Wreath Cake


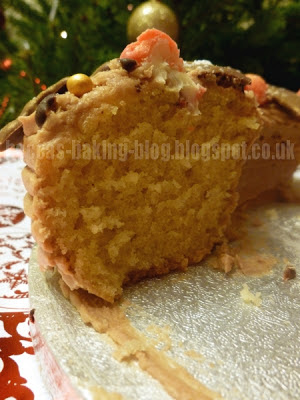
Now this was a cake I've had in mind for months.  This year is the turn of the fiancé's Mum to host the Christmas dinner for her side of the family.  I got to make dessert and I knew I wanted to bake a cake made to look like a wreath.  I even got a special ring mould and everything!

So it's a vanilla sponge ring covered in chocolate orange buttercream made to look like bark, which is then decorated with dark chocolate branches, milk chocolate holly leaves and white chocolate truffle berries, tinted with gold lustre powder and dusted with icing sugar.  

I would have liked to make my chocolate leaves by painting chocolate onto actual (or wax) leaves but I couldn't find any holly.  So I had to resort to piping the chocolate shapes instead, which meant they were a bit thicker and less refined than I would have liked but they still looked pretty good.

The truffle berries gave me the most trouble because they just did not want to set and I was already running over the time I had said we would head down to the house.  Ideally they would have been perfectly round but due to the lack of time and the fact they ended up fused to the wire rack they were setting on, I had the slice them off so the bases are flat.  They still tasted yummy though.  The buttercream also gave me some difficulty too since I ran out of orange extract making cupcakes for work and couldn't find any in the local supermarket.  So I had to use the juice of an orange instead, which made the buttercream runnier and thus I had to add more icing sugar to get the right consistency.  A bit of trial and error, which was slightly annoying but I got there in the end.  I'll be putting extract in the recipe write-up though.

It went down very well with everyone who ate it.  They said it was light and fluffy and the buttercream was delicious, which isn't surprising since it is one of my most popular flavours.


Recipe:

Cake:
  • 225g/8oz butter
  • 225g/8oz caster sugar
  • 2 tsp vanilla extract
  • 4 large eggs
  • 225g/8oz self-raising flour
  1. Preheat the oven to 180°C/350°F/Gas Mark 4 and grease a 24cm ring mould with butter.
  2. In a bowl, beat together the butter, sugar and vanilla extract until it is smooth and creamy.
  3. Add the eggs one at a time and beat well after each addition.
  4. Sift in the flour and fold in until fully incorporated.
  5. Spoon the mixture into the ring mould, trying to distribute it evenly.  Run your spoon round the top to smooth it out.
  6. Bake for 30-40 minutes, until the sponge is springy to the touch and a skewer inserted through it comes out clean.
  7. Leave in the mould to cool for about 15 minutes before transferring to a wire rack to finish.
Chocolate Orange Buttercream:
  • 140g/5oz butter
  • 280g/10oz icing sugar
  • 100g/3.5oz milk chocolate
  • 2 tsp orange extract  
  1. Put the milk chocolate in a glass bowl and set over a pan of simmering water to melt.  Don't let the bowl touch the water.
  2. Beat the butter, icing sugar and orange extract together in a bowl until smooth a creamy.
  3. Add the melted chocolate to the buttercream and mix in until well incorporated.  You're aiming for a soft but spreadable consistency so if it's a bit runny, add more icing sugar.
  4. Place the cake on a cake board or plate.
  5. With a rubber spatula or a palette knife, spread a thin layer of buttercream over the cake to form a crumb coat.
  6. Now coat the cake in a thicker layer, making sure there are no gaps.  Wipe up any buttercream that falls on the board/plate with a cloth so you have a clean finish.
  7. Use a fork to draw lines in the buttercream to resemble tree bark.

 Decoration:
  • 85g/3oz white chocolate
  • 15ml/0.5fl.oz whipping cream
  • 25g/1oz dark chocolate
  • 75g/2.5oz milk chocolate
  • Red blossom tint
  • Gold lustre dust
  • Icing sugar for dusting
  • Gold edible pearls
  1. Put the cream and 50g/2oz of the white chocolate in a glass bowl over a a pan of simmering water.
  2. When the chocolate has melted, whisk the ganache together until it is smooth.  Set to one side to cool.  It needs to get a pipeable consistency so if it's still really runny after cooling, put in the fridge to firm up.  This may take an hour or so.
  3. Next, cover a tray with a a sheet of greaseproof paper.
  4. Melt the milk chocolate then put into a piping bag fitted with a small round nozzle and pipe holly leaves onto the prepared tray.  Start by drawing an outline and then fill it in.  Make as many as you want.  It's always good to have spares in case of breakages or for future decorations.  Leave to set.
  5. Melt the dark chocolate then put in a piping bag fitted with a small round nozzle.
  6. Draw branches with the chocolate over the top of the cake (so lines with more lines branching off them).  Leave to set.
  7. Prepare another tray with greaseproof paper.
  8. Once the ganache has firmed up, spoon into a piping bag fitted with a large round nozzle.
  9. Pipe small blobs of ganache onto the tray.  Doesn't matter if you don't get perfect spheres, you can fix that later.
  10. Place the ganache back in the fridge to set.  If you want it to set faster you can put it in the freezer.
  11. Meanwhile, melt the remaining 35g/1oz white chocolate and stir in the red blossom tint.
  12. Once the leaves have set, take the gold lustre dust and brush over the surface of the leaves with a pastry brush.
  13. Place the leaves on the cake, pressing gently into the buttercream so they stay in place.
  14. If the ganache is set, remove from the fridge.  
  15. One at a time, quickly roll a blob of ganache between your hands to make a ball and then drop into the melted white chocolate.
  16. Quickly coat the ball and then remove and place back on the tray.
  17. When all the balls are coated, leave them to set.
  18. Once set, remove from the tray.  If they get stuck, use a knife to slice them away from it.
  19. Place the berries on the cake, matching them up with the base of the leaves.  Dust the berries with the gold lustre dust.
  20. Place the gold pearls around the buttercream.
  21. Finish the cake by dusting it with icing sugar.

Saturday 29 December 2012

Candy Cane Cupcakes


I had been wanting to make some Christmas themed cupcakes for a while, and since I had peppermint extract and willing volunteers, I thought candy cane inspired cakes would be fun.

I probably got a bit carried away with ideas for this one.  Some of which were too big and I didn't manage to pull off, so the end result wasn't quite what I was hoping for.  But they were still very much enjoyed by the fiancé and his friends.

So what have we got?  Well, the cakes are red velvet and white chocolate marble cakes.  These are then topped with peppermint flavoured buttercream, in red and white, and then finished with crushed candy cane sprinkles.  If I had managed too, I wanted to pipe the cake mixture into the cases to get a spiral pattern, rather than marbling, but the two mixtures I used were of slightly different consistency and wouldn't co-operate.  Maybe if I'd used one of the split piping bags instead of trying to fill a single one half and half it might have worked better but oh well.  Live and learn.

I actually tried two different mixtures for the white chocolate part of the cakes but the first recipe was far too runny.  I did save it to cook as a cake on its own but, due to being ill and thus a bit cloudy in the head, I forgot to take it out the oven when the timer went off and it got ruined.  Ooops.  I'll have to try it again at some point in the future though because it sounded yummy. 


Recipe - makes about 12 (and maybe 3 or so spare red velvet cupcakes)


Red Velvet Cake - adapted from Cake Days 
  • 60g/2oz unsalted butter
  • 150g/5oz caster sugar
  • 1 large egg
  • 10g/0.35oz cocoa powder
  • 40ml/1.5fl.oz red food colouring
  • 1/2 tsp vanilla extract
  • 1/2 tsp salt
  • 150g/5oz plain flour
  • 120ml/4.25fl.oz buttermilk
  • 1/2 tbsp white wine vinegar
  • 1/2 tsp bicarbonate of soda
White Chocolate Cake:
  • 60g/2oz butter
  • 60g/2oz caster sugar
  • 1/2 tsp vanilla extract
  • 1 large egg
  • 60g/2oz self raising flour
  • 100g/4oz white chocolate
  1. Preheat the oven to 190°C/375°F/Gas Mark 5 and line a 12 hole muffin case with cases.  
  2. Put the white chocolate in a glass bowl and then place over a pan of gently simmering water to melt.  Don't let the water touch the bowl.
  3. Start making the red batter by creaming the butter and sugar until pale and fluffy.
  4. Add the egg and beat into the mixture well until thoroughly incorporated.
  5. In a small, separate bowl, mix together the vanilla extract, cocoa powder and food colouring to form a paste.  Add the paste to the cake batter and mix until all the batter is red.
  6. In another bowl, sift together the flour and the salt.  Add the flour to the cake batter in two batches, alternating with the buttermilk.  Mix well after each addition.
  7. In yet another bowl, mix together the vinegar and bicarbonate of soda and then add to the batter.  Mix well and then set aside.
  8. If the chocolate has melted, remove from the heat and place to one side.
  9. For the white chocolate cake, start by beating the butter, sugar and vanilla together until creamy.
  10. Add the egg and mix in well.
  11. Pour in the white chocolate and mix in.
  12. Sift in the flour and fold into the mixture.
  13. Fill the muffin cases about two thirds full, half with red batter and half with white.  If you can, try and keep the colours split down the middle.  Otherwise fill with alternating spoonfuls.  You will probably have more red velvet mixture than you need so pour any excess into spare cases.
  14. Use a skewer or toothpick to marble the cake batter.  You want to aim for a swirling, spiral pattern but don't worry if it doesn't co-operate.  Not all of mine would.
  15. Bake in the oven for about 25-30 minutes.  The sponge should be slightly springy to the touch.
  16. Remove and leave to cool before decorating.
Peppermint Buttercream
  • 340g/6oz butter
  • 680g/12oz icing sugar 
  • 2 tsp peppermint extract
  • Red food gel
  • White food gel
  • 7 candy canes
  1. Divide the butter and sugar between two bowls (so 170g/3oz butter and 340g/6oz sugar per bowl) and add 1 tsp peppermint extract to each.
  2. Mix together until you get smooth and creamy buttercream.
  3. Add the red gel to one bowl a little at a time and mix until you get the desired colour.
  4. Do the same with the white gel in the other bowl.
  5. Fit a piping bag with a large star nozzle and then fill it half with red icing and half with white.  You want the colours side by side, not one of top of the other.  It is tricky but doable.
  6. Pipe swirls of buttercream on top of each of your cakes.
  7. Put the candy canes in a bag and partially crush them with a rolling pin.  You want small, sprinkle like pieces but also some big chunks of candy cane.
  8. Sprinkle the smaller pieces over the top of each cake, and then finish with a couple of bigger pieces.

Sunday 23 December 2012

Gingerbread Snowflakes and Orangebread Baubles


Soooo, I'm a bit behind on some updates.  It's been a hectic couple of weeks in the lead up to Christmas, working in a shop and all (though only until the end of the week).  So whilst I have managed to fit baking in to my busy schedule, I haven't had time to do the write-up.  Now I have my first proper day off in ages, I can do just that.  So here is the first.

This is my first Christmas in my flat and the first time I get to have my very own Christmas tree that is just mine that I can decorate with decorations I chose, something I have been looking forward to for a long time.  And I decided I wanted to make gingerbread decorations for my tree, especially since the fiancé likes gingerbread.  I don't like it though, but also wanted something to eat on the tree.  Hence the 'orangebread', which substitutes the spices for orange extract instead.  I also used golden syrup alongside the treacle, so make them slightly lighter, though this was more because I ran out of treacle than anything else.

As for decoration, I did a simple lemon icing for the gingerbread and piped pretty patterns.  Then for the orangebread I cut out fondant and decorated it.

What can I say, they are super yummy.  I only wish they had stayed on the tree.  Unfortunately, I hadn't made the holes for the string big enough, so they closed up when they were cooking.  Hence, I was using very thin thread and a needle to make the hooks.  That didn't end up working so well, which was a shame.  So they ended up back in the biscuit tin, and are pretty much all gone now. Yum yum yum.


Recipe - adapted from A Zombie Ate My Cupcake (altered to make orangebread)
    For gingerbread:
    • 225g/8oz plain flour
    • 1/2 tsp bicarbonate of soda
    • 1/8 tsp salt
    • 60g/2oz unsalted butter
    • 50g/1.75oz granulated sugar
    • 1 small egg
    • 80ml/2.8fl.oz black treacle
    • 3/4 tsp lemon extract
    • 1 tsp ground ginger
    • 3/4 tsp ground cinnamon
    • 1/2 tsp ground nutmeg
    • 100g/3.5oz icing sugar
    • 1 tsp lemon extract
    • Lemon juice
    • Water
    1. Sift together the flour, bicarbonate of soda, spices and salt.
    2. In a large bowl, beat the butter and sugar together until light and fluffy.
    3. Add the egg and the treacle and mix until thoroughly combined.
    4. Add the lemon extract and mix in. 
    5. Gradually add the flour a bit at a time, mixing until fully incorporated before adding more.  You may need to use your hands for the last of it as you end up with quite a thick dough.
    6. Shape into a ball and wrap in clingfilm.  Put in the fridge to rest for about 3 hours.
    7. Preheat the oven to 180°C/350°F/Gas Mark 4 and line 2-3 baking trays with greaseproof paper.
    8. Remove the dough from the fridge and let it sit for about 5 minutes.  Meanwhile lightly flour your work surface and rolling pin.
    9. Roll the dough out to be about 5mm/0.25inches thick and then cut out your decoration shapes.  
    10. Lay on a tray and then use a skewer to make a hole for the ribbon/string in the top of each.
    11. Bake for about 10-20 minutes before removing from the oven and leaving to cool on a wire rack. 
    12. Put the icing sugar in a bowl and add the lemon extract.
    13. Add alternating spoonfuls of lemon juice and water to the icing sugar, mixing after each addition, until you get a fairly firm mixture that is of pipe-able consistency.  If you add too much liquid, just add a bit more icing sugar to firm it up. 
    14. Put icing into a piping bag fitted with a small, round tipped nozzle and pipe patterns onto the cooled biscuits. 
    15. When icing has set, thread string through the hole and knot together. 
     For orangebread: 
    • 225g/8oz plain flour 
    • 1/2 tsp bicarbonate of soda
    • 1/8 tsp salt
    • 60g/2oz unsalted butter
    • 50g/1.75oz granulated sugar
    • 1 small egg
    • 2 tsp orange extract
    • 20ml/0.7fl.oz black treacle
    • 60ml/2fl.oz golden syrup 
    • 1 x 450g pack of pre-rolled fondant icing
    • 30g/1oz icing sugar
    • Water 
    • Red and Green writing icing
    1. Sift together the flour and salt.
    2. In a large bowl, beat the butter and sugar together until light and fluffy.
    3. Add the egg, the treacle and the golden syrup and mix until thoroughly combined.
    4. Add the orange extract and mix in. 
    5. Gradually add the flour a bit at a time, mixing until fully incorporated before adding more.  You may need to use your hands for the last of it as you end up with quite a thick dough.
    6. Shape the dough into a ball and wrap the ball in clingfilm.  Put in the fridge to rest for about 3 hours.
    7. Preheat the oven to 180°C/350°F/Gas Mark 4 and line 2-3 baking trays with greaseproof paper.
    8. Remove the dough from the fridge and let it sit for about 5 minutes.  Meanwhile lightly flour your work surface and rolling pin.
    9. Roll the dough out to be about 5mm/0.25inches thick and then cut out your decoration shapes with a cutter.  
    10. Lay on a tray and then use a skewer to make a hole for the ribbon/string in the top of each.
    11. Bake for about 10-20 minutes before removing from the oven and leaving to cool on a wire rack. 
    12. In a small bowl, add a tsp of water to the icing sugar at a time, until you get a slightly runny paste.
    13. Open out the pre-rolled icing and use the same cookie cutter as you did for the biscuits to cut out shapes.
    14. Put some of the runny icing on the back of the cut out shapes to act as a glue to affix it to the biscuits.
    15. Use the writing icing to draw patterns on top of the cut out icing.
    16. Thread a string through the holes and knot.

    Monday 26 November 2012

    Fireworks Cupcakes


    So this was my other Guy Fawkes' inspired cupcake idea.  Yes, I was supposed to do these last week but was so worn out on the Monday that I could not find the energy for them.  So they've been left to today, ready for the fiancé to take to Dundee tomorrow.

    The idea is quite a simple one.  They are vanilla cupcakes, topped with blue icing, with drawn firework decoration on top, plus some edible silver balls for a bit of sparkle.  The secret is that in the middle of the cakes is some popping candy.  It's also been sprinkled onto the icing too.  So when you bite into the cake, you get a tingling, popping sensation in your mouth!  It is quite fun and amusing.

    They taste rather yummy, if I say so myself, and, as I said, the popping candy adds a nice tingle to everything.  The only thing I'm disappointed with is the decoration.  Mainly the colour of the blue icing.  No matter how much blue I added to it, I couldn't make it dark navy coloured.  Even adding black didn't help (seriously, Morrisons food colouring sucks).  So I got stuck with light blue, meaning the fireworks didn't stand out very well.  Not that they look that good anyway.  Drawing fireworks is hard!  I like some designs more than others.  I dislike the spiral ones and the ones shooting up from an edge look the best.


    Recipe - makes 12

    Note: The 'poppy-ness' of the candy does deteriorate after being in contact with the cakes for a while, so these are best eaten on the day they are made and as fresh as possible. 

    Cakes
    • 170g/6oz butter
    • 170g/6oz caster sugar
    • 3 eggs
    • 1 tsp vanilla extract
    • 170g/6oz self-raising flour
    • 6 x 10g packets popping candy in flavour of choice (I used strawberry)
    Icing
    • 225g/8oz royal icing sugar
    • 20ml/0.7fl.oz water
    • Blue food colouring
    • Edible silver balls
    • Coloured writing icing
    • 1 x 10g packet poppy candy 
    1. Preheat the oven to 180°C/350°F/Gas Mark 4 and line a 12 hole muffin tray with cases (preferably dark blue ones).
    2. In a large bowl, beat the butter and sugar together until smooth and creamy.
    3. Beat the eggs in a separate bowl and then gradually add to the sugar butter, beating after each addition until well incorporated.
    4. Mix in the vanilla extract.
    5. Add the flour and fold into the mixture.
    6. Fill the paper cases and then bake in the oven for 20-25 minutes, until risen, golden and springy to the touch.
    7. Leave to cool in the tin for 5 minutes before transferring to a wire rack to finish cooling.
    8. Pour the 6 packets of popping candy into a small bowl, ready to use.
    9. When the cakes have cooled, use a small knife or an apple core to cut out a hole that reaches about halfway into the cakes.
    10. Fill each hole with about 1/2 teaspoon popping candy and then replace the sponge cores.
    11. Make the icing by mixing the icing sugar, water and blue food colouring together.  You want quite a stiff icing that holds its shape.
    12. Use a spoon to spread the icing on top of each cake.
    13. Use the writing icing to draw firework patterns on top of the blue and then add silver balls for a little sparkle.
    14. Sprinkle the last packet of popping candy over the top of the cakes.
     

    Saturday 17 November 2012

    Blueberry and Cranberry Cinnamon Biscuits


    So today I got up two hours earlier than usual, since the fiancé was off for his introductory CBT lesson today and since I had work later I wanted to spend any time I could with him whilst he was home.  I could have gone back to bed after he left but figured I'd be productive and tidy up the flat.  That was finished by 8:45am.  Thus I needed something else to occupy myself and, after dismissing sitting down and playing on my DS, I thought I should bake.

    I have to say, I do love my Cookie Jar book.  So many great ideas and it only cost be £2.99 at the Works.  Such a bargain!  Anyway, these were something I had picked out for the fiancé because they contained a lot of things he likes.  And since he finished all the gingerbread, I thought I'd make these for him for his sweet fix.

    He loves them!  He's eaten a number of them already.  

    The only complaint I have about the recipe is the cooking time.  When I kept them in for the recommended time, they didn't cook all the way through and they had to go back in the oven, flipped over, to finish them off.  If I just left them in longer than the cooking time, without flipping, they burnt on the base.  Quite frustrating.  I don't know if it is my oven.  Or if I'm not flattening them enough, since the recipe only said to flatten them slightly, even though the image in the book is quite flat and they don't spread out much in the oven.  So I'm going to be suggesting some trial and error in the recipe write-up.


    Recipe - adapted from Cookie Jar
    Makes about 30
    • 225g/8oz butter
    • 140g/5oz caster sugar
    • 1 egg yolk
    • 2 tsp vanilla extract
    • 280g/10oz plain flour
    • 1 tsp ground cinnamon
    • Pinch of salt
    • 55g/2oz dried blueberries
    • 55g/2oz dried cranberries
    1. Preheat the oven to 190°C/375°F/Gas Mark 5 and line 2-3 baking sheets with greaseproof paper.
    2. In a large bowl, mix the butter and sugar until smooth and creamy.
    3. Lightly beat the egg yolk and add to the sugar butter, along with the vanilla extract and mix in.
    4. Sift together the flour, cinnamon and salt and add to the mixture, followed by the blueberries and cranberries.  Stir together until thoroughly combined.
    5. Scoop tablespoons of the mixture up and roll into balls.  Space the balls well apart on the trays.  I got about 12 on mine.  Flatten each ball.
    6. Bake in the oven for 10-15 minutes.
    7. Remove and leave to cool on the tray for 5-10 minutes.  If biscuits still feel soft, they are not cooked all the way through.  In this case, use a palette knife to carefully flip them over on the tray and bake for another 5-10 minutes.  Again, leave to cool on tray for 5-10 minutes before carefully transferring to a wire rack to cool completely.

    Friday 16 November 2012

    Bonfire Parkin Cupcakes


    I've had a couple of Guy Fawkes' Night inspired cupcakes in mind for a couple of weeks.  Admittedly, since November 5th was over a week ago, I'm a bit late on getting them made, but never mind.  There shall be one set for this week and another for next week.

    So this week's cakes are inspired by bonfires.  The cupcakes are made using a recipe for parkin cake, which is apparently a traditional cake for eating on Guy Fawkes'.  I only found that out recently but thought, why not?  They are quite gingery, so would have quite a warm flavour, if that makes sense.  The fire is a two-tone buttercream, with the orange being orange flavoured, and the yellow being lemon.  If I had not been feeling so tired, I was considering making little biscuit 'Guys' to sit on the fire.

    Since I read that parkin tastes better after it has had time mature, I actually made the cakes last Wednesday (so almost a week ago) and them kept them wrapped in a tin until Monday.  Then I added the buttercream. 

    Since having them taste tested, I get the impression parkin is an acquired taste.  The fiancé doesn't know what to make of them, but he clearly doesn't like them that much because he's not keen to eat them.  He also said they taste a bit like liquorice, which I found odd since they're meant to be gingery.  Oh well.


    Recipe:
    Makes about 14

    It is recommended making the cake part a few days before you want to serve them so they can mature.

    Cake - adapted from Cake Decorating Magazine issue 31
    • 175g/6oz plain flour
    • 1 tsp salt
    • 2 tsp ground ginger
    • 1 tsp ground cinnamon
    • 1 tsp grated nutmeg
    • 1 tsp bicarbonate of soda
    • 275g/9.7oz fine oatmeal
    • 175g/6oz black treacle
    • 150g/5.3oz butter 
    • 110g/3.9oz dark brown sugar
    • 150ml/5.3fl.oz milk
    • 1 egg
    1. Preheat the oven to 180°C/350°F/Gas Mark 4 and put 14 muffin cases into muffin tins.
    2. Sift together the flour, ginger, nutmeg, cinnamon, bicarbonate of soda and salt into a large mixing bowl.
    3. Add the oatmeal and mix together with a balloon whisk.  Set aside.
    4. Put the treacle, butter, sugar and milk into a small saucepan.
    5. Place over a very low heat on the stove to melt them together.  Do not allow the mixture to boil. 
    6. Once melted, remove from heat and allow to cool slightly before adding the egg and beating it in with a metal spoon.
    7. Add the mixture to the dry ingredients and beat until well incorporated.
    8. Divide the mixture across the cases, making sure not to overfill them.
    9. Bake for 30-40 minutes until the cakes are dark brown and firm to the touch.  A skewer inserted into the centre should come out clean.
    10. Leave in the tin to cool for about 15 minutes before transferring to a wire rack.
    11. When completely cooled, put in a cake tin lined with greaseproof paper and allow to mature for at least two days.
     Lemon and Orange Buttercream
    • 140g/5oz butter
    • 280g/10oz icing sugar
    • 1 tsp lemon extract
    • 1 tsp orange extract
    • Yellow and orange food colouring
    1. Put the butter and icing sugar into a medium bowl and beat together until smooth and creamy.
    2. Divide the buttercream in half and put one half in a separate bowl.
    3. Add the lemon extract and yellow food colouring to one bowl, and the orange extract and orange food colouring to the other.  Mix.
    4. Fit a piping bag with a large star nozzle and fill with alternating tablespoons of yellow and orange buttercream.
    5. Pipe large swirls on top of each cake to look like flames.

    Sunday 11 November 2012

    White Chocolate Cupcakes


    So yesterday I went to Edinburgh to see my friend Jess, having not seen her for about 6 months.  Having made her biscuits last time, I wanted to bring cakes this time.  Especially as I have cake boxes and ribbon and tags for presenting them in now.  I knew she liked the look of the vanilla fudge cupcakes, so I made 6 of those.  But I also decided to make some white chocolate cupcakes too, for a little variety.  So I found a recipe I thought looked pretty good, except it was for a layer cake rather than cupcakes.  I adapted it.

    I admit, I am reluctant to actually call these white chocolate cupcakes.  I don't think the cakes taste particularly white chocolate like, despite the 85g of it incorporated into the mix.  This may be because of the water that the chocolate was melted in.  Maybe it watered down the taste, I don't know.  However, combined with the buttercream it does taste wonderfully creamy and white chocolatey, according to the fiancé.  The buttercream is my own creation, not the one from the original recipe.  I did make a batch of that one but it tasted horrible.  It didn't taste of white chocolate, it tasted of flour.  Not nice.  So I made my own.  It was much better and tastes sooooo good, even if I say so myself.

    The opinion from my friend?  "Your cupcakes are like edible heaven."


    Recipe: 
    Makes about 10


    Cakes - adapted from Allrecipe.co.uk
    • 155g/5.5oz plain flour
    • 1/2 teaspoon bicarbonate of soda
    • 1/4 teaspoon baking powder
    • 1/4 teaspoon salt
    • 85g/3oz white chocolate, chopped
    • 60ml/2fl.oz hot water
    • 110g/3.8oz butter, softened
    • 150g/5.2oz caster sugar
    • 1 large egg
    • 125ml/4.4fl.oz buttermilk
    • 3/4 tsp vanilla extract
    1. Preheat the oven to 180°C/350°F/Gas Mark 4 and line a 12 hole muffin tin with muffin cases.
    2. In a small bowl, sift together the flour, bicarbonate of soda, baking powder and salt together.
    3. Melt the chocolate and water in a glass bowl placed over a simmering pan of water.  Set aside to cool.
    4. Cream the butter and sugar together in a large bowl until light and fluffy.  
    5. Add the egg and beat well until fully incorporated.
    6. Gradually add the flour and buttermilk alternately to the mixture, stirring after each addition.
    7. Add the cooled chocolate mix and vanilla extract and stir in.
    8. Spoon into the cases.
    9. Bake in the oven for 25-30 minutes until the cakes are risen, slightly springy and a skewer inserted into the centre comes out clean.
    10. Leave to cool on a wire rack.
    White Chocolate Buttercream:
    • 85g/3oz butter
    • 170g/6oz icing sugar
    • 100g/3.5oz white chocolate, plus a bit extra for grating
    • 1 tsp vanilla extract
    1. Melt the chocolate in a glass bowl placed over a pan of simmering water.
    2. Cream together the butter, icing sugar and vanilla extract until smooth and creamy.
    3. Add the melted white chocolate and mix in.
    4. Put into a piping bag fitted with a star nozzle and pipe small swirls in the centre of each cake.
    5. Grate white chocolate over the top of each cake.

    Saturday 3 November 2012

    Poison Caramel Apple Cupcakes


    So here is the final batch of cakes I made for Halloween.  Inspired by a traditional Halloween sweet: caramel apples.  They are an apple and cinnamon sponge, with a caramel centre, a thin layer of caramel on top and then a layer of fondant painted to look like an apple.  I admit, I wasn't sure if anyone would like them, especially as the topping ended up being quite gooey and a bit messy.  But everyone who has eaten one really enjoyed them.  Of the ones I made for the trick-or-treaters, these are the fiancé's favourite.

    The sponge for these cakes came from an American recipe, which was all measured in cups.  I also did my measuring in cups this time around because I was tired and did not want to convert them all. I will convert in the write-up though.


    Recipe - adapted from Group Recipes
    Makes about 15
    • 2-3 Granny Smith apples 
    • 260g/9oz plain flour
    • 100g/3.5oz caster sugar
    • 1 tsp ground ginger
    • 1 tsp ground cinnamon
    • 1/8 tsp ground nutmeg
    • 1 tsp bicarbonate of soda
    • 1/4 tsp salt
    • 2 large eggs
    • 170g/6oz oil (I used rapeseed)
    • 60ml/2fl.oz apple juice
    • 1 tsp vanilla extract
    • 1 x 397g tin Carnation Caramel
    • 200g/7oz ready-to-roll icing
    • Red and green food colouring
    • Icing sugar 
    1. Preheat the oven to 180°C/350°F/Gas Mark 4 and line a 12 hole and a 6 hole cake tin with 15 cupcake cases.
    2. Rinse and core the apples, put on a baking tray and put in the oven to cook until soft.  This takes about 30 minutes.
    3. Remove, allow to cool and then peel off the skin.  Do not turn off the oven.
    4. Put the remains in a bowl and mash them into a pulp with a fork.  Leave to one side to cool.
    5. In a large bowl, combine the flour, sugar, ginger, cinnamon, nutmeg, bicarbonate of soda and salt and mix together.
    6. Break the eggs in a separate bowl and beat.  Add the oil, apple juice, vanilla extract and cooled apple pulp and mix together.
    7. Add the wet ingredients to the dry and mix until everything comes together in a smooth batter.  
    8. Spoon into the cases, trying to spread the mixture evenly.
    9. Bake for about 20 minutes, until risen and a skewer inserted into the centre comes out clean.
    10. Leave on a wire rack to cool.
    11. Once cool, use an apple corer or a knife to make a hole in the centre of the cakes.  Be sure to keep the cores.
    12. Open the tin of caramel and put 3 tablespoonfuls into a small bowl.  Mix until smooth and runny.
    13. Fill the holes with the runny caramel and then remove the top of each core and use them to plug up the cakes.
    14. Using a knife or small spoon, spread a thin layer of caramel from the tin (where it won't be runny) over the top of each cake.
    15. Reserve a small part of the fondant icing for making leaves and stems.  Use the red food colouring to colour the rest of the fondant red.  The addition of colour will make it sticky so knead it in icing sugar to stop this from occurring.
    16. Break off some fondant and roll in out into a square that is bigger than one the cakes.
    17. Drape the fondant over the top and smooth down to the edge of the cake.
    18. Press your finger along the edge of the case to cut through the fondant for a smooth finish.  Gently make an indent in the centre of the fondant with your finger to give the illusion of the top of an apple.
    19. Using a clean paintbrush dipped in green food colouring, paint strips of colour from the centre of the cake to the edge.  Try to make your brush strokes as quick as possible to get the right texture.
    20. Use another paintbrush to do the same with the red food colouring.
    21. Colour the remaining food colouring with green food colouring (add a touch of red if you want a brown colour).  
    22. Break off small pieces and shape into stalks and gently push them into the indent in the middle of the cakes.
    23. Shape the rest into leaves, scrunching them slightly to make them look like they are dying.  Set atop the cakes, with one pointed end next to the stem.
    24. Leave the fondant to dry before putting them in a tin.

    Thursday 1 November 2012

    Marshmalloween Ghost Cupcakes


    These are my favourite cakes out of the ones I made for Halloween, both in terms of taste and looks.  They just came out so cute!  And vanilla, marshmallow and fondant is a wonderfully sweet combination.  I kept most of these for myself, rather than taking them to work.  I took four into my work and gave none to the fiancé.

    So these ones are a vanilla cake, with a marshmallow centre.  They were then topped with a marshmallow and covered in a layer of ready-to-roll fondant to look like little ghosts.  I was quite proud of them, since I was pretty much making it up as I went along.  I even made vanilla buttercream to use for sticking the fondant on but then had so much melted marshmallow left over that I ended up using that instead, and really, I think that was the better option.  I had a much easier time putting the marshmallow in this time around.  I don't know if it was because I used bigger marshmallows or a bigger pan and bowl for melting.  Whatever I did, it made my life easier.

    In the recipe write up, I'm going to do something I've not done before, which is post pictures of some of the decorating process, since I took some photos as I was doing it.  Admittedly not the best photos because the light wasn't that great but hopefully still helpful.


    Recipe - makes 18
    • 150g/5oz butter
    • 150g/5oz caster sugar
    • 1 tsp vanilla extract
    • 3 eggs
    • 175g/6oz self-raising flour
    • 200g/7oz bag of large marshmallows
    • 300g/10.5oz ready-to-roll fondant icing
    • Chocolate flavoured writing icing
    1. Preheat the oven to 180°C/350°F/Gas Mark 4 and line a 12 hole cake tin and a 6 hole cake tin with cases.
    2. Cream the butter and sugar together in a large bowl until pale and fluffy.
    3. Add the vanilla extract and beat in.
    4. Add the eggs one at a time, and beat until fully incorporated after each addition.
    5. Sift in the flour and fold into the mixture.
    6. Spoon into the cases, trying to distribute the mixture equally.
    7. Bake for about 20 minutes.  The cakes should be risen and golden, and a skewer inserted into the centre should come out clean.
    8. Leave to cool on a cooling rack.

    1. Melt the marshmallow while you wait.  Count out 9 large marshmallows and put to one side.  Put the rest into a large glass bowl set above a pan of simmering water.  Don't let the bowl touch the water.  You will want to keep the bowl warm after all the marshmallow has melted because if it is allowed to cool too much, it becomes hard to work with.
    2. When the cakes have cooled, use an apple corer or a knife to carve a hole in the centre of a cake.  Do not get rid of the cake 'core' you removed.
    3. Fill the hole with melted marshmallow.
    4. Cut the top off the 'core' and put this top back into the top of the cake to cover the marshmallow. 
    5. Cut the remaining marshmallows in half, dab the base in melted marshmallow and use it to stick them to the centre of the top if the cakes.
    6. Drizzle the remaining melted marshmallow around the edges of the cake.
    7. Knead the fondant until pliable and then roll out small amounts into thin squares that are bigger than the cakes.
    8. Drape the fondant over the marshmallow and gently push down to cover the cake.
    9. Press your finger around the fondant against the edge of the cake case and it should cut through the icing, giving you a smooth finish.
    10. Use the writing icing to pipe faces on the wider side of the ghosts.