Wednesday 29 January 2014

Chocolate Truffles


The last couple of weeks have been rather stressful, dear readers, and a 4000 word essay is to blame.  Essays are not something I like doing.  I did not take an essay subject for my undergraduate course for a reason.  Sure, we wrote reports but it's not quite the same thing.  This one ended up being particularly awful and culminated with me being up until 2:30am the night before it was due, resulting in only 4 hours sleep.  That has never happened to me before with any piece of assigned work.  I have always finished at a reasonable hour, sometimes even a day or two ahead of the deadline, and been able to get plenty of sleep.  It was dreadful.  But it's been handed in now so I can put it out of my mind for a couple of weeks whilst it is being marked.  Anyway, said essay-that-is-not-on-my-mind is responsible for a serious delay in getting this post together.  I actually made these the day after the brownie post went out which was...three weeks ago.  Oh dear.  We're here now though so better late than never? 

Okay, so you might be looking at these and thinking, 'those don't look like truffles, they're the wrong shape'.  Well yes, you would be right.  Truffles get their name from their round shape and these are not round; they're square-ish.  That's because this recipe was actually supposed to be fudge.  You know me and fudge.  I love the stuff but still haven't quite mastered the art of making it.  I was attracted to this one because it looked nice and simple to make, which is one of my favourite qualities in a recipe.  And to be fair, it was simple.  Problem was, I did not end up with fudge.  


Admittedly, that's probably my own fault.  It's possible I did not cook it long enough.  And I wasn't sure how I would know when the condensed milk was almost boiling.  I went with waiting until bubbles were forming around the edges.  That's what I do when I cook milk for making custard anyway.  It may also be because some of the amounts are off.  For instance, a can of condensed milk over here ways 397g/14oz.  Apparently in America, it's 12oz cans, which I did not realise until after I had made it.  Oh well.  The rest of the recipe was easy enough.  Tangentially though, I do feel the need to complain about another encounter with the bizarre measurements they have in the US.  'Squares'?  Really?  When I first read the phrase I thought it meant individual cubes of chocolate, since bars come in rows of cubes.  But nope.  Apparently one square is equal to one ounce.  You learn something new every day.

Anyway, I came to the conclusion that this was not fudge after I cut it up and ate some.  It was too sticky for a start, which is why I rolled it in icing sugar, so the squares would not stick together in the container.  Then when I bit into it, it was too soft rather than slightly firm like fudge should be.  However, it wasn't until much later that it occurred to me that the texture resembled that of a truffle.  The mixture involved is essentially a ganache after all.  So hence the change in name.  If you make this using my recipe, you're going to have soft, truffley things.  If you follow the original better than I did, you'll get fudge.

Not to say that these aren't yummy, because they are.  Very rich and creamy.  I personally cannot eat more than one in a sitting though, but that's just me.  


Recipe - adapted from Little House Living
Makes 36 pieces
  • 125ml/4.5fl.oz double cream
  • 1 x 397g/14oz can condensed milk (sweetened if you're American)
  • 1 tsp vanilla extract
  • 450g/16oz milk chocolate chips
  • 115g/4oz milk chocolate
  • 2 tbsp icing sugar, for dusting
  1. Grease and line a 20cm/8inch square pan with greaseproof paper. Leave a slight overhang so you can get the fudge out easier after it has set.
  2. Put the cream and condensed milk into a pan and cook over a medium heat.  Stir continuously and do not allow to boil.
  3. Once bubbles have started forming around the edge of the pan remove from the heat and add the chocolate chips, chocolate and vanilla extract.  Stir.
  4. Return the pan to the heat, and cook gently, whisking the mixture until all the chocolate has melted and the mixture is smooth and creamy.
  5. Pour the mixture into the prepared pan and then chill in the fridge overnight.
  6. Once it has set and is quite firm to the touch, take it out of the fridge, remove it from the tin, peel off the greaseproof paper and use a sharp knife to cut it into 36 pieces (6 cuts down and 6 along).
  7. Sift the icing sugar into a bowl and toss the truffle cubes in it to lightly coat all sides.

Thursday 9 January 2014

Chocolate and Marshmallow Brownies


So it's a brand new year and thus begins a brand new set of dessert challenges over at Lady Behind the Curtain.  There are certainly some interesting ones coming up, that's for sure (bacon and maple?!).  Anyway, this month starts us off with something fairly simple: chocolate pudding (or cocoa) and marshmallows.  Admittedly, I was not entirely sure what it meant by 'chocolate pudding' so I opted for the cocoa option.

I decided I to kill two birds with one stone with this bake.  Not only would it be my challenge bake but it would also be the bake that I would give to my friend Jess when I saw her on Saturday.  I know Jess likes brownies so that seemed like an ideal choice for both categories.  What did we do Saturday?  Well, we went to see The Lion King in Edinburgh!  It was so cool!  All the costumes and singing.  I was grinning like an idiot throughout the whole thing.  Jess also brought along the other part of my Christmas present which was a handmade doll of one of my characters.  It's amazing!  It has bendy hands and removable clothes and is just wonderful!  So I felt extra guilty as I did a very stupid thing and forgot to bring the brownies with me!  They were made and bagged up and everything.  I just didn't take them out of the fridge and put them in my bag in the morning.  I only realised when I was sitting in Kirkcaldy station waiting for the train.  Very stupid of me indeed!  So I posted them to her first thing Monday morning and she got to enjoy them Tuesday instead.  Better late than never I suppose.


The idea for these was sparked by the idea of hot-chocolate, since cocoa and marshmallows invokes that image.  So I could make chocolate brownies and have marshmallows on top.  But when I think hot-chocolate, I also think cream.  The classic image comes with a lovely swirl of cream on top of the drink upon which the marshmallows sit.  But I didn't want to put cream on the brownies but there should be something to represent it.  That's when I stumbled across Love and Olive Oil's Peppermint Bark Brownies (thank you Pinterest), with their layer of white chocolate on top.  That would be perfect!  Plus the brownie recipe itself looked to be a good one to work with, with a little tweaking so it wasn't peppermint of course.

Now, someone out there may remember that I am not a brownie aficionado.  I do not like them and hence have not really baked them.  I did make one attempt at blondies last year but ended up with something more akin to cakes due to making a mistake with my choice of flour.  This meant I was a little apprehensive going in to this bake, and throughout as I had no idea what each stage should look like.  However, there didn't seem to be any disasters and when the brownies came out and were cut up I thought they looked right (very compacted and moist looking).  

Turns out they taste really good too.  The fiancé says I always bake well with chocolate and that all the parts melded together well.  And I got very excitable texts from Jess saying how yummy they are and that she had already eaten a number of them.


Recipe - adapted from Love and Olive Oil
Makes 18
Brownies:
  • 115g/4oz milk chocolate
  • 115g/4oz dark chocolate
  • 115g/4oz butter
  • 85g/3oz plain flour
  • 2 tbsp cocoa powder
  • 1/2 tsp salt
  • 125g/4.5oz caster sugar
  • 2 eggs
  • 1 tsp vanilla extract 
Topping:
  • 170g/6oz white chocolate
  • 1.5 tbsp vegetable margarine / vegetable shortening (I used Stork)
  • 150g/5oz small marshmallows
  1. Preheat the oven to 180°C/350°F/Gas Mark 4 and grease and line a 20cm/8inch square cake tin with baking parchment, making sure to leave a slight overhang so you can lift it out later.
  2. Break up the chocolate and cut the butter into cubes.
  3. Place a medium sized glass bowl over a pan of gently simmering water (without letting the bowl touch the water) and melt the chocolate and butter together, stirring occasionally.
  4. Meanwhile, sift together the flour, cocoa powder and salt into a small bowl and put to one side.
  5. When the chocolate and butter are completely melted, whisk them until smooth and remove from the heat
  6. Whisk the sugar into the chocolate mix until it has dissolved and the mixture has cooled slightly.
  7. Add the eggs and vanilla extract and whisk until just combined.
  8. Add the flour mix and gently fold in using a rubber spatula until incorporated.
  9. Pour the batter into the prepared tin.
  10. Bake for 25-30 minutes or until a skewer inserted into the centre comes out clean.
  11. Transfer the pan to a wire rack and allow to cool completely.
  12. Melt the white chocolate and margarine/shortening together in a glass bowl placed over a pan of gently simmering water.  Be careful not to overheat it so stir once in a while to keep the temperature down.
  13. Remove from the heat before completely melted and stir until it finishes melting.
  14. Spread over the top of the cooled brownies in a thin, even layer.
  15. Decorate with marshmallows.
  16. Chill in the fridge overnight.
  17. Remove the brownies from the pan and use a large knife to cut them into 9 squares.  Cut each of these squares in half diagonally so that you end up with 18 triangles.

Wednesday 8 January 2014

Chocolate Chip and Chunk Cookies


I was desiring cookies last week.  Chocolate filled cookies.  Lots of chocolate but without being an entirely chocolate cookie because I don't like those very much.  I could have made one of my other chocolate chips cookie recipes (I do have three others on here already) but where's the fun in that?  And it never hurts to have yet another recipe for such things.  They are all somewhat different so I can pick and choose based on what I'm in the mood for and how much waiting I can stand to do.

I wanted to try this recipe after seeing the photos.  Seriously, the photos from the original post are so gorgeous and the cookies look so inviting.  The oozy chocolate makes your mouth water.  Maybe they were shot straight from the oven, though after the required cooling period of course?  They are delicious right after said period, by the way.  Extra soft too.

So yes, this is a soft cookie recipe.  Very soft.  But oh so good, especially considering there was 340g/12oz of chocolate spread between 18 cookies in the form of chips and chunks.  Good quality chocolate too as I used Cadbury's Dairy Milk for my chunks.  I honestly recommend you choose your favourite chocolate for these cookies, which is why I did not specify a type in the recipe write up.  They are a fabulous cookie.  Both the fiancé and I have been enjoying them immensely.


Recipe - adapted from Averie Cooks
Makes about 18

  • 170g/6oz butter
  • 115g/4oz light brown sugar
  • 40g/1.5oz caster sugar
  • 1 egg
  • 2 tsp vanilla extract
  • 225g/8oz plain flour
  • 2 tsp cornflour
  • 1 tsp bicarbonate of soda
  • 1/2 tsp salt
  • 170g/6oz chocolate chips
  • 170g/6oz chocolate
  1. Beat the butter in a large bowl until it is smooth.
  2. Add the brown sugar and caster sugar to the butter and beat until creamy and pale.
  3. Mix in the egg and the vanilla extract.
  4. Add the flour, salt, cornflour and bicarbonate of soda to the mix and stir together until just incorporated.
  5. Cut the chocolate into bite size chunks and add it and the chocolate chips to the dough.  Fold in.
  6. Scoop out 60g/2oz amounts of dough and place on a plate or two.
  7. Cover the plate with clingfilm and chill in the fridge for at least 2 hours (mine were chilling for about 4).
  8. Preheat the oven to 180°C/350°F/Gas Mark 4 and line 2-3 baking trays with greaseproof paper.
  9. Transfer the scoops of dough to the trays, spacing them about 5cm/2inches apart.  (I got 4 on a tray but I have small trays for a small oven).
  10. Bake until the edges of the cookies are just starting to turn gold.  This will range from 8-15 minutes.  (The original recipe said 8-10 minutes but mine took longer).  The centres will still be very soft and will be pale.
  11. Allow to sit on the tray for 5 minutes after removing from the oven before transferring to a wire rack to finish cooling.

Wednesday 1 January 2014

A 2013 Baking Retrospective

Happy New Year everybody!  It feels like it has come around rather fast and 2014 is promising to be a big year, at least for me.  I get married in July this year (and there is still so much to organise); I shall finish my post-grad in June and graduate as a probationary level primary school teacher; and as a result, I should get my first job as a primary school teacher with my own classroom and everything.  Scary!  But, of course, I also cannot forget that my blog will turn 2 years old at the end of March!  I have to admit I am surprised that I have lasted this long but I do love doing it and want to continue doing it.  So before I embark on what I hope will be another good year for baking I thought it would be nice to look back over how 2013 was on Becca's Baking Blog!

2013 Post Round-Up

So I did not quite make the same number of posts this year as I did back in 2012 but, honestly, I was nowhere near as busy in that year.  Sure, I had a part-time job but it doesn't eat up as much time as a post-grad course and teaching placements do.  However, I still managed to bake 66 new recipes, among which were 15 cookie/biscuit recipes, 24 cupcake recipes,  7 large cake recipes and 3 ice cream recipes.

The Most Popular Recipes of 2013


In third place is the After Eight (Chocolate and Peppermint) Cupcakes.  These were a fun experiment which worked out REALLY well.  They were really popular with my guinea pigs at the time and I was asked to remake them for one of the guinea pigs to give as a going away present to her colleagues when she left work (along with the Ferrero Rocher Cupcakes).


In second place is the Pumpkin Sandwich Cakes with Cinnamon Cream Cheese Filling.  This was a surprise success.  I had never baked using either pumpkin or cream cheese but thanks to the Lady Behind the Curtain Dessert Challenge (which is thankfully continuing this year) I was prompted to do just that and everyone loved them.  I was also particularly pleased with how they turned out, especially in terms of their appearance.  

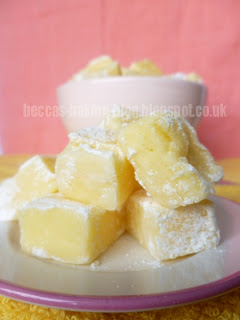
But the most popular of my 2013 recipes was for Lemon Fudge.  I admit, I wasn't expecting this but at the same time, I am not surprised.  This stuff is heavenly and really quite easy to make, providing you don't let it get too hot because then it goes weird.  It was nice to have a fudge recipe that did not rely on melting sugar to a certain temperature.  It was also nice that it did not take me 3 days to clean the saucepan afterwards too!  I should make this again soon.  I believe I do have lemon pudding mix in the cupboard...

My Favourite Ideas of 2013

I feel I really got to stretch my creative wings this year.  The blog challenge let me experiment with some new ingredients and combinations but I also got to try out some things of my own, particularly trying to make cakes based on other things.  Some of my more successful ideas were:


The Ferror Rocher cupcakes and birthday cake - the cupcakes were actually not my idea but a challenge set by my guinea pigs at the time, after the After Eight cakes had been so successful.  Now, I know it's also not an original idea but I wanted to create a version that did not just have a Ferrero Rocher in the centre.  Oh no, I was going to construct the cake as if it was a Ferrero Rocher, with all the different layers.  Despite the biscuit shell not working out quite as intended, the cupcakes went over really well and have been declared a favourite of some.  So when I was asked to make a birthday cake version I was determined to do it well.  Unfortunately, the initial attempt to make a spherical version collapsed.  However, the more generic shape held and worked really well and was scoffed.


Creme Egg Cupcakes - I do believe this was my first foray into making something based on something else.  I had seen creme egg cupcakes about but not quite like mine.  I was determined to make it as close to the actual sweet as I could, making use of Cadbury chocolate for all the chocolate elements and making sure there is only the fondant on the inside was coloured like an egg yolk.  It's just a shame I didn't have the right colour cases to go with them.


Milk and Cookies Cupcakes - Okay, again, not a completely original idea.  Milk and cookies (or cookies and cream) have been done before but I picked all my component pieces myself.  I was particularly pleased with the idea of using a Tres Leches cupcake recipe for the milk part, and then cookie dough buttercream (and a cookie) for the cookie part.

My Favourite Recipe of 2013


The Chocolate Topped Orange Shortbread was my absolute favourite recipe I baked in 2013 and the one I have remade the most over the year.  It has become my go-to biscuit bake for gifts because not only are they pretty simple to make, they are so scrummy!  It is also my go-to biscuit when want something sweet to eat and have nothing else about.

Some 2013 Failures

Now, I can't say that everything I made this year came out perfectly.  Or even near perfect.  There were some complete disasters but obviously they never made it onto the blog.  However, I will list them here as there are certainly some I would like to get right some day:
  • Pumpkin Fudge - back when doing the Pumpkin and Cream Cheese challenge, this was my first idea.  I thought it would be cool.  Alas, I could not make it, even after three attempts.  The first batch burnt, the second turned to some bizarre, crumbly powder and the last just, whilst better, had completely the wrong texture.  Plus I ended up with pans that were really hard to clean.
  • Baked Doughnuts - now, I have failed at these before, back in 2012, which I did blog about.  At the time I was all about trying to recognise my mistakes and learn from them, in public, but my ego and perfectionism has stopped me from doing it any more, except for talking about it when I do finally perfect it or if it pertains to the development of a different/better recipe, like the fudge above leading to the pumpkin cakes.  Anyway, back on topic, I did try these again, with...two different recipes I believe.  They didn't work out for me.  They just came out like bread rolls again.  Of course, I've never actually had a baked doughnut so I do not know if this is actually how they taste.  But I don't like it.  It's weird!  Admittedly, the fiancé enjoyed them, especially the ones that got coated in cinnamon.  I love doughnuts, so I do want to be able to make them myself one day, baked or fried.
  • Chocolate and Raspberry Tart - oh so many things went wrong with this.  I thought I started well: the chocolate pastry came together great.  It just went downhill from there.  I think in part I suffered from not having a proper pie tin and particularly one that has a loose bottom for making it easier to remove.  The pastry adhered itself to the dish I was using and there's no way I was getting it out in one piece.  Not that it mattered because the other problem I had was the ganache.  Curse you ganache, you are my nemesis!  The wretched thing split on me and I could not repair it.  I was so disappointed, as I had intended it to be a good-bye treat for the teachers are Markinch Primary School as I was finishing up as a classroom assistant.
  • Chocolate and Marshmallow Stuffed Cookies - I was having a marshmallow-y week back in February, as I said when I made the S'mores Cupcakes.  I had seen the idea for these on Pinterest, in giant form, and wanted to see if I could make a smaller version because it sounded so yummy.  Unfortunately, the dough recipe I chose to use spread far too much when baking so they did not work out as intended.  I am still determined to get these right because I am certain they will be delicious!  Maybe this year they will be better?
Firsts for 2013

This year was a good year for firsts!  I am determined to expand my baking repertoire (I need to if I want to apply to the Great British Bake Off one day) and, as every blogger does, I really want to increase the traffic to my blog.  I took steps towards both this year so here are some of them:


First puff pastry - this is the biggest thing for me.  Pastry is a weakness of mine because I have no cause to make it.  I do not like pastry.  Except raw pastry.  I always used to eat the leftover raw pastry when my Mum made chicken pie.  But if I want to be a good baker then I need to make the stuff, and from scratch too!  So many rounds on the GBBO involve working with pastry... So this year I took the opportunity to try making puff pastry, which is apparently quite difficult, and admittedly it is, with all that butter trying to escape.  It is also very time consuming.  But I did it and it turned out rather well for a first (technically second) attempt and I produced some great apple and cinnamon turnovers.  Just a shame I burnt the second batch.


First time making bagels - ever since I saw it on the GBBO I had been a bit dubious of trying to make them myself because of the poaching involved.  I'd never poached anything in my life and the process scared me: especially since timing was so crucial.  However, it turns out it wasn't so bad after all and I ended up with some pretty good looking bagels!  I need to try and make myself some regular ones at some point.


First Blog Party Challenge - which has led to me getting to try out lots of new flavour combinations (peaches and cream; pumpkin and cream cheese; pear and maple) and increased my traffic somewhat.  But the thing I have liked the most about this is how much fun it is!  You may have noticed that even though my activity dropped significantly thanks to university studies, I still made time for this challenge.  I enjoy it so much and intend to keep taking part in it in the coming year.

This year was also my first time sending biscuits in the post, back in Easter when I decided to try and send something to my family.  It worked out well and since then I've sent a few more biscuit parcels to people as gifts, including more orange shortbread to my Dad because he loves them.

What I Want to Do In 2014

And to round out this post I figure I should post some goals for the upcoming year.  Here's hoping it's a good one!
  • Conquer ganache!  I want to be able to make this flawlessly every time and not have it split on me!
  • Try (successfully) making another sort of pastry, possibly sweet crust or ruff puff.  Possibly extend this and try and make a pie!
  • Make more fudge without so many failures and so many temporarily ruined pans.  Hopefully investing in that cast iron one will have been worth it.
  • Take part in all the Dessert Challenges for the year.  There are a lot of interesting combinations coming up so it should be fun!
  • Take part in the Great Food Blogger Cookie Swap
  • Save up for a DSLR camera because as much as I do like my point and shoot camera, it doesn't always produce the best pictures.
And possibly the most important one of all:
Make my wedding cake!