Showing posts with label nutmeg. Show all posts

Thursday, 31 December 2015

Mini Caramel Apple Pies


I don't own a car.  I do have a license but have never been particularly fond of driving.  Being the anxious person that I am I am constantly worried that something will go wrong.  I also suck at multi-tasking so trying to drive panics me because I start to get confused.  The Hubby, on the other hand, is in the process of obtaining his license.  He is a good driver but hasn't managed to pass his test yet.  We've also never really needed a car.  It's an expense we can do without and it's easy for us to get about most places.  Of course, there are the odd times when a car would be useful, such as getting to and from work, going on trips to Ikea or for doing the weekly food shop.  It's not possible for us to carry our weekly food supplies back from the supermarket.  There is just a bit too much for the distance we have to travel (about a half hour walk).  But luckily we live in the modern age where you can get your food delivered right to your door.  

Why am I telling you this?  Well, when you shop online, you have to pick what you want and specify a quantity.  We have our favourites list which makes buying our regular groceries nice and simple.  However, we occasionally crave something different and therefore have to track it down with the search engine.  Last week, the Hubby put through the order for the shop.  I only went in to reschedule the delivery since we ended up going out on the Sunday to see The Force Awakens (which was really god, by the way).  His craving this week was for apples.  We get apples every week, but they're for me and they're red.  He doesn't really like red.  He prefers the tarter, green kind.  So he ordered 5.  5 bags that is.  Neither of us was aware until the shopping was delivered and we received a carrier bag of 5 bags of Granny Smiths - around 25 apples.  Well, I just found it funny to be honest.  The Hubby was confused and embarrassed.  I said it was fine because now we knew what I would be baking with next!


So that's how we ended up here.  I had a lot of apples and needed to make something with them.  I decided I wanted to do something with pastry because it's one of those areas I'm still a bit lacking in.  Besides, apples in pastry are quite a classic and much loved dessert.  After perusing ideas on Pinterest, I settled on making mini apple pies, with the added decadence of caramel.  If I'd had any rock or sea salt kicking about I might have turned that into salted caramel but alas, not this time.  Maybe in the future.

I ended up making a couple of tweaks due to not having everything I needed.  Namely, I used just butter, rather than butter and shortening.  I had shortening in the fridge but it was past the use by date and I couldn't decide if it had gone rancid or not since I didn't know what that would look or smell like.  I decided not to risk it in the end.  I also used orange juice concentrate in place of lemon juice because I had used up all my lemons.  The change of juice didn't seem to affect things.  As for the pastry, I knew not using the shortening would change the texture somewhat and it wouldn't be as flaky but what you get with just butter is yummy anyway.

The tedious part of this was coring, peeling and chopping all the apples.  I think I used...about 7 apples.  That and making the lattice tops.  Otherwise this was a reasonably nice recipe to do.  Other than initially forgetting to give the pies an egg wash...  I took my pies to the regular Wednesday night tea with the in-laws (along with some home-made bread, but that's for another day).  They were a big hit (and go well with ice cream) and I ended up leaving most of them there.  The Hubby said to take 1 back for him and is now regretting that because he's eaten it and doesn't have any more!

There are still two bags of apples sitting in the kitchen but that's a more reasonable amount for the Hubby to munch his way through.  Anyway, that wraps up the last post of 2015.  I'm aiming to get back into baking more regularly next year as I only work part-time just now.  I acquired some new cook books I am looking forward to trying out!  So Happy Hogmanay everyone!  See you in 2016!   


Recipe - adapted from Mama's Gotta Bake
Makes about 9 muffin-sized pies

Pastry:
  •  340g/12oz plain flour
  • 1 tsp salt
  • 2 tsp caster sugar
  • 200g/7oz butter (or 115g/4oz butter plus 85g/3oz vegetable shortening)
  • 5-6 tbsp ice water
Filling: 
  • 850g/1lb14oz tart apples (like Granny Smith)
  • 70g/2.5oz brown sugar
  • 1/2 tsp ground cinnamon
  • 60g/2oz caster sugar, plus extra for sprinkling
  • 1/4 tsp salt
  • 1/8 tsp ground nutmeg
  • 2.5 tsp cornflour
  • 1 tsp orange juice 
  • 9 tbsp Carnation caramel
  • 1 beaten egg + 1 tbsp water
  1. Start by making the pastry.  Mix the flour, salt and sugar together in a large bowl.
  2. Add the butter (or butter and shortening) quickly and rub into the flour until you have a mixture that resembles breadcrumbs.
  3. Add 2-3 tbsp of the water at a time and mix together with a fork to get a smooth dough.  
  4. Tip dough out onto a floured surface and give it a quick knead before shaping it into a ball.
  5. Wrap in clingfilm and chill in the fridge for at least 2 hours.
  6. Meanwhile, make the filling.  Peel and core the apples and cut into pieces about 0.5cm/0.25inch thick.  They need to be able to fit inside the cups of the muffin trays.
  7. Put the chopped apples in a large saucepan with the sugars, cinnamon, nutmeg, cornflour and salt and mix together.  
  8. Put the lid on the saucepan and cook the apples over a medium heat, stirring occasionally, for about 18 minutes.  By this point the apples should be nice and tender.
  9. Remove the lid and cook for another 5 minutes until the liquid has thickened.  Then remove from the heat and stir in the orange juice.  Allow to cool to room temperature.
  10. Preheat the oven to 220C/425F/Gas Mark 7 and grease a 12 cavity muffin tin (I used silicone as it made getting the pies out much easier).
  11. Roll out the dough on a floured surface to a thickness of 0.5cm/0.25inches.  Cut out circles of dough that are slightly bigger than the cavities in the muffin tins (I used a ramekin as a template) and gently fit them inside.  Make sure you have about  1/3 of the dough leftover for the tops.
  12. Fill each pie base with a generous helping of the apple filling (it shrinks as it cooks) and top with a tablespoon of caramel.
  13. Roll out some of the remaining dough so it is wide enough to make two pie tops and cut into strips.  Lay out three strips horizontally on the floured surface then cut three more strips in half.  Weave the cut strips with the uncut strips then cut out circles that are just the same size as the muffin cavities.
  14. Fit the woven tops over the top of the pies.  Repeat until you have made enough lattice tops for each pie.
  15. Press the edges of the tops down against the base with a fork then use a pastry brush to coat the tops with the beaten egg.  Sprinkle with sugar.
  16. Bake for about 20-25 minutes, until the tops are golden and the mixture inside is bubbling.
  17. Allow to rest in the tins for 5-10 minutes and then carefully remove (use a knife to run around the edges of the pies and use a spoon or fish slice to scoop pie out) and transfer to a wire rack to finish cooling.

Thursday, 14 November 2013

Pear, Raisin and Maple Squares


It's Lady Behind the Curtain Dessert Challenge time again and this month's ingredients were pears and maple.  How exciting, more ingredients I have never used before, let alone in combination!

Now, I am wondering if I am developing a habit when it comes to these challenges.  Just like last time, I ended up making two different things: one that I was not happy with and therefore does not get to grace the blog and then a second which is absolutely adored by everyone who gets to eat it.  It is madness.  Hopefully, this will not become a regular thing.  It can be a bit exhausting, as well as disappointing for a perfectionist like me.

Admittedly, this month's failure was still edible and did taste good according to my guinea pigs.  The problem was the textures didn't gel.  With both recipes, I was substituting a lot of ingredients.  So the original recipe I had found the recipe was for apple cookies.  Now, as you know by now, being British, when I hear the word 'cookie' I think crunchy, not soft.  So I was expecting a crunchy, crumbly biscuit filled with pear and drizzled in a maple syrup glaze.  What I ended up with was soft cakes with chunks of hard pear in and drizzled with the glaze.  It did not work and I was annoyed.  Even though they got eaten and were enjoyed, the texture thing was something everyone agreed on so it was out.  It wasn't getting used and I needed to come up with something else instead.


Now, the magazine I was using for the ghost cookies was still sitting out during this dilemma.  So I decided to flick through it idly and brood.  Along the way I stumbled across a recipe for apple, raisin and honey squares.  It did not look too complicated and there were oats involved so it was more likely to yield the crumbly, crunchy texture I was after.  Dare I try and mess with the recipe?  Yes I dared!  I like that I am getting confident enough to do such things.  So out went the apple and honey, in went the pears and maple syrup.  I also decided to spice up with crust on the squares with some spices that compliment both of the challenge ingredients: ginger, cardamom and a little nutmeg.

The result?  Fantastic!  They came out so well and everyone loved them.  That was more like it.  And I even got a lovely written review from one of the lovely teachers are Markinch Primary which arrived inside the tin I had sent them in:

"Your latest creation was FAB!  I'm not a fan of ginger but loved it in these cakes.  The buttery outside was really moreish - consistency was soft, moist and crumbly - lovely!  The pear and fruit was gorgeous.  I ate up all the crumbs in the tin. 10/10 Thank you."

Isn't that just so lovely?  Plus it tells you everything you need to know about how they taste, which is better than me just telling you. 


Recipe - inspired by Rachel Allen and the Kerrygold Community Recipe e-book via Baking Heaven Summer 2012
Makes about 25
  • 225g/8oz self-raising flour
  • 225g/8oz porridge oats
  • 1 tsp bicarbonate of soda
  • 1.5 tsp ginger
  • 1/2 tsp nutmeg
  • 1/2 tsp cardamom
  • 225g/8oz butter
  • 225g/8oz caster sugar
  • 90ml/3fl.oz maple syrup
  • 2 dessert pears (about 185g/6.5oz)
  • 115g/4oz raisins
  1. Preheat the oven to 180°C/350°F/Gas Mark 4 and grease and line a 23cm/9inch square cake tin with greaseproof paper.
  2. Peel, core and finely chop up the pears.
  3. In a large bowl, mix together the flour, porridge oats, bicarbonate of soda, ginger, nutmeg and cardamom.
  4. Put the butter, caster sugar and 2 tablespoons worth of the maple syrup  into a saucepan and melt over a medium heat, stirring occasionally to prevent it from getting too hot.
  5. Remove the saucepan from the heat and pour the mixture into the dry ingredients and mix to combine.
  6. Spoon half the mixture into the prepared tin and level the surface.
  7. Mix together the pears, raisins and remaining maple syrup and then distribute evenly over the oat mixture in the tin.
  8. Cover with the remaining oat mixture and smooth over.
  9. Bake for 30-35 minutes until the top is golden.
  10. Remove from the oven and allow to rest in the tin for 10-15 minutes.
  11. Remove from the tin and cut into 25 squares before placing them on a wire rack to finish cooling.

    Thursday, 10 October 2013

    Pumpkin Sandwich Cakes with Cinnamon Cream Cheese Filling


    It's the second Thursday of the month so it's time for the Lady Behind the Curtain Dessert Challenge.  This month's ingredients were pumpkin and cream cheese.

    Well, I was seriously considering not taking part this month.  I had no experience with either of the ingredients and had no idea what I would make and who would be willing to eat it.  Pumpkin seems to be a very American thing to bake with and is not very common over here in the UK (from what I've experienced anyway).  You can't get it in canned form in the supermarket, only in fruit form, and I really didn't feel like trying to scrape out the filling from one of those.  However, leave it to Pinterest to start giving me inspiration.  Just opening up the Food and Drink section started yielding several different pumpkin recipes as early as the start of September.  Clearly the stuff is even more popular over in the states than I initially thought.  But with so many options just staring me in the face I decided I would have to give something a go.  As to who would eat it, I figured if I could get them made before the autumn half term started, I could give whatever I made to the lovely ladies at Markinch Primary School via the fiancé's mum.

    I originally planned to make pumpkin fudge because it sounded really interesting to do.   Plus I want to try making more confectionery. However, I attempted it three times and all three times I failed.  The first batch burnt; the second seemed to be working until I added the final ingredient and it turned into this crumbly powder; and the final batch, whilst better than the other two, just didn't have the texture of fudge.  It was rather disappointing and I ended up with saucepans with burnt, failed fudge adhered to their bases.  It took several days to clean them all completely, which made dinner tricky since we only own 3 large-ish pots.  Really I've been needing a proper, heavy based pot for confectionery making.  Good thing I got to go to Ikea at the weekend and acquire a lovely cast iron casserole pan for half the cost one that size would usually cost then.  I cannot wait to test it out.

    Sorry, I got a little sidetracked there.  So I scrapped the fudge idea and went looking for something else I could do.  I liked the idea of biscuits but I like to make crunchy biscuits and adding wet pumpkin to it would likely not yield such a thing.  Then it hit me: whoopie pies!  They seem to get classed as biscuits (or a 'cakey cookie') but I'm leaning more on the side that they are cakes.  Cookies are not cakey.  Cake is cakey!  Hence why I've called these sandwich cakes, despite the recipe I was using referring to them as cookies.


    After the fudge disasters, this recipe ended up being really simple.  I ended up getting canned pumpkin from a seller on Amazon (who provide excellent service by the way).  The batter turned out nicely though it was a bit of a pain to get onto the trays.  I went to the trouble of smoothing them all over to make sure they came out nice and even on top, since reviews in the original recipe had complained of lumpiness.  I also made a decision to try and make them look pumpkin-like.  It was a complete experiment and I did not know if it would work.  I tested one by drawing the lines into the uncooked mixture first, putting in a clove stalk and then baking.  That worked okay but making the lines was quite fiddly.  So then I tried drawing them in after by running the sharp end of a skewer through the top just after they came out the oven.  It also worked but looked quite messy.  Finally I realised that since they were still quite soft when they came out the oven, I could just press the skewer into the top to make the pattern.  It worked really well and with the little clove stalks they made quite adorable pumpkins.
    As for the filling, cream cheese was very easy to work with and pipes really nicely.  I ended up with double the amount I needed though.  Maybe the baker of the original recipe is just really generous with their filling?  Ah well, I saved the leftovers and used it in another batch later in the week since I needed to use up the remaining pumpkin too.

    These went down really well with everyone who tried them.  I admit I was surprised since it is a bit of an out-there flavour combination but I guess the fact that it is so unbelievably popular in America should have tipped me off. 


    Recipe - adapted from Land O' Lakes
    Makes about 18

    Cakes:
    • 280g/10oz plain flour
    • 1 tsp bicarbonate of soda
    • 1/2 tsp ground cinnamon
    • 1/4 tsp ground ginger
    • 1/4 tsp ground nutmeg
    • Whole cloves
    • 1/2 tsp baking powder
    • 1/2 tsp salt
    • 200g/7oz light brown sugar
    • 170g/6oz canned pumpkin
    • 60ml/2fl.oz milk
    • 1 egg
    • 1 tsp vanilla extract
    • Orange food gel (optional)
    1. Preheat the oven to 180°C/350°F/Gas Mark 4 and line 2-3 baking trays with greaseproof paper.
    2. Remove the buds from the whole cloves, setting the stalks aside, and then crush the buds.  You want make about 1/8 teaspoon of crushed cloves.
    3. Mix the flour, bicarbonate of soda, cinnamon, ginger, nutmeg, crushed cloves, baking powder and salt together in a bowl.
    4. In a large bowl, beat together the butter and sugar until smooth and creamy.
    5. Add in the pumpkin, milk, egg and vanilla extract and beat together until well mixed.
    6. Add the flour mixture, and food gel if using, and beat until smooth.
    7. Drop level tablespoonfuls of the mixture onto the trays, spaced well apart.  Try and have an even number on each tray.  Use a spoon to make sure the dough is shaped into a neat circular mound.  Use a wet finger to smooth over the tops of each mound.
    8. Bake for 9-10 minutes until set (a skewer inserted into the centre should come out clean).  I would recommend baking them one tray at a time since you have to do the 'decoration' straight from the oven and if they cool too much it won't work.
    9. Immediately after removing a tray from the oven, use the side of a bamboo skewer to press eight lines that point towards the centre into the top of each of the cakes.  Place a clove stalk into the centre top of half of them.
    10. Transfer to a wire rack to cool.
    Filling: 
    • 200g/7oz cream cheese (I used Philadelphia)
    • 30g/1oz butter
    • 1 tsp ground cinnamon
    • 1 tsp vanilla extract
    • 1/2 tbsp milk
    • 600g/21oz icing sugar, plus extra for dusting
    1. Combine the cream cheese, butter, cinnamon, vanilla extract and milk in a bowl and beat until the mixture is well combined and smooth.
    2. Add a the icing sugar in four parts, beating well after each addition until it is nice and creamy.
    3. Spoon the filling into a piping bag fitted with a large star nozzle and pipe generous swirl on the underside of the cakes that do not have stalks in.
    4. Top each one with a stalked top piece.
    5. Dust with icing sugar.

    Tuesday, 19 February 2013

    Butterbeer Cupcakes


    I can't quite remember how these came about.  I think I was looking up what root beer was, and if it was the same as ginger beer.  There was something about the butterbeer served at Universal Studios being made with root beer and that got me interested.  If you could do a coca-cola cake, why couldn't you do one using butterbeer?  I figured I could use the Nigella recipe I discovered after my first attempt at cola cupcakes as a base and go from there.

    Hence, more research was required.  What did butterbeer taste like anyway?  Well according to J.K Rowling, butterbeer tastes "a little bit like less-sickly butterscotch", so I knew I'd need to get butterscotch in there somewhere, probably in the topping.  Then, like I said before, people who make their own butterbeer use root beer, or cream soda as a base.  But those aren't so easy to find over here so I thought I'd find a recipe that used ginger beer instead, since it is a type of root beer.  Browsing around the internet yielded a lot of results, but I settled on the one I found on The Roaming Kitchen since it incorporated ginger beer, cream and butterscotch.  It certainly looked the best and used things I thought my tasters would like.

    So I took that recipe and made the "beer" part to add to the Nigella recipe in place of Cola.  I chose to leave out the rum though, mainly because I'm not a drinker of alcohol and therefore don't keep anything like that in my house.  I switched the golden caster sugar to light brown sugar, since butterscotch cake usually uses that, and left out the cocoa powder in favour of some extra ground ginger.  Putting some of the butterscotch sauce into the cake batter just before baking was a last minute decision but seemed to pay off. 

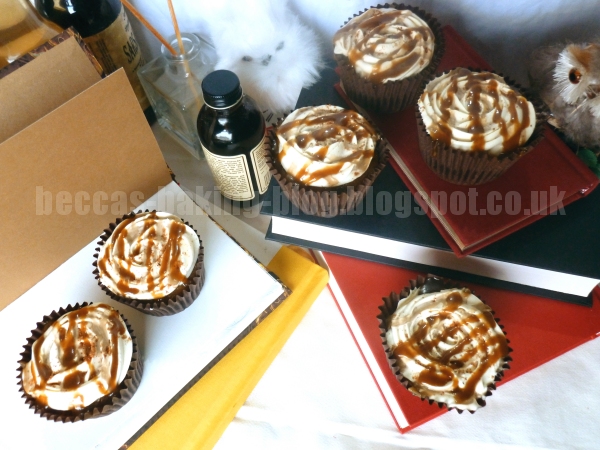
    I was rather pleased with the final result.  However, I discovered that the butterscotch sauce I put on top kinda vanished into the cream overnight in the fridge, and I had to make some more so it actually showed up in the photos and would be there for the people eating them.  So really, you want to add that bit just before you serve.

    The cake was really moist, and tastes like ginger beer, which was good.  You even get the ginger beer after taste.  The cream is lovely, especially with the nutmeg and the butterscotch sauce just brings it together with a nice sweet edge.  The fiancé really liked them.


    Recipe - adapted from The Roaming Kitchen and How to be a Domestic Goddess
    Makes about 12


    Butterscotch Sauce:
    Makes about 180ml/6fl.oz
    • 55g/2oz butter
    • 85g/3oz dark brown sugar
    • 125ml/4.5fl.oz double cream
    • 1/2 tsp fine sea salt
    • 1.5 tsp vanilla extract
    1. Put the butter in a saucepan and melt over a gentle heat.
    2. Add the sugar, cream and salt and whisk together.
    3. Bring to the boil and cook for 5 minutes, whisking the whole time.
    4. Bring off the heat when the butterscotch has thickened enough to coat the back of a spoon.
    5. Add vanilla extract and stir in.
    Butterbeer:
    • 1/2 tbsp butter
    • 3/4 tbsp light brown sugar
    • 1/4 tsp ground nutmeg
    • 1/2 tsp ground ginger
    • 1 tsp vanilla extract
    • 175ml/6fl.oz ginger beer
    1. Put the butter in a saucepan and melt over a medium heat.
    2. Add the sugar, nutmeg, ginger and vanilla and mix together.
    3. When the mixture is starts bubbling, add in the ginger beer, lower the heat and stir.
    4. Remove from heat after the ginger beer has heated through (about 2 minutes).
     
    Cupcakes:
    • 125ml/4.5fl.oz milk
    • 1/2 tsp lemon juice
    • 250g/9oz light brown sugar
    • 200g/7oz plain flour
    • 1/2 tsp bicarbonate of soda
    • 1/4 tsp salt
    • 125g/4.5oz butter
    • 175ml/6fl.oz butterbeer
    • 1 tsp ground ginger
    • 1 large egg
    • 1 tsp vanilla extract
    • Butterscotch sauce
    • 250ml/9fl.oz double cream
    • Ground nutmeg for dusting
    1. Preheat the oven to 180°C/350°F/Gas Mark 4 and line a 12 hole muffin tin with muffin cases. 
    2. Put the lemon juice and milk in a jug and leave for 10 minutes.
    3. Mix the sugar, flour, bicarbonate of soda and salt together in a large bowl.
    4. Melt the butter in a saucepan over a low heat with the butterbeer and ground ginger.
    5. Add butterbeer mixture to the dry ingredients and mix in. 
    6. Add the egg and vanilla extract to the lemon milk and beat together.
    7. Add to the other ingredients, mixing until smooth.
    8. Divide the mixture amongst the cases, filling them about 2/3 of the way up.
    9. Add a small spoonful of butterscotch to the centre of each case of mixture.
    10. Bake for about 20-25 minutes until the butterscotch is bubbling and the rest of the cake is risen and springy to the touch.
    11. Leave to cool on a wire rack.
    12. Whip the cream until it holds its shape in stiff peaks.  
    13. Put the cream into a piping bag fitted with a closed star nozzle and pipe a spiral on top of each cake, starting at the centre and moving outwards so you get something that looks like a rose.
    14. Sprinkle each cake with a little nutmeg.
    15. Just before serving, put the remaining butterscotch sauce into a piping bag fitted with a small, round nozzle and pipe a zigzag pattern across the top of each cake. (If the butterscotch has firmed up a bit too much, place back over a low heat and whisk until it becomes runnier again).

    Tuesday, 9 October 2012

    Carrot Cake Whoopie Pies with Cinnamon Filling


    So last week the game my fiancé was for going to see his friends was cancelled.  This meant he didn't take the cakes I made to Dundee.  He was not too upset by that part, because it meant he got to eat two thirds of them (I took some into work with me).  But I felt a bit bad about them missing out on cakes and because I wouldn't usually make them this week due to working Monday.  So I caved to my own feelings and whipped up something for him to take this week.  I'm a big softie apparently.

    Last week I also acquired some new books for my cookbook collection.  The shop I work in sells books (among other things) and we have loads of good deals on.  We're also getting a small period of extra staff discount so I was taking advantage of it.  One of the books I snapped up was The Hummingbird Bakery: Cake Days.  It is quite a nice book and it's where today's recipe comes from.  I found it whilst flicking through and thought my fiancé would enjoy them (I always base what I make for him and his friends primarily on what he likes).  They were based on carrot cake, which he likes, and has a cinnamon filling.  It was also for something I had never made before: whoopie pies.  It was certainly interesting.  And really I should read recipes all the way through because otherwise I start mixing up timings.  I was finishing off the filling at midnight last night and really I needed to let it set for 30 minutes before using it but I wanted to go to bed.  So I just put it in as it was and then put the whole cakes into the fridge.  Next time I'll do it the right way around.  

    As for the final result, I have no idea what a whoopie pie should feel like so I don't know if I was successful...I admit I was expecting something more biscuit like but the book said cake so I think I am at least on the right lines.  Taste wise they were apparently very yummy and well received and all gone by the end of the night.


    Recipe - adapted from The Hummingbird Bakery: Cake Days
    Makes 8-10 

    Sponge:
    • 1 large egg
    • 150g/5.5oz caster sugar
    • 125g/4.5oz plain yoghurt
    • 25ml/1fl.oz milk
    • 2 tsp vanilla extract
    • 75g/2.5oz unsalted butter
    • 275g/10oz plain flour
    • 1/2 tsp ground cinnamon
    • 1/2 tsp ground ginger
    • 1/4 tsp ground nutmeg
    • 1/4 tsp baking powder
    • 3/4 tsp bicarbonate of soda
    • 1/4 tsp fine sea salt
    • 100g/3.5oz carrot
    Filling:
    • 170g/6oz unsalted butter
    • 1/2 tsp ground cinnamon
    • 280g/10oz icing sugar
    • 175g/6oz vanilla marshmallow fluff (I made it from the recipe I used here)
    1. Melt the butter in a small saucepan and then set aside.
    2. Whisk the egg and the sugar together in a large bowl until pale and fluffy.
    3. In a jug, mix together the yoghurt, milk and vanilla.
    4. Pour into the whisked eggs, followed by the melted butter and mix to combine.
    5. In a separate bowl, sift together the flour, ground spices, baking powder, bicarbonate of soda and sea salt.
    6. Add half to the egg and yoghurt mixture and beat in until just incorporated.  Repeat with the second half.
    7. Peel and grate the carrot. 
    8. Put into a sieve and press down to drain out any liquid.
    9. Add the carrot to the batter and stir in (if using an electric whisk or mixer up until this point, do this by hand) until it is spread evenly throughout the mixture.
    10. Put the batter in the fridge to cool and set for 30-40 minutes.
    11. Meanwhile, preheat the oven to 170°C/325°/Gas Mark 3 and line 2-3 baking trays with greaseproof paper.
    12. Once the batter is cool, spoon small mounds of butter onto the trays.  Make sure you have even numbers of mounds since each pair makes a pie.  The mounds should be about 3-5cm/1.25-2inches in diameter and spaced well apart (at least 2.5cm/1inch) because they will spread out when cooking.
    13. Bake for 10-15 minutes.  They should be lightly golden all over and will spring back when you touch them.
    14. Remove and transfer to a wire rack to cool. 
    15. Whilst the cakes cool, make the marshmallow fluff (if not already done so) and then make the filling.
    16. Mix together the butter, icing sugar and ground cinnamon until the butter and sugar combine together.  
    17. Add the marshmallow fluff and mix until mixture is light and fluffy.
    18. Put the filling in the fridge for half and hour.
    19. When sponges are cold, it is time to fill them.  Spread 1.5 tablespoons of filling mixture on the flat side of one of the cakes then place a second one on top, with the flat side touching the filling, to make a sandwich.  Press together gently.
    20. Repeat until all pies are sandwiches together.