Saturday, 7 April 2012

Vanilla Sponge Cake Pops


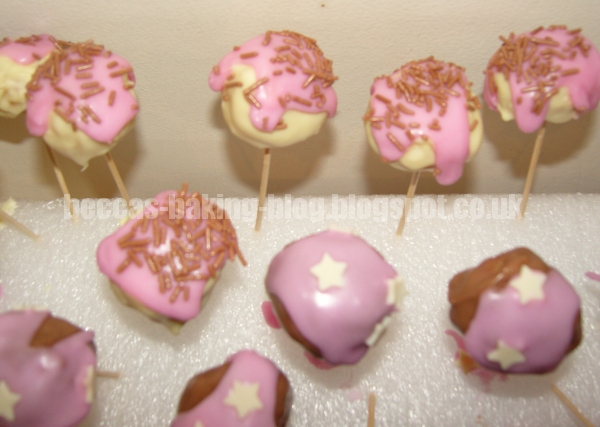
Until recently I'd never heard of cake pops.  Then they showed up in Baking Heaven and I was intrigued.  A little while afterwards I was reading through one of the cake books I got for my birthday last year and there they were again.  And then I've been perusing various baking blogs and they were there too!  So when my first sponge for the flowered birthday cake didn't quite turn out how I wanted but still tasted great I knew I wanted to use it when I tried my own hand at it.  And today there was another birthday party which was the perfect excuse.  So yes, the sponge used for this cake comes from that recipe, though I only used two eggs and my boyfriend ate a bit so in the end I only had about 260g of cake.  Despite that though I got 41 pops. 

The recipe ended up being a mish-mash of a couple of recipes from the magazine and the book.  I had to adjust amounts and such because I didn't have the same amount of sponge and I wanted to mix up the toppings.  Admittedly, when making these I missed an important part of the method.  I really don't know how I failed to read it in all the recipes.  After shaping the balls I should have put in the fridge to firm up before putting the sticks in.  I didn't and consequently I lost a few when decorating because they were not strong enough to support the weight.  I also wouldn't recommend toothpicks.  You definitely need thicker sticks, like lollipop sticks, to support the weight.  Nothing with pointed tips because that amount of weight on a tiny point means that the balls can slide down and sometimes split.  Very annoying!

General consensus was that these were very yummy.  Personally I thought the white chocolate ones were the best, even though the milk chocolate were more popular.  When I make them again I want to make dark chocolate ones too.  Obviously, adjust the amounts of chocolate to 80g/2.75oz of each type for that.


Recipe - made 41 cake pops:
  • 260g/9oz vanilla sponge
  • 1-2 tsp vanilla extract
  • 65g/2.3oz unsalted butter
  • 90g/3oz icing sugar
  • 120g/4oz white chocolate
  • 120g/4oz milk chocolate
  • Another 100g/3.5oz icing sugar 
  • Pink food colouring (or colour of your choice)
  • A little bit of water
  • Decorations of your choice (I've got chocolate sprinkles and white chocolate stars)
  • Lollipop sticks or something similar (don't use toothpicks/cocktail sticks)
  • Something to hold them in, like a polystyrene block 
  1. Put the butter and first lot of icing sugar in a bowl with the vanilla extract and beat until smooth and creamy.
  2. Add the sponge and mix well to combine evenly with the buttercream.
  3. Put some greaseproof paper on a tray or two, it needs to be able to fit in your fridge. 
  4. Take 2 teaspoons of sponge mix, make into a ball and place on the tray.  Repeat until you run out of sponge.  You should get about 40 balls.
  5. Put the balls in the fridge for 30 minutes to an hour so the balls firm up. (In bold because I forgot this bit).
  6. Melt the chocolate in two separate bowls over hot water.
  7. Take the trays out of the fridge, dip the tips of the sticks in the chocolate (half in one and half in the other) and insert one into each ball.  Put the trays back in the fridge for about 10 minutes so the chocolate sets and the balls are secure.
  8. When you think they are secure, take them back out and dip half the balls in the white chocolate and half in the milk chocolate.  Stick them in your polystyrene block (or equivalent) after you dip each one.  If you have trouble with the dipping (such as they fall off like mine did) you can put it on with a spoon instead.
  9. Let the chocolate set.  If you can fit it in your fridge, put it in since it'll set faster.
  10. Make up the icing with the second lot of icing sugar.  Add a couple of drops of colouring before the water.  Then add the water a little at a time until you get a good consistency.  You don't want it too runny or it will go everywhere.  It should just be able to pour off your spoon.
  11. Take out the set balls and put a bit of icing on top of each, easing it down the sides if necessary.
  12. Add your decorations. 

Tuesday, 3 April 2012

Gingernut Biscuits


Today's weather is truly horrific, and quite the contrast to last week.  Strange to think that just two days ago it was beautifully sunny and Scotland reached record breaking temperatures for this time of year.  Then today we've had snow, sleet and hail.  Yuck.  Very much not something you want to go out in.  But a perfect excuse for baking.  


This recipe was something my boyfriend's Mum found in Good Housekeeping magazine.  She likes gingernut biscuits and since we had all the ingredients to hand I whipped a batch up.  It's a very simple recipe though unfortunately a number of them caught in the oven, so are a bit singed around the edges.  One was completely burnt.  The temperature in our oven varies greatly so in future I'll need to keep a closer eye on them.

Both my boyfriend's Mum and her mother tried the biscuits after I made them.  The consensus was that they were delicious and wonderfully crunchy. 

Recipe - adapted from Good Housekeeping May 2012 - makes 16
  • 100g/3.5oz self-raising flour
  • 1/2 tsp bicarbonate of soda
  • 2 tsp ground ginger
  • 1 tsp ground cinnamon
  • 2 tsp caster sugar
  • 50g/2oz butter
  • 75g/3oz golden syrup
  1. Prepare two baking trays with greaseproof paper and preheat the oven to 190°C/375°F/Gas mark 5.
  2. In a large-ish bowl, sift all the dry ingredients together (so everything except the butter and syrup).
  3. In a small saucepan put the butter and the syrup and heat until the butter melts.
  4. Pour syrup mix into the dry ingredients and stir well to make a dough.  It'll be a bit sticky.
  5. With lightly floured hands, break off some of the dough, roll into a ball (about 3cm in diameter) and place on the tray.  Space them out well and flatten slightly.  Keep going until you have 16 biscuits or you use up all your mixture.
  6. Bake in the oven for 12-15 minutes.  It depends on how crunchy you want them to be.  The longer they are in, the harder they will be.  Do watch them carefully though as they catch really easily.  They will come out the oven soft but harden as they cool.
  7. Allow to cool before serving, preferably with a warm drink.   

Sunday, 1 April 2012

Flowered Birthday Cake - Vanilla Sponge


Today was the birthday of my boyfriend's Gran and I was asked to make the cake for the occasion.  Now, it has to be said that big cakes are not something I consider myself to be very good at.  My layers always come out ridiculously thin and it frustrates me to no end.  However, for my birthday last year I found a somewhat different way of making one which turned out rather successful.  It has since become my go-to method for baking large cakes.  Admittedly I've only made it twice before but have always been happy with the result.

Unfortunately, I ended up making this particular cake twice and still was not entirely happy with the final result.  It just did not seem to rise as well as the previous times.  The first attempt at this cake was a complete disaster.  The layers were too thin and they stuck to my pan!  I now know that despite investing in a lovely silicone baking set, I'm sill going to have to grease it for cakes.  Luckily, despite falling apart, the sponge still tasted good (according to my boyfriend who kept stealing pieces of it) so I've put it in a bag in the freezer to use for a later project.

I put the thinness of the first attempt, in part, down to the size of tin.  The ones I used were slightly bigger than the ones I used to use.  I went back to the old tins on my second try.  I also put the lack of thickness down to having slightly less batter due to the amount of ingredients used being dependent on the weight of the eggs.  For the first attempt I used shop bought eggs, which were about 20g less in weight than the eggs provided by our hens.  I know that does not sound like much but trust me, it made a difference.  Anyway, after my first attempt failed I had a bit of a sulk and a cuddle (I really don't like it when things go wrong) and then tried again.  The second attempt certainly came out better but I still think it came out shorter than my other cakes made with this recipe. Reviewing the recipe I realised my mistake.  I was meant to use 3 eggs.  I only used 2.  Oops.  Obviously I should not do things from memory unless I actually know it properly, like my vanilla cupcake recipe.  I've made sure to correct that in the recipe below.

The cake is a very simple sponge cake with a vanilla buttercream and jam filling and then ready to roll fondant icing for the decoration.  Originally I envisioned something more elaborate for the design involving piped flowers but that did not work out too well so modelling everything out of fondant was the way I had to go.


Recipe:

Cake - adapted from a post on The Good Food Channel
  • 3 eggs
  • Caster sugar - weight equal to that of the 3 eggs in their shells
  • Unsalted butter - weight equal to that of the 3 eggs in their shells
  • Self raising flour - weight equal to that of the 3 eggs in their shells
  • 2 tsp vanilla extract 
  1. Preheat the oven to 180°C/350°F/Gas Mark 4.
  2. Prepare two 7inch/20cm cake tins.
  3. Weigh the 3 eggs together so you know how much of the other ingredients you require. 
  4. Separate the eggs and use a whisk to beat the egg whites until the soft peak stage (this means when you pull the whisk out on the mixture it will form a peak but the tip will fall over).  DO NOT OVERWHISK!
  5. Put the butter and sugar in a bowl and mix with a wooden spoon until fluffy and pale in colour.  Usually this is about 5-10 minutes of beating by hand.  The paler the mix the better incorporated the sugar is with the butter.
  6. Whisk the egg yolks and vanilla together and add to the butter mix a little at a time, folding it in to add air to the mixture.
  7. Sift in the flour and fold that in also.
  8. Add the egg whites and fold those in too (lots of folding in this recipe) until you cannot see any white in the mixture.
  9. Pour half the mixture into each tin and then put in the over for about 30 minutes.  Do not open the oven before 20 minutes have past.
  10. Once baked. removed and let stand in the tins for a couple of minutes before transferring to a wire rack to cool.

Filling:
  • 2oz/60g icing sugar
  • 1oz/30g unsalted butter
  • 1 tsp vanilla extract
  • 1 heaped tbsp raspberry jam (or other fruit jam of your choice)
  1. In a bowl mix the butter and icing sugar until it makes a nice, creamy looking paste.
  2. Add the vanilla and mix in.
  3. On one of the cooled cake halves, spread the buttercream out in an even layer.
  4. On the other one, spread out the jam.
  5. Sandwich the two halves together.


Decoration:
  • 415g packet of ready to roll fondant icing
  • Green food colouring
  • Pink pearl cake decorations (or something similar)
  • 1 heaped tbsp apricot jam
  • Lots of icing sugar
  • Some water
  1. I recommend making the flowers first.  My cake has 30 flowers on it.  They are made by taking small pieces of the fondant icing and shaping into diamonds by pinching the ends into points with my fingers.  Make five of these and then gently push them together to make a flower shape.  Then place one of the pearl decorations into the centre, pushing it down gently so it stays in place.  Set the flower aside to set.
  2. Repeat until you have as many flowers as you want.  With this amount of fondant icing though, 35 is probably the maximum amount.  If the icing gets too dry due to constant handling, just add a tiny amount of water to your fingers.
  3. In a small saucepan, boil the jam for a couple of minutes (without burning) and then set aside to cool.
  4. With the rest of the icing, add the green food colouring and knead to spread the colour evenly throughout.  Keep adding colouring until you are satisfied with the colour.  Be warned, it will stain your hands so you may want to wear gloves and protective clothing.  The food colouring will make the icing very sticky if using a water based one so you'll have to roll and knead it in icing sugar to combat this, especially when rolling it out.
  5. Roll out the icing into as even a circle as possible, making sure it is big enough to cover the top and sides of the cake.
  6. Plate up the cake and cover the top with the cooled jam.
  7. Carefully lift the rolled out icing.  You'll probably need to use your rolling pin to support some of the weight.  Drape over the cake and then gently smooth it down, starting at the centre and then working down the sides.  Trim off the excess icing.  It doesn't matter if you trim a bit too much off.  That's what the bow is for!
  8. To make the bow, add more food colouring to the remaining icing to dye it a slightly darker green than the 'grass'.  Again, add icing sugar to stop it become too sticky. 
  9. Break off a smallish piece to use for the bow and roll out the remaining icing into a sausage long enough to wrap around the base of the cake.  Transferring it to the cake is quite tricky.  It took me several attempts before I got it around without it breaking in transit.
  10. Fashion the bow out of what is left.  I made a bow pretzel and a separate 'knot' to hide where the bow joined the cake.  I used a bit of leftover jam to stick the bow edges to the top of the cake.
  11. In a small bowl mix up some icing sugar with a teeny bit of water to make a thin paste.  You don't need very much.  Using something with a thin tip (I used a knife) put a small blob on the bottom of each flower and place on top of the cake wherever you like.  Repeat until all the flowers are stuck down.