Showing posts with label sponge cake. Show all posts

Saturday, 13 September 2014

Great British Bake Along: Vanilla Bean Baked Alaska


Firstly, I have to apologise for the lateness of this post.  Finishing the bake was delayed by the fact that it was for my birthday and my birthday was on a Monday.  Then the rest of that week ended up being quite stressful with almost no time for me to relax and do something that wasn't school work.  Hence the post wasn't getting written.  The same thing ended up happening this week, though with a little less stress.  It's here now though so I guess it's better late than never.  I would also like to say that unfortunately, there won't be a bake along for episode 5.  At least not yet.  I did attempt a custard tart at the previous weekend but it didn't work out and there hasn't been time to try again this week.  I'll try and come back to it after GBBO is finished.  Anyway, enough apologising, let's get on with this thing!


Well, episode 4 was certainly a dramatic one!  And yet once again I don't feel like I have much to say.  Admittedly, it may be because my memory is a little fuzzy on the details since it has taken so long to put this post together.

The signature bake was self saucing puddings.  A rather fascinating idea though not something that appeals to me.  I'm not really a sauce person.  There were so rather pretty puds though.  We all liked Diana's teacups.  Very cute.

I know I wouldn't have liked the tiramasu challenge.  I hate working with such thin cake.  Not to mention the chocolate tempering.  I really should try tempering chocolate at some point but since I got a temperer as one of my birthday presents the desire to try it has become even smaller.  Good on Martha for winning the challenge though.  It was about time she came top in something!

But we all know that the part of the show that everyone remembers is the showstopper round and 'Bin Gate'!  Poor Iain.  I feel I may have had a similar reaction if it was me.  Though I'm not sure I would have removed the ring and let the ice cream go everywhere.  I'm not sure I would have had the guts to bin it either because the thought of having nothing to present would be worse than presenting a destroyed Alaska (although that would still be devastating).  And I don't feel Diana did anything deliberately but if you took it out of the freezer why just leave it on the side?  Tell him!  Or find it a different freezer.  It really wasn't surprising that Iain went home.  The Hubby was outraged.  There was a lot of ranting at the result.  I was just thinking that Norman was lucky.  If Iain hadn't binned his bake, I think Norman would have gone that week.  He's still keeping it too simple.  But then, I probably can't talk.  I'm all about vanilla this week, as you are about to see.


I deviated from the usual plan this time.  I did not do the signature challenge.  I did the showstopper!  Though mine is not as amazing as some of the stuff that cropped up on GBBO and my flavours are so simple.  But why the change?  Well, it was my birthday!  I am now actually 26 and don't just think I am 26 like I have been doing for the past year (25 just doesn't exist for me apparently).  I am now too old for a railcard!  I have to pay full fare for train rides now.  This makes me sad!  But that is besides the point.  The point is, being my birthday, I needed a birthday cake.  Week 4's GBBO featured desserts and the showstopper was Baked Alaska!  Well how fortunate was that because I had been considering making myself some kind of ice cream cake concoction for months now!  Admittedly, I was thinking an Arctic roll but Baked Alaska had also featured in the thought process.  So when it cropped up on GBBO I knew it was meant to be as I could kill two birds with one stone!  I could bake along and I could make myself a birthday cake at the same time.  Fabulous!

Now, once again, I did not do this in the designated time.  I thought I probably could have done but then my ice cream didn't churn on day one.  I was having the same problem last year.  Despite leaving my ice cream maker's bowl in the freezer for the designated amount of time, my custard was still custard after an hour.  It was also late by this point so I couldn't even do it the old fashioned way.  So I put the custard back in its bowl and returned it to the fridge, then cleaned out the ice cream maker and put it back in the freezer.  I turned the temperature on the freezer down and left it overnight.  The next day I tried again and, would you believe it, it worked this time!  I don't know if it was the change in temperature in the freezer or the custard being chilled longer but I wasn't complaining!  I had beautifully churned ice cream and it tasted delicious!  One part was down!  The cake part was done easily and was one of the lightest cakes I have made.  I was rather pleased.  The final part was the one I was dreading: meringue.


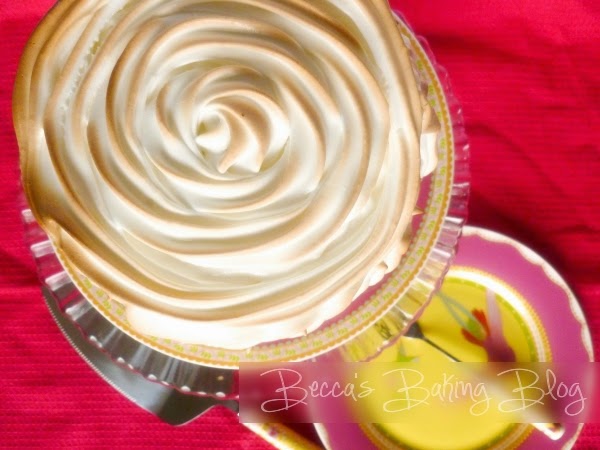
And not just any meringue either.  Oh no.  I was going to attempt Italian Meringue.  In the few attempts I have had at making meringue in the past I have not been successful.  My mixture wither won't hold its shape or adheres itself to whatever it is being baked on.  It is my other nemesis, after ganache.  But Baked Alaska calls for meringue so I had to make meringue.  I decided on Italian because it is cooked whilst you make it, it's pipeable and it is impossible to overwhisk.  The part that made me nervous was the sugar syrup.  I often burn any sugar I attempt to turn to syrup.  Especially when I am having to get it to a specific temperature.  And if I'm not burning the sugar I'm burning myself, which is even less fun.  However, it turned out not to be so bad after all.  In fact, it turned out pretty awesome.  I just wished I'd had a better idea about how I wanted to decorate the thing.  It's a little slapdash if I'm honest but ah well.  Maybe next time.

But of course, the most important thing for me is the taste.  And it tasted AMAZING!  So so so good!  The ice cream is some of the best I have made and the meringue was lovely and sweet.  Soft but yummy.  Adding some jam to the cake was also a good idea as it added a little extra flavour.  I may not have scored great on appearances if I was presenting it on GBBO (which I wouldn't, I'd put more effort in) but I was super happy with it.  It also kept okay in the freezer as it took us a few days to eat the whole thing between us.  It still tastes good even when it isn't straight out of the oven.


Recipe - makes 1 x 6inch diameter Baked Alaska


Vanilla Ice Cream - adapted from The Perfect Scoop 
  • 125ml/4.5fl.oz whole milk
  • 75g/2.5oz caster sugar
  • 250ml/9fl.oz double cream
  • Pinch of salt
  • Half a vanilla pod
  • 3 large egg yolks
  • 1/3 tsp vanilla extract
  1. Put the sugar, milk, half of the cream (60ml) and salt into a saucepan and heat gently.
  2. Scrape the seeds out of the vanilla pod and add to the milk mixture, along with the pod itself.
  3. Once warmed through, remove from the heat, cover and allow to steep for half an hour.
  4. Put the rest of the cream into a large bowl and set a mesh sieve on top.
  5. Prepare an ice bath big enough to sit the bowl of cream in.
  6. In another bowl, beat the egg yolks together.
  7. Slowly pour the warm milk mixture into the egg yolks, whisking the entire time, and then put the mixture back into the saucepan.
  8. Cook gently over a medium heat, stirring the mixture the whole time and being sure to scrape the bottom of the pan as you do so.  Keep stirring until the mixture has thickened and coats the back of the spoon. (Do not let mixture boil).
  9. Pour the custard through the sieve into the cream and stir together.  Add the vanilla pod back to the mixture and add the vanilla extract.
  10. Place the cream bowl in the ice bath and stir the mixture continuously until it has cooled.
  11. Chill the mixture thoroughly in the fridge.
  12. When ready to churn, remove from the fridge, take out the vanilla pod and then freeze in the ice cream maker according to the manufacturer's instructions.
  13. Whilst the mixture churns, line a flat sided bowl with a diameter of 15cm/6inch with clingfilm (it can be slightly smaller but not bigger).
  14. When ice cream is churned, spoon into the prepared bowl, cover and place in the freezer to firm up.
Vanilla Sponge - adapted from Mary Berry's Baking Bible
  • 2 large eggs
  • 75g/2.5oz caster sugar
  • 50g/1.5oz self-raising flour
  1. Preheat the oven to 190°C/375°F/Gas Mark 5 and line a 15cm/6inch diameter round tin with greaseproof paper.  If it is a shallow tin, make sure the edges of the paper stick out over the top to a good height.  This cake rises a lot.
  2. Put the eggs and sugar into a large bowl and beat at full speed with an electric whisk until the mixture is extremely pale and creamy and has thickened enough to leave trails when the whisk is removed.
  3. Sift the flour over the surface of the egg mixture and gently fold in with a metal spoon.
  4. Pour into the prepared tin and tip about carefully to ensure an even spread of mixture.
  5. Bake for 20-30 minutes, until sponge is springy to the touch and a skewer inserted into the centre comes out clean.
  6. Turn out onto a wire rack to cool completely before using.
Italian Meringue - adapted from James Martin via Good Food Channel
Make the meringue just before you need to use it. 
  • 50ml/1.5fl.oz water
  • 200g/7oz caster sugar
  • 1 tbsp glucose (optional)
  • 3 egg whites
  1. Put the sugar, water and glucose if using into a saucepan.
  2. Place over a medium heat and stir until it starts to boil.  Wash down any sugar crystals from the sides with a brush dipped in cold water.
  3. Attach a sugar thermometer to the pan and increase the heat to cook the sugar syrup rapidly.
  4. When the temperature reaches 116°C/240°F, beat the egg whites with an electric whisk in a large bowl until they form stiff peaks.
  5. When the temperature reaches 121°C/250°F, remove the syrup from the heat.
  6. Slowly pour the syrup into the egg whites in a thin stream, whisking the mixture the entire time.
  7. Continue to beat the mixture until it is cooled completely.  This will take about 15 minutes.
Assembly:
  • Cake circle
  • Ice cream
  • Italian meringue
  • Strawberry jam
  1. Preheat the oven to 230°C/445°F/Gas Mark 8.
  2. Cut the sponge circle in half.  Place one half onto a heatproof plate.
  3. Coat the inside of one half with jam and place the other half back on top.  Coat the top with jam.
  4. Remove the ice cream from the bowl and place on top of the sponge.
  5. Either spoon the meringue over the ice cream and cake or put into a piping bag and pipe over, making sure there are no gaps.
  6. Put into the oven for 3-4 minutes until the meringue has become well browned.  Serve immediately.

Saturday, 22 June 2013

Strawberry Mousse Cake


Being a classroom assistant occasionally gives me the opportunity to do things I might not otherwise choose to do.  On Wednesday I was told I would be accompanying the P4/P5 trip to Cairnie Fruit Farm that was happening on Friday.  I will admit, I was dreading it.  I heard the word 'farm' and could only think of mud.  I hate mud.  I will avoid walking through it whenever I can, even in boots worn specifically for walking through mud.  If I do have to go through it, I do so on tiptoe and try and do it in the fewest steps possible.  I probably sound a bit mad, don't I, but I've been that way since I was a small child.  You would never have caught little me playing in the mud and I can't understand why any of the kids I work with can stand to.  It's just yucky.

When Friday rolled around, my dread had lessened slightly upon looking up exactly what the place we were going was and discovering that part of it would be fruit picking.  That sounded quite cool and I could come away with fresh fruit to bake with.  There didn't seem to be much else to be concerned about in terms of mud but due to paranoia I had the fiancé's Mum's wellington boots in a bag over my shoulder anyway.  Really I should try to be less paranoid because I ended up carrying them around in said bag all day.  Ah well.


Strawberry picking was fun!  And I learnt several things I didn't know about strawberries.  Like how the fruit grows from the flower on the plant.  So each flower you see on a strawberry plant turns into a strawberry.  They're also called strawberries because they grow best in straw, since it helps to insulate them.  And if they're not pollinated in the right way the strawberries will grow into funny shapes.  It was all really cool.  I came away with a punnet filled to the brim with beautiful red strawberries.  Sonata strawberries I believe they are, which are the second most popular kind in Britain after Elsanta.  They are the preferred strawberry for jam since they are apparently quite sweet.  Can't say that's a bad thing, especially when baking is concerned.  They were all so gorgeous and perfect and ripe and I got so many compared to what I would get at the supermarket.  Plus the punnet was built into the trip fee so I didn't even have to pay for it.  I did fork out for an extra punnet for the fiancé's Mum though, since she'd asked me to get her some.  I also bought raspberry jam for the fiancé and a lovely canvas bag for me (I like souvenirs that last and remind me of where I've been).

So I had a punnet of strawberries that I wanted to bake with but exactly what I should bake took a little bit of thinking.  As much as I love sweet things, I am very picky about them and hence I don't end up eating most of what I bake.  This time I really wanted to make something that I wanted to eat too.  I don't like fruit in cakes so just baking the strawberries into something was not really an option.  However, I like things that taste like fruit and I love strawberry flavoured things.  I figured I could probably think of something I could flavour with the strawberries and once I was on that line of thinking it didn't take long to decide on strawberry mousse.  I could certainly do with more practice with the stuff and mousse cakes can look so pretty. 


I've made chocolate mousse before but this would be my first time attempting it with fruit.  So my first instinct was to go looking for strawberry mousse cake recipes.  I found plenty but a number of them produced quite big cakes and required a lot of ingredients.  I only really wanted to make something small, around 6 inches in diameter since that would be a nice size for myself and the fiancé.  I was also slightly limited by what I had in my cupboard.  The shopping wasn't coming until later that day and I hadn't ordered anything special for baking anyway.  Really, reducing my favourite vanilla sponge cake recipe should provide plenty for the cake base.  So I changed tact in searching and just went looking for a simple mousse recipe instead; preferably one that used white chocolate in it because that sounded yummy.  And I did, though I halved it for my recipe and chose to leave out the chopped fruit. I also decided on a white chocolate border, since the chocolate border I made on the last mousse cake looked rather nice and I didn't have many other options for supporting the mousse.  At some point I will try the acetate ring thing.  The pink stripes were a last minute decision after I remembered I still had some strawberry chocolate buttons and thought a striped pattern would be pretty.  It did turn out to be quite effective so I was rather pleased.

It is a delicious cake.  A nice sponge accompanied by a very light mousse with an obvious strawberry taste but nothing overpowering.  The chocolate is lovely with it.  It was quite enjoyable to eat something I'd baked and actually like the taste.  I've not done it in a long while.  I really wish I wasn't so fussy sometimes.


Recipe - makes a 6 inch cake

Cake - adapted from the Good Food Channel:
  • 1 large egg
  • Caster sugar - weight equal to that of the 1 egg in its shell
  • Unsalted butter - weight equal to that of the 1 egg in its shell
  • Self raising flour - weight equal to that of the 1 egg in its shell
  • 1 tsp vanilla extract 
  1. Preheat the oven to 180°C/350°F/Gas Mark 4 and grease and line one 15cm/6inch round cake tin.
  2. Put the butter and sugar in a bowl and mix with a wooden spoon until fluffy and pale.
  3. Separate the egg and whisk the yolk and vanilla together in a jug and add to the butter mix a little at a time, folding it in to add air to the mixture.
  4. Sift in the flour and fold that in also.
  5. Whisk the egg whites into soft peaks and then fold those into the batter until you cannot see any white in the mixture.
  6. Spoon into the cake tin and smooth evenly.  Make a dip in the centre of the mixture with a spoon so the cake bakes flat.
  7. Bake for 25-30 minutes, until risen and springy and a skewer inserted into the centre comes out clean.
  8. Allow to cool in its tin before removing and plating it. 
Chocolate Collar:
  • 60g/2oz white chocolate chips
  • 20g/0.7oz strawberry chocolate buttons
  1. Melt the chocolate in two heatproof bowls over saucepans of gently simmering water.
  2. Meanwhile, use a piece of string or a measuring tape to measure the circumference of the cake (should be about 48cm/19inches).
  3. Cut out a strip of greaseproof paper which is 1cm/0.5inches longer than the length you measured and 7.5cm/3inches tall.
  4. Use pastry brushes to coat the paper with the chocolate, creating thick stripes with the white chocolate and thin ones with the strawberry, trying to space them evenly.  Be sure to make the coating as thick as possible and use all the chocolate.  Paint right to the edge of one short side and both long sides.  Leave 1cm/0.5inches uncoated on the other short side.
  5. Allow to firm up slightly, so that the chocolate has thickened and is no longer runny.
  6. Carefully place the strip around the cake.  Make sure the base of the strip touches the plate and the two short ends match up.  Press against the cake to make sure there are no gaps between it and the chocolate collar or the filling will escape.
  7. Chill in the fridge. 
Strawberry mousse - adapted from Simon Rimmer, via BBC Food 
  • 125g/4.5oz strawberries, plus 7 for decorating
  • 1 tbsp lemon juice
  • 115g/4oz white chocolate chips
  • 1/2 tbsp gelatin
  • 25ml/1fl.oz warm water
  • 225ml/8fl.oz double cream
  • 15g/0.5oz icing sugar 
  • Pink food colouring (optional)
  1. Cut the tops off the strawberries and then blend into a purée in a food processor or using a stick blender.
  2. Pass the purée through a fine meshed sieve into a clean bowl to remove any excess pulp and seeds.
  3. Add the lemon juice and mix in.
  4. Melt the chocolate chips in a large, heatproof bowl placed over a pan of lightly simmering water.  Set aside.
  5. Add the gelatin to the water and leave for a few minutes.
  6. Put 65ml/2fl.oz into a saucepan with the icing sugar and sit over a gentle heat until it is warm.
  7. Add the gelatin and stir continuously over the low heat for 5 minutes so the gelatin dissolves.  DO NOT LET IT BOIL.
  8. Pour the cream/gelatin mix into the white chocolate and beat until it is smooth.
  9. Add the purée and mix in.  At this stage you can add a couple of drops of pink colouring if you wish to brighten up the colour.
  10. Whip the remaining cream into soft peaks and then fold into the chocolate mix until incorporated.
  11. Pour on top of the cake.  If you want, drop five drops of food colouring at random points on the mousse and use a toothpick/skewer to swirl them into a pattern.
  12. Return to the fridge and leave to set for about 3 hours.
  13. Carefully remove the greaseproof paper from the chocolate collar.  It should come away easily if the chocolate is thick enough.
  14. Cut the tops off the remaining strawberries.  Place six of them around the outside of the cake.  Cut the last one into six pieces lengthwise and arrange into a star pattern in the centre of the cake.

Monday, 31 December 2012

Christmas Wreath Cake


Now this was a cake I've had in mind for months.  This year is the turn of the fiancé's Mum to host the Christmas dinner for her side of the family.  I got to make dessert and I knew I wanted to bake a cake made to look like a wreath.  I even got a special ring mould and everything!

So it's a vanilla sponge ring covered in chocolate orange buttercream made to look like bark, which is then decorated with dark chocolate branches, milk chocolate holly leaves and white chocolate truffle berries, tinted with gold lustre powder and dusted with icing sugar.  

I would have liked to make my chocolate leaves by painting chocolate onto actual (or wax) leaves but I couldn't find any holly.  So I had to resort to piping the chocolate shapes instead, which meant they were a bit thicker and less refined than I would have liked but they still looked pretty good.

The truffle berries gave me the most trouble because they just did not want to set and I was already running over the time I had said we would head down to the house.  Ideally they would have been perfectly round but due to the lack of time and the fact they ended up fused to the wire rack they were setting on, I had the slice them off so the bases are flat.  They still tasted yummy though.  The buttercream also gave me some difficulty too since I ran out of orange extract making cupcakes for work and couldn't find any in the local supermarket.  So I had to use the juice of an orange instead, which made the buttercream runnier and thus I had to add more icing sugar to get the right consistency.  A bit of trial and error, which was slightly annoying but I got there in the end.  I'll be putting extract in the recipe write-up though.

It went down very well with everyone who ate it.  They said it was light and fluffy and the buttercream was delicious, which isn't surprising since it is one of my most popular flavours.


Recipe:

Cake:
  • 225g/8oz butter
  • 225g/8oz caster sugar
  • 2 tsp vanilla extract
  • 4 large eggs
  • 225g/8oz self-raising flour
  1. Preheat the oven to 180°C/350°F/Gas Mark 4 and grease a 24cm ring mould with butter.
  2. In a bowl, beat together the butter, sugar and vanilla extract until it is smooth and creamy.
  3. Add the eggs one at a time and beat well after each addition.
  4. Sift in the flour and fold in until fully incorporated.
  5. Spoon the mixture into the ring mould, trying to distribute it evenly.  Run your spoon round the top to smooth it out.
  6. Bake for 30-40 minutes, until the sponge is springy to the touch and a skewer inserted through it comes out clean.
  7. Leave in the mould to cool for about 15 minutes before transferring to a wire rack to finish.
Chocolate Orange Buttercream:
  • 140g/5oz butter
  • 280g/10oz icing sugar
  • 100g/3.5oz milk chocolate
  • 2 tsp orange extract  
  1. Put the milk chocolate in a glass bowl and set over a pan of simmering water to melt.  Don't let the bowl touch the water.
  2. Beat the butter, icing sugar and orange extract together in a bowl until smooth a creamy.
  3. Add the melted chocolate to the buttercream and mix in until well incorporated.  You're aiming for a soft but spreadable consistency so if it's a bit runny, add more icing sugar.
  4. Place the cake on a cake board or plate.
  5. With a rubber spatula or a palette knife, spread a thin layer of buttercream over the cake to form a crumb coat.
  6. Now coat the cake in a thicker layer, making sure there are no gaps.  Wipe up any buttercream that falls on the board/plate with a cloth so you have a clean finish.
  7. Use a fork to draw lines in the buttercream to resemble tree bark.

 Decoration:
  • 85g/3oz white chocolate
  • 15ml/0.5fl.oz whipping cream
  • 25g/1oz dark chocolate
  • 75g/2.5oz milk chocolate
  • Red blossom tint
  • Gold lustre dust
  • Icing sugar for dusting
  • Gold edible pearls
  1. Put the cream and 50g/2oz of the white chocolate in a glass bowl over a a pan of simmering water.
  2. When the chocolate has melted, whisk the ganache together until it is smooth.  Set to one side to cool.  It needs to get a pipeable consistency so if it's still really runny after cooling, put in the fridge to firm up.  This may take an hour or so.
  3. Next, cover a tray with a a sheet of greaseproof paper.
  4. Melt the milk chocolate then put into a piping bag fitted with a small round nozzle and pipe holly leaves onto the prepared tray.  Start by drawing an outline and then fill it in.  Make as many as you want.  It's always good to have spares in case of breakages or for future decorations.  Leave to set.
  5. Melt the dark chocolate then put in a piping bag fitted with a small round nozzle.
  6. Draw branches with the chocolate over the top of the cake (so lines with more lines branching off them).  Leave to set.
  7. Prepare another tray with greaseproof paper.
  8. Once the ganache has firmed up, spoon into a piping bag fitted with a large round nozzle.
  9. Pipe small blobs of ganache onto the tray.  Doesn't matter if you don't get perfect spheres, you can fix that later.
  10. Place the ganache back in the fridge to set.  If you want it to set faster you can put it in the freezer.
  11. Meanwhile, melt the remaining 35g/1oz white chocolate and stir in the red blossom tint.
  12. Once the leaves have set, take the gold lustre dust and brush over the surface of the leaves with a pastry brush.
  13. Place the leaves on the cake, pressing gently into the buttercream so they stay in place.
  14. If the ganache is set, remove from the fridge.  
  15. One at a time, quickly roll a blob of ganache between your hands to make a ball and then drop into the melted white chocolate.
  16. Quickly coat the ball and then remove and place back on the tray.
  17. When all the balls are coated, leave them to set.
  18. Once set, remove from the tray.  If they get stuck, use a knife to slice them away from it.
  19. Place the berries on the cake, matching them up with the base of the leaves.  Dust the berries with the gold lustre dust.
  20. Place the gold pearls around the buttercream.
  21. Finish the cake by dusting it with icing sugar.

Wednesday, 15 August 2012

Vanilla Sponge with Lemon Buttercream and Raspberries


August 17th is the boyfriend's birthday.  He is getting two cakes this year, but neither is for the actual day.  He has one for Sunday when there is a family party, and then there is one for today to enjoy with his friends.  I've had Sunday's cake planned for a while and when I ran the idea past him, he loved the sound of it.  But Wednesday's cake was a problem.  I did not know what I should do and he didn't know either.  In the end, I've made almost a preliminary to Sunday's cake, since this one has some of the same flavours.  However, it only has a vanilla sponge whereas Sunday's will be lemon.

So this is a vanilla cake with a lemon buttercream running through the middle and on top.  Then there's raspberry jam in the middle also, and it's all finished off with raspberries for decoration.  Simple yet surprisingly effective.

For the most part I followed this recipe for the sponge, but got distracted part way through and didn't separate my eggs.  I didn't realise until after I'd beaten them and started adding them to the batter.  I really did not have much time today so I could not start over.  Thus it ended up being more like the fairy cake mixture I use, though everything was based on the weight of the eggs.  Thankfully it still rose quite well so I was happy.

The lemon buttercream is DIVINE!  At the weekend I spent a good while in the baking section of the supermarket contemplating whether getting lemon extract was worth it when lemon juice usually works fine for me.  But I did, since I thought I could use it to flavour Sunday's cake because I really wasn't convinced the zest would be enough.  I thought I'd try it in today's buttercream though and WOW!  It is just so good since obviously you've got none of the acidity of the lemon but all the flavour.  Seriously amazing.  I couldn't stop myself from licking the bowl once the cake was iced.

Since pretty much everything worked off previous recipes, there's not going to be one today.  The buttercream will be used in Sunday's cake so it's recipe will go there.  

Wednesday, 1 August 2012

Oranges and Lemons Butterfly Cakes


My sister used to make butterfly cakes a lot when we were younger.  I stuck to regular fairy cakes because I was not keen on buttercream.  Plus she tended to make chocolate cakes and as I've said, not a big fan of that.  So this is my first time making them.  Not that they are really that much different from regular cupcakes.  Terribly cute though.  I always used to think they looked so fancy yet so simple.  I like simple on a lazy day like today.  But I decided to go one step further from plain old vanilla cakes and do a combination of citrus flavours: orange cakes with lemon buttercream.  Yum yum yum.

I mainly followed the recipe from Cupcakes and Muffins but I decided to add some orange juice to the cake batter rather than just the zest for an extra orangey kick.  I also used slightly more lemon juice than it said for the buttercream.  

The boyfriend gave them his approval.  Apparently they are very creamy and he could taste both the orange and the lemon so huzzah.  Hopefully his friends like them too.


Recipe - adapted from Cupcakes and Muffins
Makes 12 

For the cupcakes:
  • 115g/4oz self-raising flour
  • 1/2 tsp baking powder
  • 115g/4oz caster sugar
  • 115g/4oz butter
  • 2 eggs
  • Finely grated rind of one orange
  • 2 tbsp milk
  • Juice of 1/2 an orange
  • Icing sugar, for dusting
For the buttercream:
  • 85g/3oz butter
  • 175g/6oz icing sugar
  • 1.5 tbsp lemon juice
  1. Preheat the oven to 190°C/375°F/Gas Mark 5 and line a 12 hole muffin tin with 12 cases.
  2. Sift the flour and baking powder into a large bowl.
  3. Beat the eggs separately and then add to the flour along with the sugar, butter, rind, juice and milk.
  4. Beat everything together until smooth.
  5. Spoon mixture into the cases a tablespoon at a time and then bake for 15-20 minutes.
  6. Leave to cool on a cooling rack.
  7. Make the buttercream by mixing the butter, sugar and lemon juice together in a bowl until smooth and creamy.
  8. If your cakes have a domed top, cut the dome off to use for the wings.  If your cakes are flat topped (like mine were) use a sharp knife to cut circular holes out of them to use instead.  Place each circle next to the cake it comes from.
  9. When the cakes are cool, spoon or pipe the buttercream onto the cakes.  I filled in my holes with the buttercream.
  10. Cut each accompanying circle in half and gently press them into the buttercream at an angle so that the two halves stick up like wings.
  11. Dust with sifted icing sugar.

Wednesday, 25 July 2012

Failed Experiment: Doboz Torte

No photos for this one.  Considering it doesn't look very good cosmetically, I don't think fancy pictures would have helped.  Ah well.

So this is a Doboz Torte, which is a cake with six very thin layers of sponge, sandwiched together with chocolate buttercream with a caramel top.  The top should have been 16 pieces, not 8, but I burnt my hand on the caramel and had trouble cutting it.  Consequently I think the pieces were too heavy for the buttercream and ended up being rather flat rather than having the cool fan effect they were supposed to.  All my layers were uneven too so trying to coat the outside in buttercream really didn't work, and my caramel was hardening too fast for me to get an even coat on the top.  Lots of disappointments really but our guests were very nice and said they enjoyed it, one taking the remaining cake home with her so that was nice.

This cake was not easy.  As I already said, I burnt myself on the caramel, which left me with an unusable left hand for the rest of the day since not having it on ice until about 3am was ridiculously painful.  I now have a lovely, squishy blister for my troubles.  I also lost 2 of my original cake layers, one to burning and one to being so thin that it was hard and cracked when trying to separate it from the parchment.  I had to quickly redo those.  Then I burnt my first batch of caramel, which was annoying.  It all took a very long time and was quite frustrating.  I wish it had turned out better for my troubles, at least looks wise.  Taste was fine.

I would quite like to do something similar to this again one day.  I might have some thicker layers though because you really lost the cake in the buttercream.  I would also change the way I do some of the things in the method since I found it easier to do things a bit differently.  Mostly to do with making the sponge layers in tins rather than on sheets, and arresting the caramel after cooking it.  I didn't the first time and it continued cooking in the pan after it came off the heat, resulting in burnt caramel.

Thursday, 19 July 2012

Chocolate Marble Cake Squares


Wednesday seems to have become 'make cakes for boyfriend's friends' day.  Completely voluntarily of course.  I don't need much of an excuse to bake and this way I can experiment with a whole bunch of things I probably wouldn't try otherwise.  Having willing guinea pigs is fun.

I have never made marble cake before and thought it was about time that I tried.  It just looks so cool.  So I decided to make a big square cake, then cut it up into smaller ones.  I intended to dip them in chocolate but I ended up with much less time on Wednesday than originally planned so I just made a quick chocolate icing instead.  Hence the slightly unimaginative photos too.

Again they went down well and all the leftovers were taken home by people so the boyfriend returned with empty boxes.  So yay!  They're all coming over this weekend to see our flat so I shall be attempting something else that has caught my eye in one of my books.  As well as making cake pops because they were specially requested.

The recipe for the cake comes from Cake Decorating magazine.  I flicked through a few recipes before settling on this one, though I created the marbled effect a bit differently, because I wanted it to look very marbled.


Recipe - adapted from Cake Decorating issue 4
Makes 16 squares
  • 225g/8oz butter
  • 225g/8oz caster sugar
  • 4 eggs
  • 1/2 tsp vanilla extract
  • 275g/10oz self-raising flour
  • 2 tsp baking powder
  • 2 tbsp milk
  • 1.5 tsp cocoa powder
  • 2 tbsp hot water
  • 150g/5oz milk chocolate
  • 100g/4oz butter
  • 2 tbsp water 
  1. Preheat the oven to 170°C/325°F/Gas Mark 3 then grease and line a 23cm/9inch square cake tin.
  2. Beat the butter and sugar together in a bowl until pale and creamy.
  3. Add the eggs one at a time and mix in.
  4. Add the vanilla extract and mix.
  5. Fold the flour and the baking powder into the mixture until smooth.
  6. Add the milk and stir thoroughly.
  7. Put half the mixture into a different bowl.
  8. In a small bowl mix together the cocoa powder and the hot water until completely smooth.  Allow to cool slightly.
  9. Add the cocoa mix to one of the bowls of cake batter and mix well until evenly combined.
  10. Put alternating spoonfuls of each mixture into the cake tin until you use it all up.
  11. Take a fork and swirl it through the mixture to create the marble effect.  Don't stir or overdo it or you'll just get a watered down chocolate cake.
  12. Bake in the oven for 50 minutes to 1 hour.  The cake is ready when a skewer inserted into the middle comes out clean.
  13. Allow to cool in the tin for a few minutes before transferring to a cooling rack.  Cake must be completely cooled before adding the icing.
  14. Using a serrated knife, cut the cake into 16 squares.
  15. To make the icing, break the chocolate into pieces and put in a glass bowl along with the water and the butter.
  16. Put the bowl over a saucepan of hot water to melt the contents, stirring occasionally until you get a smooth icing.
  17. Put a baking tray covered in greaseproof paper under the cooling rack and then pour the icing over the top of each cake, easing it over the edges so it runs down the sides.
  18. Leave to set.

Friday, 13 July 2012

Treacle Sponges


This was something that I just wanted to try.  I wanted to bake today but didn't know what, and so flicked through the Mary Berry Baking Bible and came across these (amongst other things).  I had pretty much everything I needed and it was a great excuse to finally use my mini casserole dishes for something.  It was also the first time using my bamboo steamer and it worked well.  I want to steam more things!  The recipe is actually for four sponges, but I only made two, one each for me and my boyfriend as a little evening dessert.

Anyway, this was mostly successful.  I steamed for as long as recommended but unfortunately this wasn't enough and the first one I turned out just collapsed into goop.  So they went back in the steamer for another 10 minutes or so and turned out fine.  I think I may have been steaming on too low a heat.


Recipe - adapted from Mary Berry's Baking Bible
Makes 2 
  • 4 tbsp golden syrup
  • 1/2 tbsp lemon juice
  • Grated rind of 1 lemon
  • 50g/2oz butter
  • 50g/2oz caster sugar
  • 1 large egg
  • 50g/2oz self-raising flour
  • 1/2 tsp baking powder 
  1. Grease two 175ml/6fl.oz pudding basins or mini casserole dishes.
  2. Mix the syrup and lemon juice together and then spoon half into one basin and half into the other.
  3. Put all the other ingredients into a bowl and mix together until well combined.
  4. Split the mixture between the two basins and level it out.
  5. Make a lid of pleated greaseproof paper to sit on top of each basin and then cover with foil.  Don't seal too tightly.
  6. Steam the puddings for about 45 minutes.  You can do this in a steamer or using a large pan filled with boiling water.  If you are using the pan of water, invert two saucers and sit the basins on top of them to stop them being in contact with the base of the saucepan.  Fill the saucepan with boiling water until it reaches halfway up the basins.
  7. Test the sponges with a skewer to make sure they are cooked all the way through.
  8. When done, turn out onto plates and serve.

Friday, 29 June 2012

Murderwang Birthday Cake

My boyfriend asked if I would make a cake for his friend's birthday, which isn't actually until next week but we're on holiday so he wanted to take it this week.  I asked what to do and he said just a simple sponge and nothing too sweet.  So I did my usual vanilla sponge cake split across two tins and then filled with jam.  No buttercream because even I think buttercream is too sweet.  But I figured a little bit of icing wouldn't hurt.  The decoration is inspired by a Mitchell and Webb, sketch: the Numberwang Code.  The friend uses the name 'Murderwang' on their society forum, which is inspired by this sketch.  Thus I translated it onto a cake.  I did the red first and let it set before I did the white.

It went down really well apparently, so I am very pleased.

Saturday, 7 April 2012

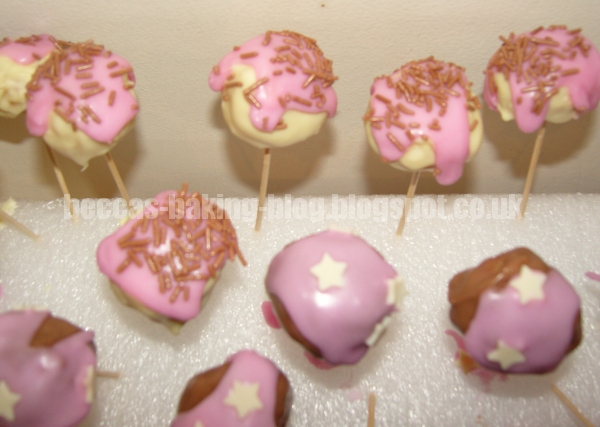
Vanilla Sponge Cake Pops


Until recently I'd never heard of cake pops.  Then they showed up in Baking Heaven and I was intrigued.  A little while afterwards I was reading through one of the cake books I got for my birthday last year and there they were again.  And then I've been perusing various baking blogs and they were there too!  So when my first sponge for the flowered birthday cake didn't quite turn out how I wanted but still tasted great I knew I wanted to use it when I tried my own hand at it.  And today there was another birthday party which was the perfect excuse.  So yes, the sponge used for this cake comes from that recipe, though I only used two eggs and my boyfriend ate a bit so in the end I only had about 260g of cake.  Despite that though I got 41 pops. 

The recipe ended up being a mish-mash of a couple of recipes from the magazine and the book.  I had to adjust amounts and such because I didn't have the same amount of sponge and I wanted to mix up the toppings.  Admittedly, when making these I missed an important part of the method.  I really don't know how I failed to read it in all the recipes.  After shaping the balls I should have put in the fridge to firm up before putting the sticks in.  I didn't and consequently I lost a few when decorating because they were not strong enough to support the weight.  I also wouldn't recommend toothpicks.  You definitely need thicker sticks, like lollipop sticks, to support the weight.  Nothing with pointed tips because that amount of weight on a tiny point means that the balls can slide down and sometimes split.  Very annoying!

General consensus was that these were very yummy.  Personally I thought the white chocolate ones were the best, even though the milk chocolate were more popular.  When I make them again I want to make dark chocolate ones too.  Obviously, adjust the amounts of chocolate to 80g/2.75oz of each type for that.


Recipe - made 41 cake pops:
  • 260g/9oz vanilla sponge
  • 1-2 tsp vanilla extract
  • 65g/2.3oz unsalted butter
  • 90g/3oz icing sugar
  • 120g/4oz white chocolate
  • 120g/4oz milk chocolate
  • Another 100g/3.5oz icing sugar 
  • Pink food colouring (or colour of your choice)
  • A little bit of water
  • Decorations of your choice (I've got chocolate sprinkles and white chocolate stars)
  • Lollipop sticks or something similar (don't use toothpicks/cocktail sticks)
  • Something to hold them in, like a polystyrene block 
  1. Put the butter and first lot of icing sugar in a bowl with the vanilla extract and beat until smooth and creamy.
  2. Add the sponge and mix well to combine evenly with the buttercream.
  3. Put some greaseproof paper on a tray or two, it needs to be able to fit in your fridge. 
  4. Take 2 teaspoons of sponge mix, make into a ball and place on the tray.  Repeat until you run out of sponge.  You should get about 40 balls.
  5. Put the balls in the fridge for 30 minutes to an hour so the balls firm up. (In bold because I forgot this bit).
  6. Melt the chocolate in two separate bowls over hot water.
  7. Take the trays out of the fridge, dip the tips of the sticks in the chocolate (half in one and half in the other) and insert one into each ball.  Put the trays back in the fridge for about 10 minutes so the chocolate sets and the balls are secure.
  8. When you think they are secure, take them back out and dip half the balls in the white chocolate and half in the milk chocolate.  Stick them in your polystyrene block (or equivalent) after you dip each one.  If you have trouble with the dipping (such as they fall off like mine did) you can put it on with a spoon instead.
  9. Let the chocolate set.  If you can fit it in your fridge, put it in since it'll set faster.
  10. Make up the icing with the second lot of icing sugar.  Add a couple of drops of colouring before the water.  Then add the water a little at a time until you get a good consistency.  You don't want it too runny or it will go everywhere.  It should just be able to pour off your spoon.
  11. Take out the set balls and put a bit of icing on top of each, easing it down the sides if necessary.
  12. Add your decorations.